Tajima Embroidery Machine Common Errors and Solutions: A Comprehensive Guide
Tajima embroidery machines are renowned for their high-quality performance and durability, making them a popular choice for both hobbyists and professional embroiderers. However, like any sophisticated machinery, they can experience errors and issues that may disrupt your workflow. In this comprehensive guide, we’ll explore the most common Tajima embroidery machine errors and provide practical solutions to keep your machine running smoothly.
Introduction
Embroidery is a delicate craft that requires precision, and even the slightest error can impact the final product. Understanding the common errors that occur with Tajima embroidery machines and how to resolve them can save you time, reduce frustration, and maintain the quality of your work.
1. Thread Breakage
Causes
Thread breakage is one of the most common issues faced by embroidery machine operators. It can be caused by several factors, including:
- Incorrect Tension Settings: Too tight or too loose tension can cause the thread to snap.
- Poor Quality Thread: Low-quality or old thread is more prone to breaking.
- Needle Wear: A worn or bent needle can cause the thread to catch and break.
- Incorrect Needle Size: Using the wrong needle size for the fabric or thread can lead to breakage.
- Threading Issues: Improper threading can cause friction and lead to thread breakage.
Solutions
- Adjust Thread Tension: Ensure that the thread tension is set correctly for the fabric and thread you’re using.
- Use High-Quality Thread: Invest in good quality thread and store it properly to avoid deterioration.
- Replace Needles Regularly: Regularly check and replace needles to ensure they are in good condition.
- Use the Correct Needle Size: Choose the appropriate needle size based on the fabric and thread specifications.
- Check Thread Path: Ensure that the machine is threaded correctly, following the manufacturer’s instructions.
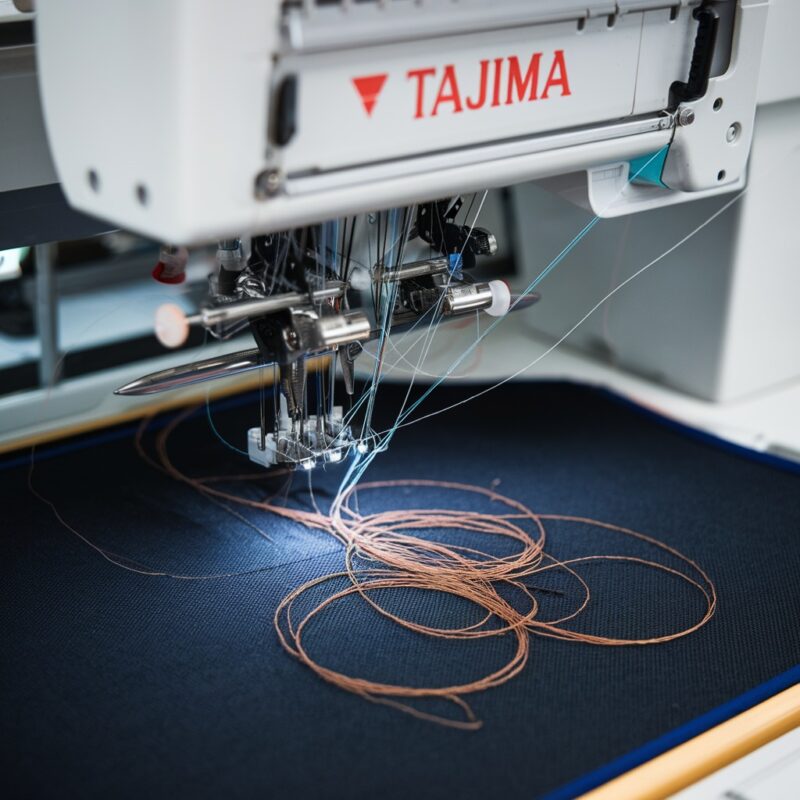
2. Bird Nesting (Thread Bunching)
Causes
Bird nesting occurs when a large amount of thread bunches up under the fabric, creating a tangled mess. This can be caused by:
- Incorrect Bobbin Tension: If the bobbin tension is too loose, it can cause the thread to bunch up.
- Loose Upper Thread Tension: Incorrect upper thread tension can lead to bird nesting.
- Improper Threading: Incorrect threading of the upper thread can cause this issue.
Solutions
- Re-thread the Machine: Start by re-threading the machine to ensure the thread is properly aligned.
- Adjust Bobbin Tension: Check and adjust the bobbin tension to ensure it’s not too loose.
- Check Upper Thread Tension: Make sure the upper thread tension is correctly set for the project you are working on.
3. Needle Breakage
Causes
Needle breakage can interrupt your work and potentially damage the fabric or machine. Common causes include:
- Hitting a Hoop: If the needle hits the embroidery hoop, it can break.
- Incorrect Needle Type or Size: Using the wrong needle can cause it to break, especially on thick or dense fabrics.
- Improper Fabric Hooping: If the fabric is not properly hooped, it can cause the needle to break.
- Machine Speed: Running the machine too fast can increase the risk of needle breakage.
Solutions
- Use the Correct Needle Size and Type: Ensure you are using the right needle for the fabric and thread.
- Properly Hoop the Fabric: Make sure the fabric is taut and correctly hooped to prevent needle damage.
- Adjust Machine Speed: Slow down the machine if you are working with thick or dense materials to reduce stress on the needle.
4. Skipped Stitches
Causes
Skipped stitches can affect the design quality and lead to an uneven appearance. This issue can be caused by:
- Worn or Bent Needle: A damaged needle may not penetrate the fabric properly, leading to skipped stitches.
- Incorrect Needle Size: Using the wrong needle size for the fabric or thread can cause skipping.
- Thread Tension Issues: Improper tension can cause the needle to miss stitches.
- Improper Hooping: If the fabric is not secure, it can move during stitching, leading to skipped stitches.
Solutions
- Replace the Needle: Regularly check the needle for wear or bending and replace it as needed.
- Select the Correct Needle Size: Use the appropriate needle size based on your fabric and thread.
- Adjust Tension Settings: Ensure both upper and lower thread tensions are properly set.
- Secure the Fabric: Make sure the fabric is properly hooped and secure to prevent movement during stitching.
5. Fabric Shifting
Causes
Fabric shifting can lead to misaligned designs and is often caused by:
- Incorrect Hooping: Loose or improper hooping can cause the fabric to shift during embroidery.
- Loose Fabric: If the fabric is not taut, it can move, leading to misalignment.
- Improper Stabilizer Use: Using the wrong stabilizer or not enough stabilizer can cause the fabric to move.
Solutions
- Proper Hooping: Ensure the fabric is tightly hooped and does not have any slack.
- Use a Suitable Stabilizer: Choose the correct stabilizer for the fabric to prevent shifting.
- Re-hoop as Needed: If you notice any movement during stitching, stop and re-hoop the fabric.
6. Bobbin Issues
Causes
Bobbin issues can cause various problems, from poor stitch quality to thread jams. Common bobbin issues include:
- Improperly Wound Bobbin: Uneven winding can cause inconsistent thread delivery.
- Lint Buildup in Bobbin Case: Lint and debris in the bobbin case can cause thread jams and tension issues.
- Using the Wrong Bobbin Size: A bobbin that is too large or too small can cause operational issues.
Solutions
- Use Pre-Wound Bobbins: These often provide a more consistent thread delivery.
- Clean the Bobbin Case Regularly: Remove lint and debris from the bobbin case to ensure smooth operation.
- Use the Correct Bobbin Size: Make sure you are using the appropriate bobbin size for your machine.
7. Misalignment of Design
Causes
Design misalignment can ruin an embroidery project and is usually caused by:
- Fabric Movement: If the fabric moves during stitching, it can cause the design to misalign.
- Incorrect Hooping: If the fabric is not properly hooped, it can shift during stitching.
- Machine Calibration Issues: If the machine is not properly calibrated, it can cause misalignment.
Solutions
- Double-Check Hooping: Ensure that the fabric is securely hooped and there is no movement during stitching.
- Secure the Fabric: Use clips or adhesive sprays to hold the fabric in place if necessary.
- Calibrate the Machine: Regularly calibrate your machine to ensure accurate stitching.
8. Tension Problems
Causes
Tension issues can lead to poor stitch quality, with stitches that are too loose or too tight. Causes include:
- Incorrect Tension Settings: Tension that is too tight or too loose can cause stitch problems.
- Incorrect Thread Type: Using the wrong thread for the fabric or design can cause tension issues.
Solutions
- Adjust Tension Settings: Fine-tune the tension settings according to the fabric and thread you are using.
- Match Thread and Fabric: Ensure that the thread type is appropriate for the fabric and design.
9. Color Changes Not Functioning Properly
Causes
Automated color changes not working as expected can disrupt the embroidery process. This can be due to:
- Programming Errors in Design File: Incorrectly set color sequences in the design file can cause issues.
- Mechanical Issues: Problems with the color change mechanism can prevent proper operation.
Solutions
- Check and Correct Design File: Ensure the design file is properly set up with the correct color sequences.
- Consult the Machine Manual: If mechanical, refer to the machine’s manual for troubleshooting or consult a technician.
10. Machine Stopping Mid-Operation
Causes
If your machine stops unexpectedly, it could be due to:
- Thread Breaks: A broken thread can cause the machine to stop automatically.
- Needle Breaks: A broken needle will also cause the machine to halt.
- Sensor Malfunctions: Sensors that detect issues may cause the machine to stop even if nothing is wrong.
- Software Errors: Software glitches can occasionally cause unexpected stoppages.
Solutions
- Re-thread the Machine: Check for thread breaks and re-thread the machine if necessary.
- Replace the Needle: If the needle breaks, replace it before continuing.
- Check for Software Updates: Ensure your machine’s software is up-to-date and free from glitches.
11. Preventive Maintenance Tips
To minimize errors and prolong the life of your Tajima embroidery machine, regular maintenance is essential. Here are some tips:
- Clean the Machine Regularly: Remove lint, dust, and debris from the machine, particularly around the bobbin case and needle area.
- Oil the Machine: Follow the manufacturer’s guidelines for oiling your machine to keep it running smoothly.
- Check Tension Settings Regularly: Ensure tension settings are appropriate for the fabrics and threads you use.
- Replace Needles and Threads Regularly: Don’t wait for a problem to occur; regularly replace needles and threads to prevent issues.
Conclusion
Tajima embroidery machines are reliable tools, but like any equipment, they require proper care and troubleshooting when issues arise. By understanding the common errors and their solutions, you can keep your machine in optimal condition and ensure high-quality embroidery results.
Remember, preventive maintenance is key to avoiding many of these common issues. Regularly clean and service your machine, use quality materials, and follow the manufacturer’s guidelines to keep your embroidery projects running smoothly.