Design Misalignment or Shifting in Embroidery: Common Errors & Effective Solutions
Design Misalignment or Shifting in Embroidery: Common Errors & Effective Solutions
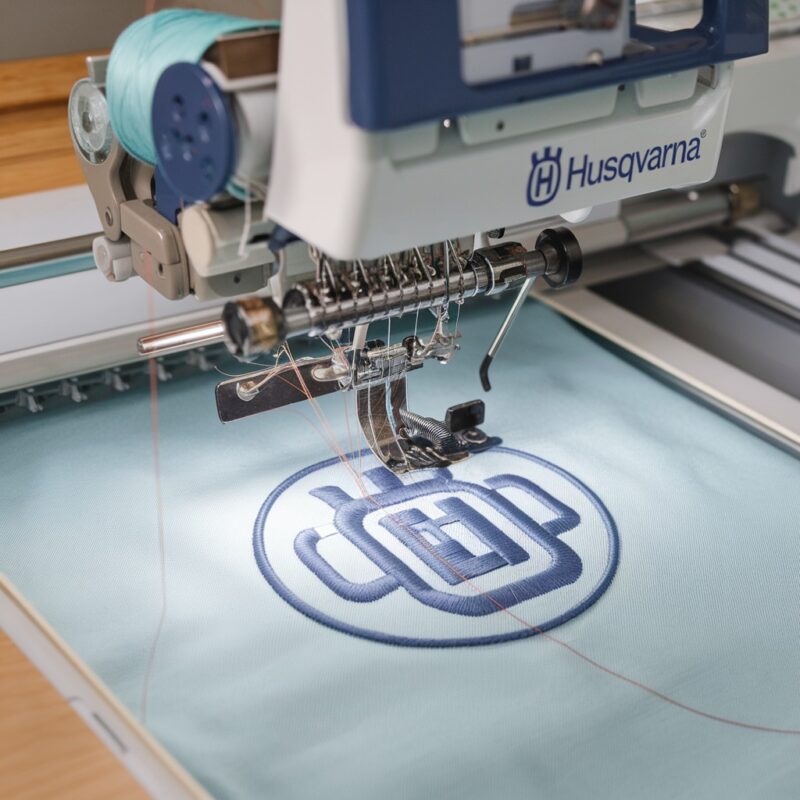
Embroidery design misalignment, often referred to as shifting, can be a major setback, especially when you’ve spent hours perfecting a project. Misalignment occurs when the design stitches don’t match the intended placement, resulting in a distorted or skewed design. Whether you’re working on intricate patterns or simple designs, even slight misalignment can negatively impact the overall appearance of your work. Fortunately, there are effective ways to identify the causes and correct the problem.
In this blog, we’ll discuss common errors that cause design shifting and provide solutions to help you achieve perfectly aligned embroidery results.

1. Improper Hooping
Error: Incorrectly hooping the fabric can lead to design misalignment. If the fabric is not taut or evenly hooped, it can shift during the stitching process, causing misaligned designs.
Solution:
- Always make sure your fabric is tightly and evenly hooped. The fabric should be taut but not overly stretched, and it should lay flat in the hoop.
- Use a good-quality embroidery hoop with a tight grip, and consider using a fabric stabilizer to keep everything in place.
2. Inadequate Stabilization
Error: Insufficient stabilization can cause the fabric to move during embroidery, leading to design shifting. This is especially common when working with stretchy or slippery fabrics.
Solution:
- Choose the right stabilizer for the type of fabric you are using. For stretchy or delicate fabrics, opt for a stronger stabilizer or even a double layer.
- Ensure the stabilizer is properly adhered to the fabric before starting your embroidery. Test on scrap fabric to see how well the stabilizer holds.
3. Fabric Slipping in the Hoop
Error: Even when the fabric appears tightly hooped, it may slip slightly during the embroidery process, especially on larger or denser designs.
Solution:
- Use an adhesive spray or sticky stabilizer to secure the fabric and prevent any movement within the hoop.
- For large or heavy projects, consider using basting stitches to hold the fabric in place while the machine works.
4. Machine Speed Too High
Error: Running the embroidery machine at a very high speed can lead to design misalignment, as faster stitching increases the chances of fabric shifting.
Solution:
- Lower the machine speed, especially for intricate or dense designs. Slower stitching gives the machine more control, ensuring that each stitch is placed accurately.
- Monitor the machine’s performance during the embroidery process to catch any shifts early.
5. Incorrect Thread Tension
Error: If the upper or bobbin thread tension is not properly balanced, it can cause the fabric to pucker or move slightly during embroidery, resulting in misaligned designs.
Solution:
- Adjust the thread tension so that it is evenly balanced. Test different tension settings on a scrap piece of fabric before starting your main project.
- Pay attention to the quality of the stitches on both the top and bottom of the fabric to ensure proper tension.
6. Thread Breaks or Bobbin Runouts
Error: Thread breaks or running out of bobbin thread mid-design can disrupt the embroidery process and cause the machine to misalign the design when resuming stitching.
Solution:
- Keep an eye on the bobbin thread levels and change the bobbin before it runs out. Use high-quality thread to minimize breakage.
- If a thread break or bobbin runout occurs, carefully realign the needle to the last stitch position before resuming the design to avoid shifting.
7. Poor Fabric Placement
Error: Incorrect placement of the fabric on the machine or hoop can lead to design elements being stitched in the wrong location, causing misalignment.
Solution:
- Double-check that the fabric is properly aligned with the design template or grid before beginning embroidery.
- Many embroidery machines have built-in alignment tools or lasers—use these features to ensure perfect placement.
8. Environmental Factors (Bumps or Vibrations)
Error: Any external bumps or machine vibrations can cause the fabric or hoop to move slightly, leading to design shifts.
Solution:
- Make sure the embroidery machine is placed on a stable, level surface to avoid unnecessary vibrations.
- Prevent interruptions during the embroidery process and avoid bumping into the machine while it’s working.
9. Software or Design File Issues
Error: Sometimes, design misalignment is due to issues within the embroidery software or a corrupted design file that causes improper stitching patterns.
Solution:
- Ensure that the design file is properly formatted for your machine and that you’re using compatible software.
- If the design continues to shift, try reloading or resizing the file to see if the issue is resolved.
10. Incorrect Stabilizer Positioning
Even the best stabilizers can fail if not positioned properly, leading to fabric movement and design shifting.
Solution:
- Ensure the stabilizer fully covers the embroidery area. If needed, use multiple layers or overlapping stabilizers for extra support.
- Avoid using adhesive sprays excessively, as they can cause the stabilizer to lose grip over time.
11. Worn-out hoops or Clips
Frequent use of hoops and clips can cause them to lose their grip, resulting in slight movements that disrupt the design.
Solution:
- Inspect your hoops regularly for wear and tear. Replace them if they no longer secure the fabric tightly.
- Tighten screws or clamps on the hoop to ensure a firm grip.
12. Machine Frame Alignment Issues
Barudan embroidery machines rely on a precisely aligned frame to execute designs accurately. Misaligned frames can lead to shifting.
Solution:
- Check the frame alignment using the machine’s diagnostic tools or by visually inspecting the frame’s position.
- If the frame is misaligned, consult the user manual for recalibration instructions or contact a professional technician.
13. Environmental Factors
Sometimes, external factors such as vibrations or unstable surfaces can cause the machine to shift slightly during operation.
Solution:
- Place the machine on a sturdy, vibration-free surface.
- Ensure the machine is not in direct contact with heavy machinery or items that could transfer vibrations during operation.
14. Adjusting Presser Foot Height
If the presser foot is set too high or too low, it can either pull the fabric too tightly or fail to hold it securely, leading to misalignment.
Solution:
- Adjust the presser foot height according to the fabric thickness and stabilizer being used. Barudan machines allow precise adjustments for this purpose.
- Test the presser foot setting on scrap fabric before starting the final design.
Pro Tips for Long-Term Prevention
- Digitizing Expertise: Work with high-quality digitized designs. Misaligned stitches often occur when the design isn’t properly digitized for the fabric and stabilizer.
- Calibration Routine: Schedule routine calibration for your Barudan embroidery machine to maintain alignment precision.
- Use Tension Gauges: Invest in a tension gauge to fine-tune the upper and bobbin thread tension for optimal stitch alignment.
- Machine Training: Familiarize yourself and your team with Barudan-specific machine features and settings to minimize errors.
- Documentation: Keep a record of settings for different projects to replicate successful setups in the future.
Conclusion
Design misalignment or shifting on Barudan embroidery machines can often be avoided by paying close attention to setup, fabric preparation, and machine maintenance. Addressing these factors with care will ensure high-quality, professional embroidery results. By integrating advanced techniques and solutions, you can eliminate recurring alignment problems and enhance the overall efficiency of your embroidery operations.