Blog
Husqvarna Viking Embroidery Machine: Thread Breakage Troubleshooting

Quick answer: Thread breakage on your Husqvarna Viking embroidery machine is often caused by incorrect thread tension, a worn or wrong needle, improper threading, or lint buildup. Systematically check these areas to resolve the issue.
Thread breakage is a common frustration for Husqvarna Viking embroidery machine users, disrupting workflow and wasting materials. This guide provides practical steps to diagnose and resolve frequent thread breaks, helping you maintain efficient, high-quality embroidery.
Two-minute checks before you open anything
- Is the machine threaded correctly from spool to needle?
- Is the needle new, sharp, and the correct type/size for your thread and fabric?
- Is the thread tension set appropriately for your thread and fabric?
- Is the bobbin wound evenly and inserted correctly?
- Is the machine clean, especially around the tension discs, bobbin case, and needle area?
1. Incorrect Thread Tension high likelihood
How to tell
Observe the stitch quality: too tight tension causes thread to snap, while too loose tension results in tangled threads or loops on the fabric surface. The thread may also feel excessively taut or slack when pulled through the tension discs.
Fix
- Ensure the thread is correctly seated in all tension discs and guides.
- Adjust the upper thread tension dial incrementally, usually starting with the manufacturer's recommended setting for your thread type.
- Test on a scrap piece of fabric with the same thread and stabilizer. The tension is correct when the top thread forms a balanced stitch on the underside, with no loops or excessive pulling.
- Check bobbin tension if upper tension adjustments don't resolve the issue. Refer to your machine's manual for specific bobbin tension adjustment procedures, as this is less frequently adjusted.
Parts involved: Thread path & tension → Threads & supplies →
2. Threading Issues high likelihood
How to tell
The thread may snag, fray, or break immediately after starting. Visually inspect the entire thread path for skipped guides, incorrect seating in tension discs, or thread wrapped around components.
Fix
- Completely unthread the machine.
- Re-thread the machine carefully, following the numbered path indicated on your Husqvarna Viking machine, ensuring the thread passes through every guide and is correctly seated in the tension discs.
- Ensure the bobbin is wound evenly, not overfilled or underfilled, and inserted correctly into the bobbin case. The thread should pull smoothly from the bobbin case.
Parts involved: Thread path & tension → Rotary hooks & bobbin cases → Threads & supplies →
Parts you may need for Husqvarna Viking
In stock, tested before dispatch, Buyer Protection on every order. Part types for this problem: Thread path & tension, Threads & supplies, Rotary hooks & bobbin cases, Needles & needle bars.
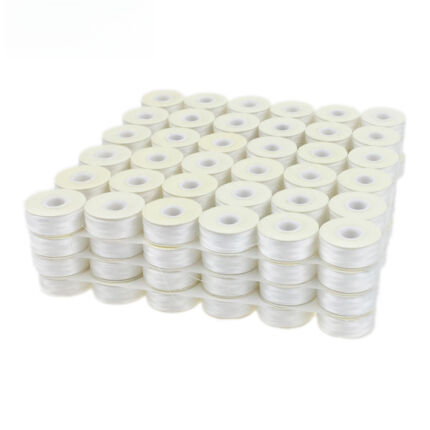 Sanbest Prewound Bobbins 70D/2 75D/2 Size L TH00017 White Black for...$ 47.99View part →
 eversnice 4125615-45, 4131825-45, 4123078-G, 4125615-45-SP-B, 41256...$ 35.99View part →Husqvarna Viking Bobbins (50 Clear Green) P/N: 4125615-45, 4131825-...$ 35.99View part →
 evernice Needle Threader 416190401 P3A0295000 for Singer 2010, 3229...$ 36.99View part →
 Needle Threader Replacement for Singer 5511, 5523, 5532, 5554, 85SC...$ 36.99View part →
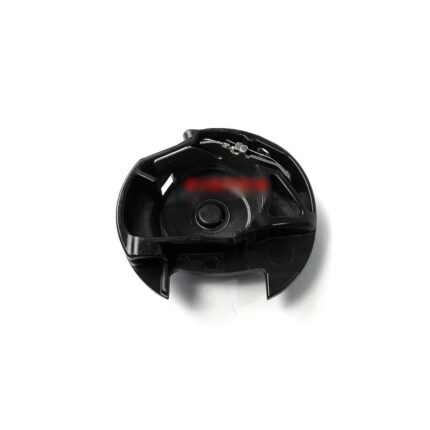 Viking Bobbin Case for Designer 1, 2, Diamond, Royale, Ruby Royale,...$ 78.99View part →
All Husqvarna Viking parts → Thread Path & Tension → Threads & Supplies → Rotary Hooks & Bobbin Cases →
3. Wrong Needle Type or Size / Damaged Needle high likelihood
How to tell
Thread may fray, shred, or break, especially during dense embroidery. Stitches may skip, or the needle may make a popping sound. A dull or bent needle can be seen upon close inspection.
Fix
- Replace the needle with a new, sharp needle. Needles should be replaced after 6-8 hours of embroidery or at the first sign of trouble.
- Ensure the correct needle type and size are used for your thread and fabric. For most embroidery, a 75/11 or 80/12 embroidery-specific needle (e.g., 'Embroidery' or 'Sharp' point) is recommended.
- Verify the needle is inserted correctly, fully seated in the needle clamp with the flat side facing the back of the machine.
Parts involved: Needles & needle bars →
4. Lint and Debris Build-Up medium likelihood
How to tell
Increased friction or resistance in the thread path, especially around tension discs, the bobbin area, or the needle plate. Thread may appear dirty or frayed after passing through the machine.
Fix
- Turn off and unplug the machine.
- Remove the needle plate, bobbin case, and bobbin.
- Using a small brush (often provided with the machine) or compressed air, carefully remove all lint, dust, and thread fragments from the tension discs, bobbin case area, feed dogs, and under the needle plate.
- Clean the thread path guides and take-up lever area.
- Avoid blowing lint further into the machine's internal mechanisms; always brush or vacuum outwards.
Parts involved: Lubrication & maintenance → Rotary hooks & bobbin cases → Thread path & tension → Screws, springs & small parts →
5. Poor Thread Quality medium likelihood
How to tell
Thread breaks frequently despite correct machine settings. The thread may feel weak, fuzzy, or have inconsistent thickness when handled. This is often more noticeable with older or cheaper threads.
Fix
- Use high-quality embroidery thread from reputable brands known for consistency and strength (e.g., Madeira, Sulky, Isacord).
- Ensure the thread is stored correctly, away from direct sunlight and humidity, to prevent degradation.
- Test with a different spool of thread to rule out a faulty batch.
Parts involved: Threads & supplies →
6. Improper Fabric Stabilization low likelihood
How to tell
Fabric puckers, shifts, or bunches during embroidery, causing the thread to snag or break. The design may appear distorted.
Fix
- Use the appropriate stabilizer for your fabric type and design density. For stretchy or delicate fabrics, a cut-away or tear-away stabilizer provides necessary support.
- Ensure the fabric and stabilizer are hooped correctly, taut but not stretched, and free of wrinkles.
- Consider using temporary adhesive spray or basting stitches to secure fabric to the stabilizer within the hoop.
While not a machine part, proper stabilization directly impacts machine performance and thread integrity.
Parts involved: Hoops & frames → Threads & supplies →
Stop and call a technician if
- If thread breakage persists after performing all troubleshooting steps.
- If you suspect an internal mechanical issue, such as a bent needle bar or timing problem.
- If the machine displays an error code related to thread breakage that is not resolved by basic troubleshooting.
Prevent it coming back
- Always use high-quality embroidery thread and needles appropriate for your project.
- Thread the machine meticulously, following the manufacturer's instructions for every guide and tension disc.
- Regularly clean your machine, especially the bobbin area, tension discs, and under the needle plate, to prevent lint buildup.
- Change your needle frequently (every 6-8 hours of sewing) or at the first sign of wear.
- Ensure proper fabric stabilization and hooping to prevent fabric shifting and tension issues.
Frequently asked questions
Why does my Husqvarna Viking machine keep breaking thread?
Frequent thread breakage is commonly due to incorrect thread tension, a dull or wrong needle, improper threading, or lint buildup in the machine. Less common causes include poor thread quality or inadequate fabric stabilization.
How often should I change the needle on my embroidery machine?
It's recommended to change your embroidery machine needle after every 6-8 hours of embroidery time, or immediately if you notice any signs of wear, bending, or if thread breakage begins to occur.
Can old thread cause thread breaks?
Yes, old or improperly stored thread can become brittle, lose its strength, or degrade, leading to frequent thread breaks. Always use fresh, high-quality thread stored away from direct sunlight and humidity.
What is the correct thread tension for embroidery?
The correct thread tension allows the top thread to form a balanced stitch on the underside of the fabric, with about 1/3 top thread and 2/3 bobbin thread showing. There should be no loops on the top or bottom, and the fabric should not pucker. This often requires testing and adjustment based on thread, fabric, and design.
Did this guide fix your machine?
Rate it - it helps other operators find the right fix.
Not sure which part is failing?
Need the logo stitched too?
Get your logo digitized by the people who know this machine
Upload the artwork, see the stitch count and the exact price in 10 seconds, then order with a free sew-out preview. $1 per 1,000 stitches, $10 minimum, 24-hour delivery. Vector conversion from $12.
After the fix
Fixed it? Keep the rest of the shop moving.
OS 360 is the shop software from the team behind this parts store. Every job keeps its status, deadline and owner while a Husqvarna Viking head is down, restock alerts fire for needles, hooks and bobbins before you run dry, and quotes, invoices and payment live in one place.
- Jobs with status, deadline and owner - nothing slips during downtime
- Inventory with restock alerts, this store one click away
- Instant quotes, invoices and one place to collect payment