Blog
Singer Futura XL-550: Troubleshooting Needle Breakage

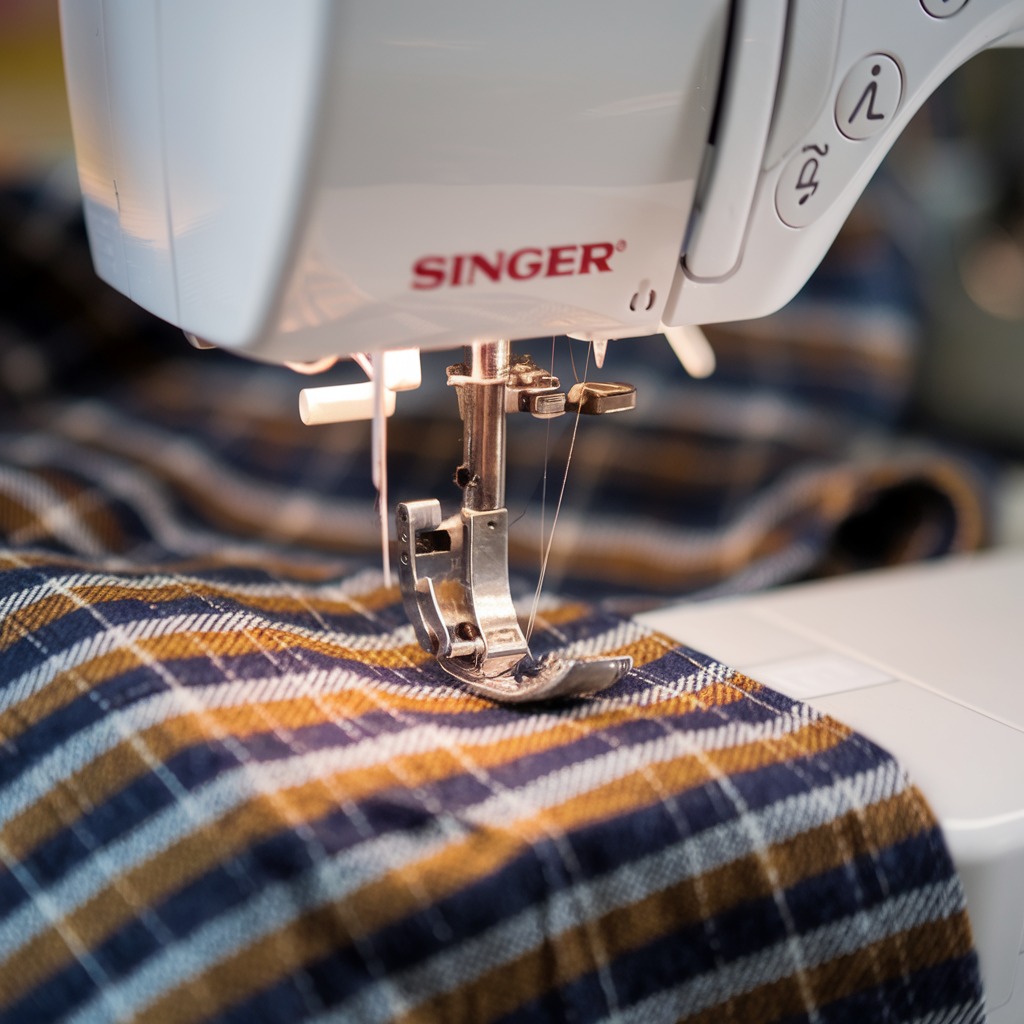
Quick answer: Needle breakage on the Singer Futura XL-550 is most often caused by an incorrectly inserted, damaged, or wrong type of needle, improper threading, or issues with fabric hooping. Systematically check these common culprits first.
Needle breakage is a common and frustrating issue for Singer Futura XL-550 embroidery machine operators. While it can disrupt your projects, understanding the underlying causes and performing systematic checks can resolve most problems. This guide provides practical, step-by-step instructions to diagnose and fix needle breakage, helping you get back to smooth embroidery.
Two-minute checks before you open anything
- Is the needle inserted correctly with the flat side facing the back and tightened securely?
- Is the needle bent, dull, or the wrong type for your fabric and thread?
- Is the machine threaded correctly from spool to needle, and is the bobbin case installed properly?
- Is the fabric hooped tautly without stretching, and is the needle clearing the hoop?
- Is the needle plate free of burrs or damage?
1. Incorrect Needle Insertion or Damaged Needle high likelihood
How to tell
The needle breaks immediately or after a few stitches. The needle may be visibly bent, dull, or the tip might be blunted. If the needle was recently changed, it might be inserted incorrectly.
Fix
- Turn off the machine.
- Loosen the needle clamp screw.
- Remove the old needle.
- Insert a new, correct type and size needle (e.g., 90/14 embroidery needle for general use) all the way up into the needle clamp, ensuring the flat side of the needle shank faces the back of the machine.
- Tighten the needle clamp screw securely. Gently tug on the needle to confirm it is firm and does not move.
- If the needle is dull or bent, replace it immediately. It is recommended to replace the needle after every project or after 8 hours of continuous use.
Always use high-quality embroidery needles appropriate for your fabric and thread.
Parts involved: Needles & needle bars → Screws, springs & small parts →
2. Improper Threading or Incorrect Thread Tension high likelihood
How to tell
Thread tangles, 'bird's nesting' (excess thread gathering under the fabric), skipped stitches, or the needle breaking during stitching. The upper thread might feel too tight or too loose when pulled through the tension discs.
Fix
- Turn off the machine.
- Remove all thread from the machine, both upper and bobbin.
- Clean the bobbin case area thoroughly with a small brush to remove lint buildup.
- Re-thread the upper thread carefully, following the numbered path on the machine. Ensure the thread is seated correctly in all guides and tension discs. If your machine has an automatic threading feature, ensure it functions correctly; manually check the threading if necessary.
- Check the bobbin: Ensure it is wound evenly, inserted correctly into the bobbin case, and the bobbin case is properly seated in the machine. Refer to your machine manual for specific bobbin case installation instructions.
- Adjust the upper thread tension. Start with the recommended tension setting (usually around 4-5 for general embroidery) and perform a tension test on a scrap of your project fabric. Adjust in small increments (e.g., 0.5) until the top and bobbin threads interlock evenly between the fabric layers. Loosen tension slightly for thicker fabrics or specialty threads.
Parts involved: Thread path & tension → Rotary hooks & bobbin cases → Threads & supplies → Lubrication & maintenance →
Parts you may need for Singer
In stock, tested before dispatch, Buyer Protection on every order. Part types for this problem: Needles & needle bars, Screws, springs & small parts, Thread path & tension, Rotary hooks & bobbin cases.
 Bobbin Case & 2 Metal Bobbins for Brother, Janome, Singer, Babylock...$ 5.59View part →
 11PCS Low Shank Presser Foot Kit Set for Singer Brother Janome Kenm...$ 23.49View part →
 PET-121 40WT 120D/2 Polyester Embroidery Thread 4000M Spool, 80 Mad...$ 17.49View part →
 Flying Tiger DBx1 Industrial Lockstitch Needles, 100 pcs/box, Sizes...$ 10.99View part →
 PET-80 80 Madeira Colors Embroidery Thread Set - Premium 40WT Polye...$ 15.99View part →40 Weight 120D/2 Polyester Embroidery Thread 4000M PET-121 for Brot...$ 17.49View part →
All Singer parts → Needles & Needle Bars → Screws, Springs & Small Parts → Thread Path & Tension →
3. Improper Fabric Hooping or Needle Hitting Hoop high likelihood
How to tell
Fabric bunches up, shifts, or puckers during embroidery. The needle may visibly strike the embroidery hoop, causing immediate breakage. Stitches may appear uneven or distorted.
Fix
- Turn off the machine.
- Remove the hoop from the machine.
- Unhoop the fabric and re-hoop it. Ensure the fabric is taut like a drum, but not stretched or distorted. There should be no wrinkles or slack.
- Use an appropriate stabilizer for your fabric type and design density. The stabilizer should be hooped with the fabric or adhered securely.
- When placing the hoop back on the machine, ensure it is correctly seated. Before starting embroidery, manually move the needle to various points within the design area (using the machine's positioning controls) to confirm the needle's path will clear the hoop at all points. Adjust hoop position if necessary.
- For larger designs, use a larger hoop if available to provide more clearance.
Parts involved: Hoops & frames → Threads & supplies →
4. Incorrect Needle Type for Fabric/Thread medium likelihood
How to tell
Needle breaks when sewing through thick or dense fabrics, or when using specialty threads like metallic or rayon. Stitches may skip, or the thread may shred.
Fix
- Turn off the machine.
- Select a needle appropriate for your fabric and thread combination. For thick fabrics (e.g., denim, multiple layers), use a heavy-duty or denim needle (e.g., size 100/16 or 110/18).
- For metallic, rayon, or other decorative threads, use a metallic or topstitch needle, which typically has a larger eye and a specially designed scarf to reduce friction and prevent shredding.
- Reduce the sewing speed on the machine, especially when working with thick materials or specialty threads, to allow the needle to penetrate smoothly.
Parts involved: Needles & needle bars → Threads & supplies →
5. Bent or Damaged Needle Plate low likelihood
How to tell
The needle consistently breaks at the same point or angle, often hitting the needle plate. Visible burrs, dents, or a bent edge on the needle plate, especially around the needle hole.
Fix
- Turn off the machine.
- Remove the needle plate (refer to your machine manual for specific instructions).
- Inspect the needle plate carefully for any damage, such as burrs, dents, or a bent needle hole. Run your finger gently over the surface to feel for imperfections.
- If any damage is found, the needle plate must be replaced. A smooth, undamaged needle plate is crucial for proper needle movement.
Parts involved: Presser feet & sewing parts →
6. Machine Timing Issues low likelihood
How to tell
Needle breakage occurs frequently despite all other checks being clear. The needle may hit the bobbin case or rotary hook. Unusual noises (clunking, grinding) may accompany the breakage. This is a more advanced issue.
Fix
- If you suspect timing issues, it is recommended to consult a professional technician. Adjusting machine timing requires specialized knowledge and tools.
- Do not attempt to adjust internal components without proper training, as this can cause further damage.
Parts involved: Rotary hooks & bobbin cases → Shafts, bearings & bushings → Belts, pulleys & gears → Head & mechanical parts →
Stop and call a technician if
- Frequent or constant needle breakage persists despite trying all troubleshooting steps.
- Needle breakage occurs with every project or after a very short period of sewing.
- The machine makes unusual noises, grinding, or excessive vibration during operation.
- There is visible damage to internal components, such as the needle bar or tension discs, that you cannot repair yourself.
- You suspect machine timing issues, which require specialized adjustment.
Prevent it coming back
- Always use high-quality embroidery needles appropriate for your fabric and thread type.
- Change your needle regularly – after every large project or approximately 8 hours of continuous use.
- Keep your machine clean, especially the bobbin case area and under the needle plate, to prevent lint buildup and tangles.
- Always use the appropriate stabilizer for your fabric to prevent shifting, puckering, and stress on the needle.
- Ensure your fabric is hooped correctly – taut like a drum, but not stretched or distorted.
- Follow the machine's recommended threading path precisely for both upper and bobbin threads.
- Adjust thread tension correctly for your specific project, performing a tension test if unsure.
- Reduce sewing speed when working with thick fabrics, dense designs, or specialty threads.
Frequently asked questions
How often should I change the needle on my Singer Futura XL-550?
It's recommended to change your needle after every major project or after approximately 8 hours of continuous use. For delicate fabrics or specialty threads, change it even more frequently.
What type of needle should I use for metallic thread on my Singer Futura XL-550?
When using metallic or other decorative threads, always use a needle specifically designed for them, such as a metallic needle. These needles have a larger eye and a smoother finish to reduce friction and prevent thread shredding and needle breakage.
Why does my needle keep hitting the embroidery hoop?
This usually indicates improper hoop positioning or fabric hooping. Ensure your fabric is hooped tautly without stretching, and that the hoop is correctly seated on the machine. Manually check the needle's path to ensure it clears the hoop before starting embroidery.
Can lint buildup cause needle breakage?
Yes, lint buildup, especially in the bobbin case and under the needle plate, can interfere with thread movement, leading to tangles, bird's nesting, and ultimately, needle breakage. Regular cleaning is essential.
Did this guide fix your machine?
Rate it - it helps other operators find the right fix.
Not sure which part is failing?
Need the logo stitched too?
Get your logo digitized by the people who know this machine
Upload the artwork, see the stitch count and the exact price in 10 seconds, then order with a free sew-out preview. $1 per 1,000 stitches, $10 minimum, 24-hour delivery. Vector conversion from $12.
After the fix
Fixed it? Keep the rest of the shop moving.
OS 360 is the shop software from the team behind this parts store. Every job keeps its status, deadline and owner while a Futura XL-550 head is down, restock alerts fire for needles, hooks and bobbins before you run dry, and quotes, invoices and payment live in one place.
- Jobs with status, deadline and owner - nothing slips during downtime
- Inventory with restock alerts, this store one click away
- Instant quotes, invoices and one place to collect payment