Blog
Singer Futura XL-420 Stops or Won’t Sew: Troubleshooting Guide

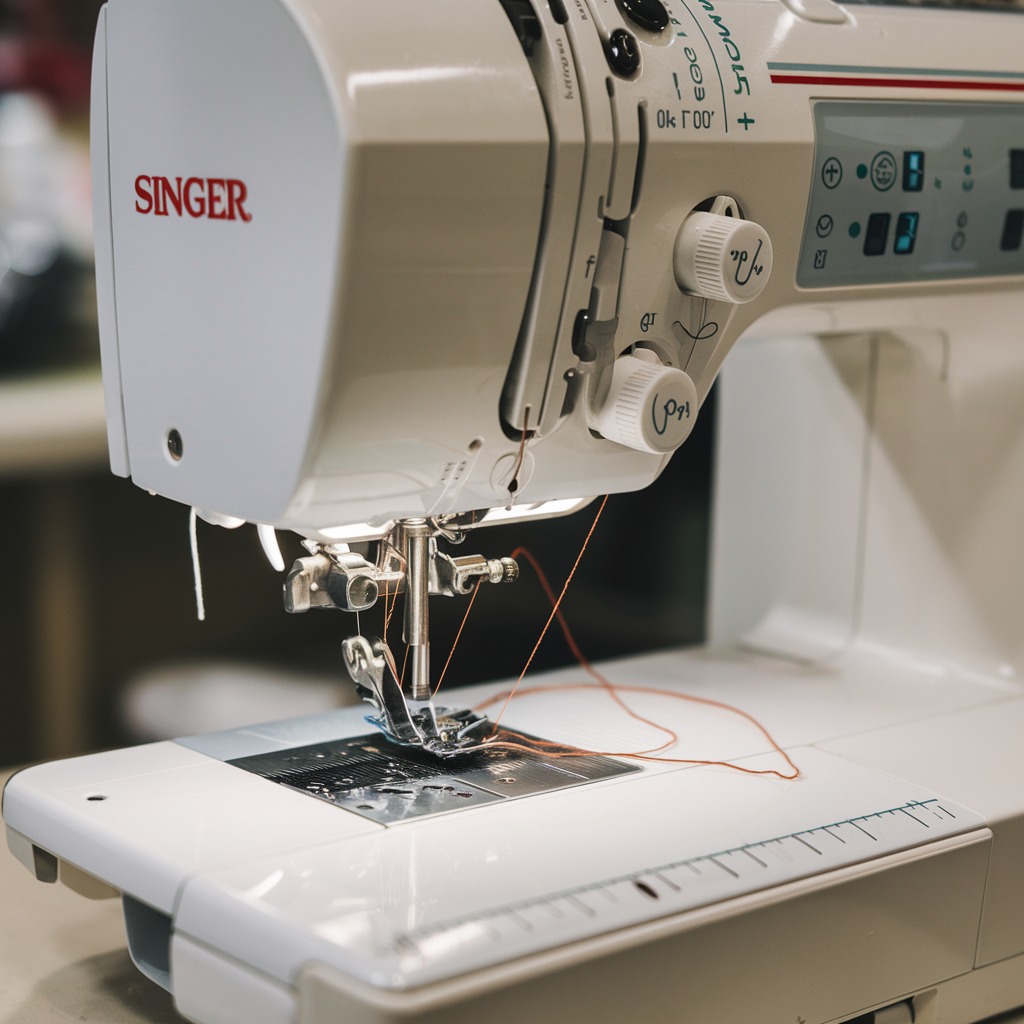
Quick answer: If your Singer Futura XL-420 stops or won't sew, the most common culprits are incorrect thread tension, improperly wound or inserted bobbins, or a wrongly inserted needle. Always start by checking the thread path, bobbin area, and needle installation.
The Singer Futura XL-420 is a robust embroidery machine, but like any precision equipment, it can encounter issues where it stops unexpectedly or refuses to sew. As a technician, I've found that most 'stops or won't sew' problems are due to common user errors or simple maintenance oversights. This guide provides practical, step-by-step instructions to diagnose and fix these issues yourself, getting your machine back to digitizing quickly.
Two-minute checks before you open anything
- Is the machine powered on and plugged in securely?
- Is the foot pedal connected correctly (if applicable)?
- Is the needle inserted correctly with the flat side facing the rear and fully seated?
- Is the bobbin wound evenly and inserted correctly into the bobbin case?
- Is the machine threaded correctly from spool to needle, with no tangles or snags?
- Is the bobbin area clear of lint and thread scraps?
1. Incorrectly Wound or Inserted Bobbin high likelihood
How to tell
The machine may jam, make unusual noises, produce uneven stitches, or stop abruptly. Bobbin thread might loop on the fabric's underside or break frequently. The bobbin may feel loose or incorrectly seated in the bobbin case.
Fix
- Power off the machine.
- Remove the bobbin case and bobbin.
- Inspect the bobbin: it should be wound smoothly and evenly, not too tightly or loosely. If uneven, rewind it.
- Reinsert the bobbin into the bobbin case, ensuring the thread feeds in the correct direction (refer to your machine's manual for specific bobbin orientation).
- Reinsert the bobbin case into the shuttle hook assembly, ensuring it clicks securely into place.
- Pull the bobbin thread through the tension spring on the bobbin case and out through the small slot.
- Test by hand-cranking the machine to ensure smooth bobbin thread movement.
Parts involved: Rotary hooks & bobbin cases → Threads & supplies →
2. Thread Jam in Bobbin Area or Under Needle Plate high likelihood
How to tell
The machine will stop abruptly, often with a grinding or clunking sound. You may see a tangled mass of thread under the needle plate or around the bobbin case. The handwheel may be difficult or impossible to turn.
Fix
- Power off the machine immediately.
- Raise the needle to its highest position.
- Remove the needle plate (usually two small screws).
- Carefully remove the bobbin case and bobbin.
- Using tweezers or a small brush, meticulously remove all tangled thread, lint, and fabric debris from the bobbin area, feed dogs, and shuttle hook assembly.
- Inspect the rotary hook for any damage or remaining thread fragments.
- Clean the area thoroughly with a soft brush or vacuum cleaner attachment.
- Reassemble the bobbin case, bobbin, and needle plate.
- Test by hand-cranking the machine to ensure smooth movement before powering on.
Parts involved: Rotary hooks & bobbin cases → Lubrication & maintenance → Screws, springs & small parts → Head & mechanical parts →
Parts you may need for Singer
In stock, tested before dispatch, Buyer Protection on every order. Part types for this problem: Rotary hooks & bobbin cases, Threads & supplies, Lubrication & maintenance, Screws, springs & small parts.
 Bobbin Case & 2 Metal Bobbins for Brother, Janome, Singer, Babylock...$ 5.59View part →
 11PCS Low Shank Presser Foot Kit Set for Singer Brother Janome Kenm...$ 23.49View part →
 PET-121 40WT 120D/2 Polyester Embroidery Thread 4000M Spool, 80 Mad...$ 17.49View part →
 Flying Tiger DBx1 Industrial Lockstitch Needles, 100 pcs/box, Sizes...$ 10.99View part →
 PET-80 80 Madeira Colors Embroidery Thread Set - Premium 40WT Polye...$ 15.99View part →40 Weight 120D/2 Polyester Embroidery Thread 4000M PET-121 for Brot...$ 17.49View part →
All Singer parts → Rotary Hooks & Bobbin Cases → Threads & Supplies → Lubrication & Maintenance →
3. Incorrect Needle Insertion or Damaged Needle high likelihood
How to tell
Skipped stitches, thread breakage, needle hitting the bobbin case, or the machine stopping with a 'clunk'. The needle may appear bent, dull, or have burrs. The machine might make a knocking sound.
Fix
- Power off the machine.
- Loosen the needle clamp screw.
- Remove the existing needle.
- Inspect the needle for any bends, burrs, or dullness. Replace if damaged.
- Insert a new, correct size needle (e.g., 90/14 for general embroidery) all the way up into the needle clamp, ensuring the flat side of the needle shank faces the rear of the machine.
- Tighten the needle clamp screw securely, but do not overtighten.
- Gently lower the needle by hand to ensure it clears the needle plate hole and does not strike the bobbin case.
Parts involved: Needles & needle bars → Screws, springs & small parts →
4. Incorrect Threading or Tension high likelihood
How to tell
Thread breaks frequently, stitches are uneven (too loose or too tight), machine jams, or the machine stops with an error related to thread. The thread may appear snagged or caught in the thread path.
Fix
- Power off the machine.
- Remove the thread spool.
- Completely unthread the machine, including the needle and bobbin.
- Inspect the entire thread path (spool pin, thread guides, tension discs, take-up lever, needle bar thread guide) for any lint, burrs, or obstructions. Clean with a soft brush.
- Ensure the thread spool is placed correctly on the spool pin, with the thread unwinding in the correct direction (refer to manual). Use a spool cap appropriate for your spool size.
- Rethread the machine carefully, following the numbered guides in your Singer Futura XL-420 manual precisely. Ensure the thread is seated firmly in the tension discs and take-up lever.
- Set the upper thread tension to the recommended default setting (usually around 4-5 for general embroidery). Adjust in small increments if needed after testing.
- Ensure the bobbin is correctly inserted and threaded with appropriate tension.
Parts involved: Thread path & tension → Threads & supplies →
5. Improper Presser Foot or Hoop Placement medium likelihood
How to tell
The machine may stop, make grinding noises, or the needle may strike the presser foot or hoop. Stitches may be uneven or skipped. The fabric might not feed correctly.
Fix
- Power off the machine.
- Verify that the correct presser foot for embroidery (e.g., embroidery foot) is attached and securely lowered.
- Ensure the presser foot is compatible with the needle plate opening.
- Check that the embroidery hoop is correctly attached to the embroidery unit and securely locked into place.
- Confirm the fabric is hooped tautly but not over-stretched, and that the hoop is not interfering with the needle or presser foot movement.
- Ensure the hoop size selected on the machine matches the physical hoop attached.
Parts involved: Presser feet & sewing parts → Hoops & frames →
6. Fabric Too Thick or Inappropriate for Needle/Thread medium likelihood
How to tell
The machine struggles to sew, makes loud noises, stitches are skipped or broken, or the machine stops with a 'motor overload' type error. The needle may break or bend.
Fix
- Power off the machine.
- Assess the fabric thickness and type. If very thick or dense, consider if the machine is suitable for the material.
- Replace the needle with a heavier-duty needle appropriate for the fabric (e.g., a denim or leather needle for thick materials). Refer to your needle manufacturer's guide.
- Use a stronger thread type if necessary.
- If possible, reduce the number of fabric layers.
- Reduce the sewing speed on the machine's control panel.
- Consider using a walking foot if sewing multiple layers of slippery fabric (though less common for embroidery).
Parts involved: Needles & needle bars → Threads & supplies → Presser feet & sewing parts →
7. Overheating of the Machine low likelihood
How to tell
The machine stops unexpectedly after prolonged use, often with a warning message on the display (if equipped) or simply powers down. The machine casing may feel warm to the touch.
Fix
- Power off the machine immediately.
- Unplug the machine from the power outlet.
- Allow the machine to cool down completely for at least 30-60 minutes. Do not attempt to restart it during this time.
- Ensure the machine is in a well-ventilated area, away from direct sunlight or heat sources.
- Avoid continuous, long embroidery sessions without short breaks.
- Check for any blocked ventilation slots and clear them if necessary.
8. Power Supply or Foot Pedal Issue low likelihood
How to tell
The machine does not power on, or it powers on but does not respond to the foot pedal. The display may be blank or show no activity. Other electrical devices plugged into the same outlet may also not work.
Fix
- Power off the machine.
- Check that the power cord is securely plugged into both the machine and a working wall outlet. Try a different outlet.
- Inspect the power cord for any visible damage (frays, cuts). Replace if damaged.
- If using a foot pedal, ensure it is securely plugged into the machine's designated port.
- Test the foot pedal by pressing it gently; listen for any internal clicks or feel for resistance. If possible, test with a known working foot pedal.
- If the machine has a main power switch, ensure it is in the 'ON' position.
Parts involved: Cables & wiring → Motors & drivers →
9. Software/Firmware Glitch or Overloaded Memory low likelihood
How to tell
The machine freezes, displays an error code related to memory or design, or stops mid-design without a mechanical reason. The control panel may become unresponsive.
Fix
- Power off the machine and wait 30 seconds, then power it back on (a 'hard reset').
- If loading a large or complex design, try loading a simpler, smaller design.
- Reduce the number of designs stored in the machine's internal memory. Delete old or unused designs.
- Ensure the USB stick (if used) is formatted correctly and contains only compatible design files.
- Check the Singer website for any available firmware updates for the Futura XL-420. Follow the manufacturer's instructions precisely for updating firmware to avoid bricking the machine.
Firmware updates are software, but they interact directly with the machine's circuit boards and memory.
Parts involved: Floppy, USB & memory → Circuit boards & electronics → Control panels & displays →
Stop and call a technician if
- If the machine displays a persistent error code not covered in the manual's basic troubleshooting.
- If the machine makes grinding noises or is completely seized after clearing all visible jams.
- If the motor runs but the needle bar or rotary hook does not move.
- If the machine has power issues despite checking outlets and cords.
- If you suspect internal electronic component failure or motor damage.
Prevent it coming back
- Regularly clean the bobbin area, under the needle plate, and the entire thread path to prevent lint and thread buildup.
- Lubricate your machine's moving parts according to the Singer Futura XL-420 manual's instructions.
- Always use a fresh, sharp needle appropriate for your fabric and thread type.
- Ensure bobbins are wound evenly and inserted correctly.
- Thread the machine precisely according to the manual's diagrams, ensuring the thread is seated in all guides and tension discs.
- Avoid overloading the machine's memory with too many complex designs.
- Do not force the machine to sew through excessively thick or inappropriate materials.
- Allow the machine to cool down during long embroidery sessions to prevent overheating.
Frequently asked questions
Why does my Singer Futura XL-420 keep breaking thread?
Frequent thread breakage is often due to incorrect threading, too much upper thread tension, a damaged or incorrectly inserted needle, burrs in the thread path, or a poorly wound bobbin. Check all these points, rethread the machine, and replace the needle.
My machine makes a loud clunking noise and stops. What's wrong?
A loud clunking noise followed by a stop usually indicates a mechanical jam, most commonly a thread jam in the bobbin area or the needle striking something (like the bobbin case or presser foot). Power off immediately, remove the needle plate, and thoroughly clean out any thread or debris. Inspect the needle and bobbin case for damage.
How often should I clean my Singer Futura XL-420?
For regular use, clean the bobbin area and under the needle plate after every 8-10 hours of sewing or after every major project. Lubricate moving parts according to your machine's manual, typically every 20-30 hours of use, or if the machine starts sounding dry or sluggish.
Can I use any brand of needle in my Futura XL-420?
While many brands make compatible needles, always ensure you are using the correct needle system (e.g., 130/705H or HAx1) and size for your fabric and thread. Using the wrong type can cause skipped stitches, thread breakage, or damage to your machine.
Did this guide fix your machine?
Rate it - it helps other operators find the right fix.
Not sure which part is failing?
Need the logo stitched too?
Get your logo digitized by the people who know this machine
Upload the artwork, see the stitch count and the exact price in 10 seconds, then order with a free sew-out preview. $1 per 1,000 stitches, $10 minimum, 24-hour delivery. Vector conversion from $12.
After the fix
Fixed it? Keep the rest of the shop moving.
OS 360 is the shop software from the team behind this parts store. Every job keeps its status, deadline and owner while a Futura XL-420 head is down, restock alerts fire for needles, hooks and bobbins before you run dry, and quotes, invoices and payment live in one place.
- Jobs with status, deadline and owner - nothing slips during downtime
- Inventory with restock alerts, this store one click away
- Instant quotes, invoices and one place to collect payment