
Blog
Tajima STNE Series: Essential Maintenance Schedule & Wear Parts Guide


Quick answer: Regular maintenance for your Tajima STNE series machine involves daily cleaning and lubrication, weekly checks of thread path components, monthly inspections of moving parts, and periodic replacement of wear items like thread guides, springs, and belts to ensure optimal performance and prevent costly breakdowns.
Maintaining your Tajima STNE series embroidery machine is crucial for its longevity, stitch quality, and consistent performance. As a workhorse in many embroidery shops, regular care prevents costly downtime and ensures your machine operates at its best. This guide provides a comprehensive maintenance schedule and highlights the wear parts you should regularly inspect and replace to keep your STNE running smoothly.
Two-minute checks before you open anything
- Check for any loose threads or lint build-up around the needle bar, hook, and tension discs.
- Listen for any unusual noises during operation.
- Visually inspect the needle for bends, burrs, or dullness.
- Ensure the bobbin is winding evenly and smoothly.
- Check that the presser foot moves freely and applies even pressure.
1. Thread Guide Collar Ceramic Coil high likelihood
How to tell
Visible grooves, nicks, or rough spots on the ceramic surface. Frequent thread breaks, fraying thread, or inconsistent tension can also indicate a worn guide. You might hear a slight scraping sound as thread passes through.
Fix
- Power off the machine and unplug it.
- Locate the worn Tajima 516503010011 MX0521010000 Thread Guide Collar Ceramic Coil 1.8mm.
- Carefully unscrew or unclip the old guide from its mounting point.
- Clean any debris from the mounting area.
- Install the new ceramic coil, ensuring it is seated correctly and tightened securely but not overtightened.
- Thread the machine and test for smooth thread flow and proper tension.
Inspect all ceramic thread guides regularly, as they are critical for smooth thread flow.
Parts involved: Thread path & tension →
2. Hook Thread Take-Up Spring high likelihood
How to tell
Skipped stitches, loose loops on the fabric surface, thread nesting under the fabric, or inconsistent stitch quality. The spring may appear stretched, bent, or broken. You might notice the thread not being pulled up properly after the needle exits the fabric.
Fix
- Power off the machine and unplug it.
- Locate the Tajima 0C0220060060 Hook Thread Take-Up Spring in the hook area.
- Carefully remove the old spring, noting its orientation and how it was attached.
- Install the new spring, ensuring it is correctly hooked into place and provides proper tension.
- Manually turn the handwheel to observe the spring's action and ensure it moves freely and returns to its original position.
- Test with a sample embroidery.
Parts involved: Screws, springs & small parts →
Parts you may need for Tajima
In stock, tested before dispatch, Buyer Protection on every order. Part types for this problem: Rotary hooks & bobbin cases, Needles & needle bars, Thread path & tension, Presser feet & sewing parts.
 Hirose HSH-7.94ATR(MTQ) KHS12-RYP Rotary Hook for Tajima, Barudan, ...$ 18.09View part →
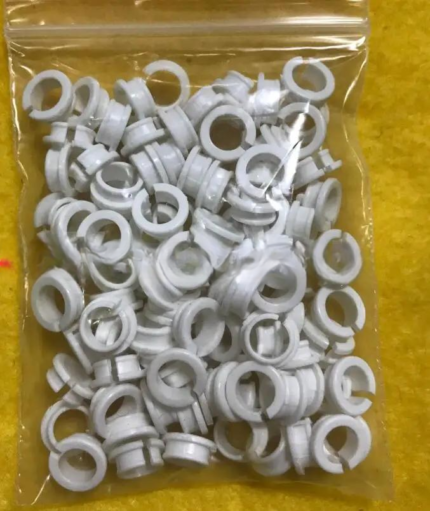 Tajima EF0613220000 EF0613210000 090460040020 090460040031 Presser ...$ 18.09View part →
 Koban KHS12-RYP Rotary Hook with Trimmer for Tajima, Barudan, SWF, ...$ 37.29View part →
 Groz-Beckert DBXK5 FG/SUK Embroidery Needles (100 Pcs) for Tajima, ...$ 33.99View part →
 HAYA MGP BC-DBZ(1)-NBL KF220440 ME0503000NBL Bobbin Case (50 Pcs) f...$ 66.29View part →
 KHS12-RYPN KF220750 ME0505010AMQ Rotary Hook for Tajima Barudan SWF...$ 27.09View part →
All Tajima parts → Rotary Hooks & Bobbin Cases → Needles & Needle Bars → Thread Path & Tension →
3. Needle Retention Compression Spring medium likelihood
How to tell
Needles falling out or becoming loose during operation, inconsistent needle depth, or difficulty in securely inserting a new needle. The spring may feel weak or appear compressed and not returning to its original length.
Fix
- Power off the machine and unplug it.
- Lower the needle bar to access the needle clamp area.
- Carefully remove the needle and any retaining screws for the needle clamp.
- Locate the Onloyo 507605030044 EF0618030000 Needle Retention Compression Spring 0.5mm.
- Remove the old spring and insert the new one, ensuring it sits correctly.
- Reassemble the needle clamp and insert a new needle, checking for secure retention.
Parts involved: Screws, springs & small parts → Needles & needle bars →
4. Presser Foot Bushing Guide Collar medium likelihood
How to tell
Excessive play or wobble in the presser foot, uneven presser foot pressure, or unusual noise from the presser foot mechanism. The bushing may show visible wear, scoring, or be loose in its housing.
Fix
- Power off the machine and unplug it.
- Raise the presser foot to its highest position.
- Carefully inspect the Tajima EF0613220000 EF0613210000 090460040020 090460040031 Presser Foot Bushing Guide Collar for wear.
- Depending on the machine's design, you may need to remove the presser foot assembly or surrounding components to access the bushing.
- Remove the old bushing and install the new one, ensuring it fits snugly.
- Reassemble any removed parts and check for smooth presser foot movement and reduced play.
Parts involved: Presser feet & sewing parts → Shafts, bearings & bushings →
5. Shockproof Pad / Damper Ring medium likelihood
How to tell
Increased vibration, louder operation, or a 'clunking' sound during needle bar movement. The pads (Tajima 090430070032 Shockproof Pad A Damper Ring or Tajima 090430080010 EF0643010000 Damper Ring B) may appear compressed, cracked, hardened, or disintegrated.
Fix
- Power off the machine and unplug it.
- Identify the specific damper ring that is worn (e.g., Damper Ring A or B). These are typically located around needle bar components or other moving parts to absorb shock.
- Carefully remove the worn pad, noting its position and orientation.
- Clean the area where the new pad will be installed.
- Install the new shockproof pad, ensuring it is seated correctly.
- Test machine operation to confirm reduced vibration and noise.
Parts involved: Head & mechanical parts → Screws, springs & small parts →
6. Oil-Bushing Bobbin Shaft Sleeve medium likelihood
How to tell
Excessive play or wobble in the bobbin shaft, unusual noise from the bobbin area, or inconsistent bobbin thread tension. The bushing may show visible wear or scoring.
Fix
- Power off the machine and unplug it.
- Access the bobbin shaft area, which may require removing the needle plate and rotary hook.
- Locate the Onloyo 509179010000 EF0206000001 Oil-Bushing Bobbin Shaft Sleeve.
- Carefully remove the old bushing, which might be pressed in.
- Clean the housing and gently press in the new bushing, ensuring it is flush and properly seated.
- Reassemble the hook area and test for smooth bobbin shaft rotation.
Parts involved: Shafts, bearings & bushings → Rotary hooks & bobbin cases →
7. Synchronous Belt medium likelihood
How to tell
Skipped stitches, misaligned embroidery, machine stopping unexpectedly, or a 'slipping' sound. Inspect the belt (e.g., Tajima Synchronous Belt 623500270000, Tajima W35-S5M Synchronous Belt) for cracks, fraying, missing teeth, or excessive slack. The machine may also display timing errors.
Fix
- Power off the machine and unplug it.
- Locate the synchronous belts (e.g., main drive belt, X/Y axis belts). You may need to remove covers to access them.
- Loosen any tensioning mechanisms or motor mounts.
- Carefully remove the old belt.
- Install the new belt, ensuring it is correctly seated on all pulleys.
- Adjust belt tension according to your machine's manual (it should be firm but not overly tight).
- Replace covers and test machine timing and operation.
Always refer to your machine's manual for specific belt tensioning procedures.
Parts involved: Belts, pulleys & gears →
8. Electromagnetic Induction Substrate A (Magnetic Sensor A) low likelihood
How to tell
Machine stopping with sensor-related errors (e.g., hook position error, needle position error), inconsistent trimming, or failure of certain machine functions that rely on position sensing. The machine's control panel may display specific error codes related to sensor failure.
Fix
- Power off the machine and unplug it.
- Consult your machine's manual to locate the specific Onloyo 0J4204400000 0J4200800012 Electromagnetic Induction Substrate A.
- Carefully disconnect the wiring connector from the old sensor.
- Unscrew and remove the faulty sensor.
- Install the new sensor, ensuring it is correctly positioned and secured.
- Reconnect the wiring harness.
- Power on the machine and test its functions, checking for error code resolution.
Parts involved: Sensors & switches →
Maintenance schedule
| When | What to do | Why |
|---|---|---|
| Daily (or every 8-10 hours of operation) | Clean the rotary hook area | Removes lint and thread debris that can cause skipped stitches, thread breaks, and damage to the hook. |
| Daily (or every 8-10 hours of operation) | Lubricate the rotary hook | Ensures smooth operation of the hook, reduces friction, and prevents wear. |
| Daily (or every 8-10 hours of operation) | Clean tension discs and thread path | Removes lint and wax buildup, ensuring consistent thread tension and preventing thread breaks. |
| Weekly (or every 40-50 hours of operation) | Clean under the needle plate | Removes accumulated lint and small thread pieces that can interfere with needle movement and stitch formation. |
| Weekly (or every 40-50 hours of operation) | Inspect and clean needle bars | Ensures smooth needle bar movement and prevents lint from interfering with needle changes or operation. |
| Weekly (or every 40-50 hours of operation) | Check thread guides for wear | Worn guides (like the Tajima 516503010011 MX0521010000 Thread Guide Collar Ceramic Coil) can fray thread and cause breaks. |
| Monthly (or every 160-200 hours of operation) | Lubricate all specified points (refer to manual) | Ensures all moving parts operate smoothly, reducing friction and extending component life. |
| Monthly (or every 160-200 hours of operation) | Inspect synchronous belts for wear and tension | Worn or loose belts can cause timing issues, skipped stitches, and machine malfunctions. Check Tajima Synchronous Belt 623500270000 and Tajima W35-S5M Synchronous Belt. |
| Monthly (or every 160-200 hours of operation) | Check presser foot for play and smooth movement | Excessive play can indicate a worn Tajima EF0613220000 Presser Foot Bushing Guide Collar, affecting stitch quality. |
| Quarterly (or every 500 hours of operation) | Inspect all springs (take-up, needle retention, etc.) | Springs can weaken or break over time, leading to various stitching problems. Check Tajima 0C0220060060 Hook Thread Take-Up Spring and Onloyo 507605030044 Needle Retention Compression Spring. |
| Quarterly (or every 500 hours of operation) | Inspect damper rings and shockproof pads | Worn dampers (Tajima 090430070032 Shockproof Pad A or Tajima 090430080010 Damper Ring B) can lead to increased vibration and noise. |
| Annually (or every 2000 hours of operation) | Professional service and timing check | Ensures all critical adjustments are correct and identifies potential issues before they become major problems. |
Stop and call a technician if
- If you encounter persistent error codes that you cannot resolve with basic troubleshooting.
- If you suspect a major mechanical issue, such as a bent shaft or damaged motor.
- For complex timing adjustments that require specialized tools or expertise.
- If there are electrical issues or unusual smells coming from the machine.
- When you are unsure about a repair and want to avoid causing further damage.
Prevent it coming back
- Always use high-quality needles and threads appropriate for your fabric and design.
- Keep your work area clean and free of dust, lint, and debris.
- Avoid forcing the machine or running it beyond its recommended speed for extended periods.
- Ensure proper thread tension settings to prevent undue stress on machine components.
- Regularly check and tighten any loose screws or fasteners.
- Never operate the machine with damaged or worn parts; replace them promptly.
Frequently asked questions
How often should I lubricate my Tajima STNE machine?
Lubrication frequency depends on usage. For typical daily operation, light oiling of the rotary hook and needle bar area should be done daily. Other points may require weekly or monthly lubrication. Always refer to your Tajima STNE operator's manual for specific lubrication points and intervals.
What kind of oil should I use for my Tajima STNE?
Always use high-quality, non-staining sewing machine oil specifically designed for embroidery machines. Avoid using general-purpose oils that can gum up or stain your embroidery. Check your machine's manual for any specific oil recommendations.
Why is my Tajima STNE making a new noise?
Unusual noises often indicate a problem. It could be due to lack of lubrication, a loose screw, a worn part (like a damper or bushing), thread caught in a mechanism, or a timing issue. Stop the machine immediately, inspect for obvious issues, and consult your manual or a technician if you can't identify the cause.
Can I perform all maintenance myself?
Many routine maintenance tasks like cleaning, oiling, and replacing easily accessible wear parts can be performed by an operator. However, complex repairs, timing adjustments, or electrical issues should be handled by a qualified embroidery machine technician to prevent further damage.
How do I know which synchronous belt to order for my STNE?
Synchronous belts vary in length and tooth profile. Always check your machine's parts manual for the exact part number for your specific Tajima STNE model and the belt you need to replace. You can also match the numbers printed on your existing belt if it's still legible.
Did this guide fix your machine?
Rate it - it helps other operators find the right fix.
Not sure which part is failing?
Need the logo stitched too?
Get your logo digitized by the people who know this machine
Upload the artwork, see the stitch count and the exact price in 10 seconds, then order with a free sew-out preview. $1 per 1,000 stitches, $10 minimum, 24-hour delivery. Vector conversion from $12.
After the fix
Fixed it? Keep the rest of the shop moving.
OS 360 is the shop software from the team behind this parts store. Every job keeps its status, deadline and owner while a Tajima head is down, restock alerts fire for needles, hooks and bobbins before you run dry, and quotes, invoices and payment live in one place.
- Jobs with status, deadline and owner - nothing slips during downtime
- Inventory with restock alerts, this store one click away
- Instant quotes, invoices and one place to collect payment





