
Blog
Tajima TMFD Series: Essential Maintenance Schedule & Wear Parts Guide

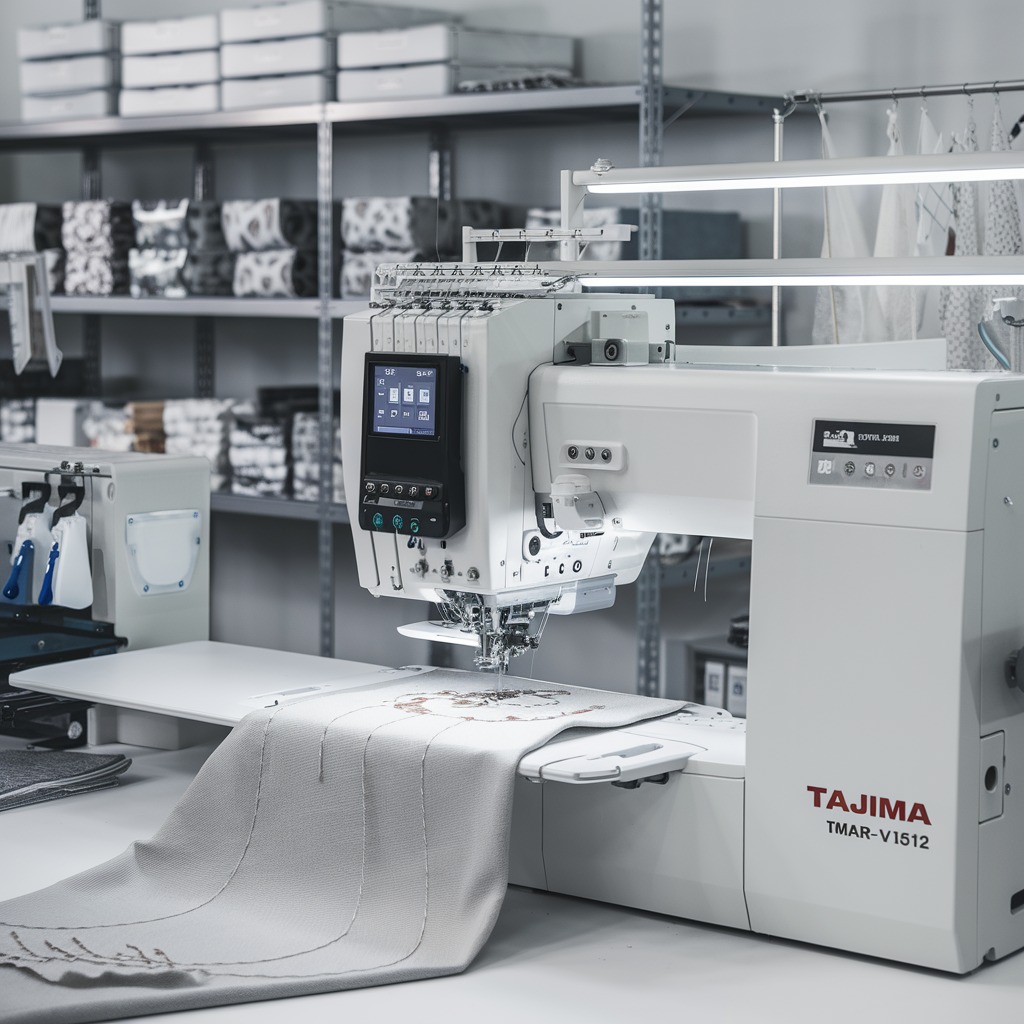
Quick answer: Regular maintenance for your Tajima TMFD series machine involves daily cleaning and oiling, weekly checks of thread path components, monthly inspection of belts and springs, and periodic replacement of wear parts like springs, bushings, and timing belts to ensure optimal performance and prevent costly downtime.
Maintaining your Tajima TMFD series embroidery machine is crucial for its longevity, consistent stitch quality, and preventing costly downtime. As a workhorse in many embroidery shops, the TMFD benefits greatly from a proactive maintenance schedule. This guide outlines essential daily, weekly, and monthly tasks, along with identifying common wear parts you should regularly inspect and replace. By following these recommendations, you can keep your TMFD running efficiently and extend its operational life.
Two-minute checks before you open anything
- Check for any loose threads or lint accumulation around the rotary hook, needle bars, and tension discs.
- Verify that all needles are straight, sharp, and correctly inserted.
- Ensure bobbin cases are clean and free of lint, and bobbins are wound evenly.
- Listen for any unusual noises during machine operation.
- Check that the presser foot moves freely and is not obstructed.
- Confirm that the machine is properly oiled at all designated points.
1. Jump Control Rod Spring high likelihood
How to tell
Skipped stitches, inconsistent thread trimming, or the jump foot not returning to its correct position can indicate a weak or broken jump control rod spring. Visually inspect the spring for deformation or breakage.
Fix
- Power off and unplug the machine.
- Locate the jump control rod assembly.
- Carefully remove the old spring, noting its orientation.
- Install the new Tajima 507309040020 MX0503010000 Jump Control Rod Spring, ensuring it is seated correctly.
- Test machine operation after reassembly.
Use Tajima 507309040020 MX0503010000 Jump Control Rod Spring 0.9mm Torsion Spring for TMFD Embroidery Machines.
Parts involved: Screws, springs & small parts →
2. Hook Thread Take-Up Spring high likelihood
How to tell
Loose stitches, thread looping on the underside, or frequent thread breaks can be symptoms of a worn or broken hook thread take-up spring. Inspect the spring for proper tension and integrity.
Fix
- Power off and unplug the machine.
- Access the hook area, usually by removing the needle plate.
- Locate the hook thread take-up spring.
- Carefully remove the old spring, noting its attachment points.
- Install the new Tajima 0C0220060060 Hook Thread Take-Up Spring.
- Reassemble and test stitch quality.
Use Tajima 0C0220060060 Hook Thread Take-Up Spring for TMEG, TMFD, STNE, TFKN Machines.
Parts involved: Screws, springs & small parts → Thread path & tension →
Parts you may need for Tajima TMFD
In stock, tested before dispatch, Buyer Protection on every order. Part types for this problem: Screws, springs & small parts, Thread path & tension, Needles & needle bars, Shafts, bearings & bushings.
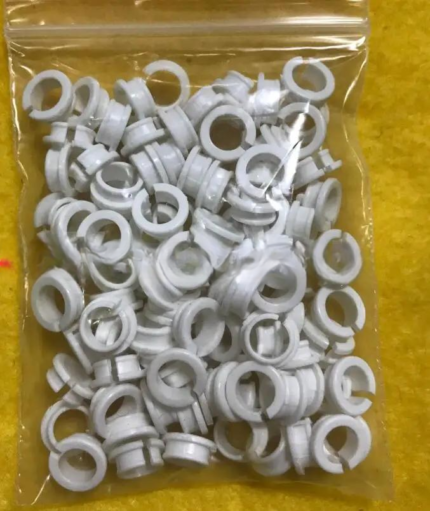 Tajima EF0613220000 EF0613210000 090460040020 090460040031 Presser ...$ 18.09View part →
 Unbranded Reciprocator Assembly Set for Tajima TMFD & Chinese Embro...$ 21.49View part →
 Tajima 507309040020 MX0503010000 Jump Control Rod Spring 0.9mm Tors...$ 8.09View part →
 Tajima 0C0220080000 EF0910000000 Spring Hook for TMEG TMFD STNE TFK...$ 5.49View part →
 Tajima ME0530000000 Take-Up Lever Drive Crank Rod Gear: TME, TME-DC...$ 16.49View part →
 MITSUBOSHI MBL S5M1680 Timing Belt for Tajima TMFX TMFD TMEZ TFMX T...$ 64.99View part →
All Tajima TMFD parts → Screws, Springs & Small Parts → Thread Path & Tension → Needles & Needle Bars →
3. Needle Retention Compression Spring high likelihood
How to tell
Needles falling out, difficulty inserting needles, or needles not being held securely can indicate a weak or damaged needle retention spring. Inspect the spring within the needle bar assembly.
Fix
- Power off and unplug the machine.
- Lower the needle bar to access the needle clamp area.
- Carefully remove the needle clamp screw and the old spring.
- Install the new Onloyo 507605030044 EF0618030000 Needle Retention Compression Spring.
- Reassemble the needle clamp and test needle retention.
Use Onloyo 507605030044 EF0618030000 Needle Retention Compression Spring 0.5mm for Tajima TMEG TMFD STNE TFKN STKN TFGN TCMX TMLH TLMX.
Parts involved: Screws, springs & small parts → Needles & needle bars →
4. Presser Foot Bushing Guide Collar medium likelihood
How to tell
Excessive play or wobble in the presser foot, uneven presser foot pressure, or unusual noise from the presser foot mechanism. Visually inspect the bushing for wear, cracks, or looseness.
Fix
- Power off and unplug the machine.
- Remove the presser foot assembly.
- Locate the bushing guide collar.
- Carefully remove the worn bushing.
- Install the new Tajima EF0613220000 EF0613210000 090460040020 090460040031 Presser Foot Bushing Guide Collar.
- Reassemble and ensure smooth presser foot movement.
Use Tajima EF0613220000 EF0613210000 090460040020 090460040031 Presser Foot Bushing Guide Collar for TFMX TMAR TMBP-SC TMEZ.
Parts involved: Shafts, bearings & bushings → Presser feet & sewing parts →
5. Oil-Bushing Bobbin Shaft Sleeve medium likelihood
How to tell
Increased friction or resistance when the bobbin shaft rotates, unusual noise from the bobbin winder, or uneven bobbin winding. Inspect the bushing for wear or scoring.
Fix
- Power off and unplug the machine.
- Access the bobbin winder assembly.
- Disassemble the bobbin shaft to expose the sleeve.
- Remove the old Onloyo 509179010000 EF0206000001 Oil-Bushing Bobbin Shaft Sleeve.
- Install the new bushing, ensuring it fits snugly.
- Reassemble and lubricate as per your machine's manual.
Use Onloyo 509179010000 EF0206000001 Oil-Bushing Bobbin Shaft Sleeve for Tajima TMEG, TMFD, STNE, TFKN, STKN, TFGN, TCMX, TMLH, TLMX.
Parts involved: Shafts, bearings & bushings → Lubrication & maintenance →
6. Needle Bar Guide medium likelihood
How to tell
Excessive side-to-side play in the needle bar, needle deflection, or increased needle breakage. Inspect the guide for wear grooves or looseness.
Fix
- Power off and unplug the machine.
- Remove the needle plate and presser foot.
- Access the needle bar guide assembly.
- Carefully remove the old Tajima Needle Bar Guide.
- Install the new guide, ensuring proper alignment.
- Adjust needle bar height and timing if necessary, referring to your machine's manual.
Use Tajima Needle Bar Guide 090450036011, 090450049011, 09045005Y011 for TMEG, TMFD, STNE, TFKN, STKN, TFGN, TCMX, TLMX Embroidery Machines.
Parts involved: Needles & needle bars → Head & mechanical parts →
7. Timing Belts (Main Drive & Head) medium likelihood
How to tell
Skipped stitches, misaligned designs, unusual noise (squealing, slapping), or machine slowing down. Inspect belts for cracks, fraying, missing teeth, or excessive slack. Check tension regularly.
Fix
- Power off and unplug the machine.
- Locate the timing belts (main drive and head drive).
- Loosen tensioners and carefully remove the old belt.
- Install the new MITSUBOSHI MBL S5M1680 Timing Belt or Tajima W35-S5M Synchronous Belt, ensuring correct routing.
- Adjust belt tension according to your machine's manual – do not overtighten.
- Test machine operation and stitch alignment.
Common belts include MITSUBOSHI MBL S5M1680 Timing Belt for Tajima TMFX TMFD TMEZ TFMX TFMG Series and Tajima W35-S5M Synchronous Belt for TFMX, TMAR, TFGN, TMFD.
Parts involved: Belts, pulleys & gears →
8. Stopper Lower Dead Point Needle Bar Connecting Stud low likelihood
How to tell
Incorrect needle bar timing, needle hitting the hook, or unusual noise from the needle bar mechanism. Inspect the stud for wear, bending, or looseness.
Fix
- Power off and unplug the machine.
- Access the needle bar connecting rod assembly.
- Carefully remove the old stud.
- Install the new Tajima 090420060017 Stopper Lower Dead Point Needle Bar Connecting Stud.
- Verify and adjust needle bar timing as per your machine's service manual.
Use Tajima 090420060017 Stopper Lower Dead Point Needle Bar Connecting Stud for TMEG TMFD TMFX STNE TFKN STKN STKN-C TFGN TMEX TEMX TEHX TEJT TMLH TLMX.
Parts involved: Needles & needle bars → Head & mechanical parts →
9. Damper Ring / Shockproof Pad low likelihood
How to tell
Increased vibration, noise, or premature wear on connected parts due to lack of cushioning. Visually inspect for cracking, hardening, or disintegration.
Fix
- Power off and unplug the machine.
- Locate the damper ring in the needle bar or other relevant assemblies.
- Remove the old, worn damper ring.
- Install the new Tajima 090430080010 EF0643010000 Damper Ring B Shockproof Pad or Tajima 090430070032 Shockproof Pad A Damper Ring.
- Ensure it is seated correctly to absorb shock.
Use Tajima 090430080010 EF0643010000 Damper Ring B Shockproof Pad or Tajima 090430070032 Shockproof Pad A Damper Ring for TMEG TMFD STNE TFKN STKN.
Parts involved: Head & mechanical parts → Screws, springs & small parts →
10. Thread Guide Collar Ceramic Coil low likelihood
How to tell
Rough or sharp edges on the ceramic coil, causing thread fraying, breakage, or inconsistent tension. Visually inspect for nicks, grooves, or cracks.
Fix
- Power off and unplug the machine.
- Locate the ceramic thread guide collar in the thread path.
- Carefully remove the old collar.
- Install the new Tajima 516503010011 MX0521010000 Thread Guide Collar Ceramic Coil, ensuring the thread passes smoothly through it.
- Test with thread to confirm no snags.
Use Tajima 516503010011 MX0521010000 Thread Guide Collar Ceramic Coil 1.8mm for TMEG TMFD STNE TFKN STKN TFGN TCMX TMLH TLMX.
Parts involved: Thread path & tension →
11. Reciprocator Assembly Set low likelihood
How to tell
Inconsistent thread trimming, poor stitch formation, or unusual noise from the trimming mechanism. This assembly is complex; symptoms often point to wear in multiple components within it.
Fix
- Power off and unplug the machine.
- Access the reciprocator assembly, typically located near the hook.
- Carefully remove the entire worn assembly.
- Install the new Unbranded Reciprocator Assembly Set, ensuring all connections are secure.
- Verify thread trimming function and stitch quality after replacement. This may require timing adjustments.
Use Unbranded Reciprocator Assembly Set for Tajima TMFD & Chinese Embroidery Machines.
Parts involved: Cutters & trimmers → Head & mechanical parts →
Maintenance schedule
| When | What to do | Why |
|---|---|---|
| Daily (or before each shift) | Clean the rotary hook area and bobbin case. | Removes lint and thread debris that can cause skipped stitches, thread breaks, and damage to the hook. |
| Daily (or before each shift) | Oil all designated points, especially the rotary hook, needle bars, and main shaft bearings. | Reduces friction, prevents wear, and ensures smooth operation of moving parts. Refer to your manual for specific oiling points. |
| Daily (or before each shift) | Wipe down the machine exterior and clear any visible lint/dust. | Prevents dust from entering internal mechanisms and keeps the machine in good condition. |
| Weekly (or every 40-60 operating hours) | Clean under the needle plate and around the thread take-up levers. | Removes hidden lint and debris that can affect stitch quality and thread path. |
| Weekly (or every 40-60 operating hours) | Inspect all thread guides and tension discs for burrs or damage. | Damaged guides can fray thread and cause breaks. Clean tension discs ensure consistent tension. |
| Weekly (or every 40-60 operating hours) | Check needle bar play and ensure needle clamps are secure. | Excessive play can lead to needle breakage and poor stitch quality. Loose clamps can cause needles to fall out. |
| Monthly (or every 160-200 operating hours) | Inspect all timing belts (main drive, head drive) for wear, cracks, or fraying. Check tension. | Worn or loose belts can cause misaligned designs, skipped stitches, and machine damage. Adjust tension as per manual. |
| Monthly (or every 160-200 operating hours) | Check all springs (jump, take-up, needle retention) for proper tension and signs of fatigue/breakage. | Weak or broken springs lead to various stitching issues and can affect machine timing. |
| Monthly (or every 160-200 operating hours) | Clean and inspect the thread trimming mechanism (reciprocator, knives). | Ensures clean thread cuts and prevents thread jams. Remove any accumulated thread bits. |
| Every 500-1000 operating hours (or annually) | Inspect and lubricate main shafts, bearings, and gears. | Prevents excessive wear on critical moving parts. This may require partial disassembly. |
| Every 500-1000 operating hours (or annually) | Check and adjust machine timing (needle bar, hook, trimmer) if necessary. | Ensures optimal stitch formation and machine synchronization. Refer to service manual or consult a technician. |
Stop and call a technician if
- If you encounter persistent error codes that you cannot resolve with basic troubleshooting.
- If the machine exhibits severe mechanical noise, grinding, or seizing.
- If you suspect a problem with a circuit board or complex electronic component.
- If you are unsure about performing a repair that involves critical timing adjustments (e.g., hook timing, needle bar timing).
- If you've performed all recommended maintenance and troubleshooting steps, but the issue persists.
Prevent it coming back
- Always use high-quality threads and needles appropriate for your fabric to reduce stress on machine components.
- Ensure proper thread tension settings to prevent excessive strain on the thread path and needle bar mechanisms.
- Keep your work area clean to prevent dust and lint from accumulating inside the machine.
- Use only the recommended type and grade of machine oil and lubricate regularly.
- Avoid forcing parts or making aggressive adjustments; if something feels stuck, investigate the cause gently.
- Regularly check and adjust belt tensions to prevent slippage and premature wear.
- Train operators on proper machine usage and basic troubleshooting to minimize user-induced damage.
Frequently asked questions
How often should I oil my Tajima TMFD machine?
You should oil your Tajima TMFD machine daily, or at the start of each shift, using the recommended machine oil. Pay attention to all designated oiling points, especially around the rotary hook, needle bars, and other moving parts. Refer to your machine's manual for specific oiling locations and frequency.
What are the most common wear parts on a Tajima TMFD?
The most common wear parts on a Tajima TMFD series machine are springs (like jump control rod springs, hook thread take-up springs, and needle retention springs), bushings (presser foot, bobbin shaft), and timing belts. These parts are subject to constant movement, tension, and friction, leading to eventual wear.
Why is my Tajima TMFD making a new noise?
New noises often indicate a problem. It could be due to lack of lubrication, a loose or worn part (like a belt, bearing, or gear), thread caught in a mechanism, or an issue with the rotary hook. Stop the machine immediately, inspect for obvious issues, lubricate, and if the noise persists, investigate further or consult a technician.
Can I use generic parts for my Tajima TMFD?
While some generic parts may fit, using genuine or high-quality aftermarket parts specifically designed for Tajima TMFD machines is highly recommended. Inferior parts can lead to premature failure, poor stitch quality, and potential damage to other machine components. Always prioritize quality for critical moving parts.
How do I know when to replace a timing belt?
Inspect your timing belts monthly for signs of wear such as cracks, fraying, missing teeth, or excessive stretching. If you notice any of these symptoms, or if your machine experiences skipped stitches or misaligned designs that aren't resolved by other means, it's time to replace the timing belt. Always check belt tension regularly.
Did this guide fix your machine?
Rate it - it helps other operators find the right fix.
Not sure which part is failing?
Need the logo stitched too?
Get your logo digitized by the people who know this machine
Upload the artwork, see the stitch count and the exact price in 10 seconds, then order with a free sew-out preview. $1 per 1,000 stitches, $10 minimum, 24-hour delivery. Vector conversion from $12.
After the fix
Fixed it? Keep the rest of the shop moving.
OS 360 is the shop software from the team behind this parts store. Every job keeps its status, deadline and owner while a TMFD head is down, restock alerts fire for needles, hooks and bobbins before you run dry, and quotes, invoices and payment live in one place.
- Jobs with status, deadline and owner - nothing slips during downtime
- Inventory with restock alerts, this store one click away
- Instant quotes, invoices and one place to collect payment





