
Blog
Singer 29K Series: Maintenance Guide


Quick answer: Regular maintenance for your Singer 29K series machine involves daily cleaning and oiling, weekly checks for loose components, and monthly inspections of wear parts like needles, thread path components, and the feeding foot bar. Following a consistent schedule prevents breakdowns and ensures high-quality stitching.
The Singer 29K series industrial patcher sewing machine is a workhorse, renowned for its durability and ability to handle heavy materials. Like any precision machinery, consistent maintenance is key to its longevity and reliable performance. This guide outlines a practical maintenance schedule and identifies common wear parts, helping you keep your 29K running smoothly and prevent costly downtime. Regular care not only extends the life of your machine but also ensures consistent, high-quality stitching.
Two-minute checks before you open anything
- Check needle for bends or dullness.
- Ensure machine is properly threaded.
- Verify bobbin is correctly wound and inserted.
- Check for any loose screws or rattling sounds.
- Confirm power connection and foot pedal operation.
1. Needles high likelihood
How to tell
Skipped stitches, thread breakage, fabric damage, or a dull/bent needle point. The needle might also make an unusual clicking sound as it penetrates the fabric.
Fix
- Inspect the needle for any signs of bending, burrs, or a dull tip. Run your finger gently over the point to feel for roughness.
- Ensure the needle is the correct type and size for your fabric and thread.
- Loosen the needle clamp screw and remove the old needle.
- Insert a new needle, making sure the flat side faces the correct direction (usually away from the hook) and it is pushed up as far as it will go into the needle bar.
- Tighten the needle clamp screw securely.
Parts involved: Needles & needle bars →
2. Thread Path Components (Tension Discs, Thread Guides) medium likelihood
How to tell
Inconsistent stitch quality, looping stitches, thread fraying or breaking, or difficulty threading the machine. Visually inspect for burrs, nicks, or accumulated lint.
Fix
- Thoroughly clean all thread guides, tension discs, and the take-up lever with a small brush or compressed air to remove lint and debris.
- Inspect tension discs for grooves or damage. If damaged, they may need replacement.
- Check thread guides for nicks or sharp edges that could fray the thread. Smooth with fine-grit sandpaper if minor, otherwise replace.
- Ensure the tension spring is not bent or weak, and that the tension assembly moves freely.
Parts involved: Thread path & tension →
Parts you may need for Singer
In stock, tested before dispatch, Buyer Protection on every order. Part types for this problem: Needles & needle bars, Thread path & tension, Rotary hooks & bobbin cases, Presser feet & sewing parts.
 Bobbin Case & 2 Metal Bobbins for Brother, Janome, Singer, Babylock...$ 5.59View part →
 11PCS Low Shank Presser Foot Kit Set for Singer Brother Janome Kenm...$ 25.09View part →
 Flying Tiger DBx1 Industrial Lockstitch Needles, 100 pcs/box, Sizes...$ 12.09View part →
 AA7032 Open Toe Quilting & Embroidery Presser Foot for Brother, Jan...$ 5.49View part →
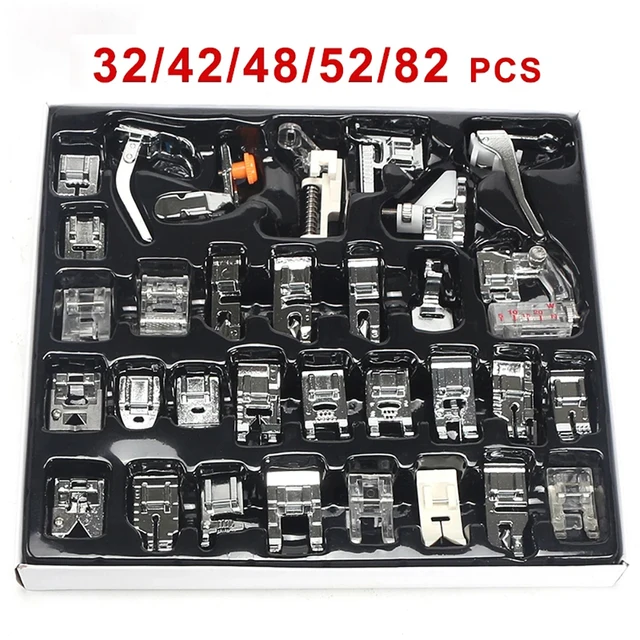 32-Piece Universal Presser Foot Kit for Brother CS6000i, Singer 442...$ 34.99View part →
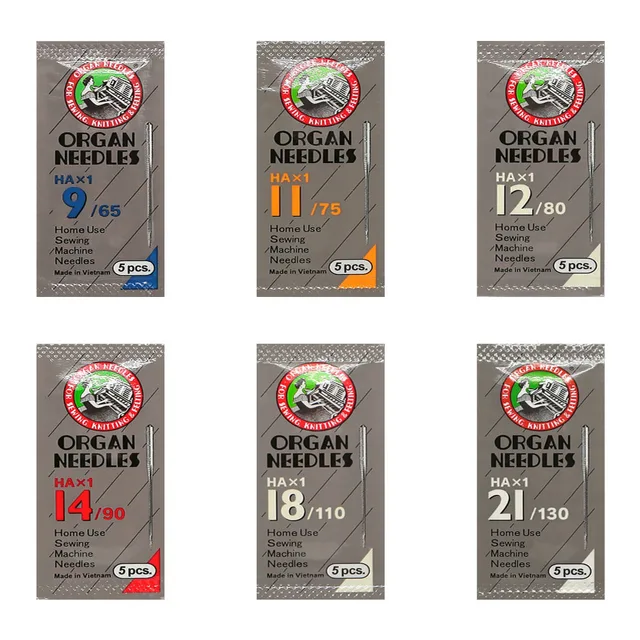 ORGAN HAX1 Household Sewing Machine Needles for SINGER & BROTHER, S...$ 6.49View part →
All Singer parts → Needles & Needle Bars → Thread Path & Tension → Rotary Hooks & Bobbin Cases →
3. Shuttle Hook Assembly medium likelihood
How to tell
Noisy operation, skipped stitches, thread breakage, or poor stitch formation on the underside of the fabric. The hook point may appear dull, burred, or worn.
Fix
- Remove the bobbin case and bobbin.
- Carefully inspect the shuttle hook point for burrs, nicks, or wear. A magnifying glass can be helpful.
- Clean out any lint, thread bits, or debris from around the hook and race area using a brush or compressed air.
- Apply a drop or two of sewing machine oil to the hook race and other designated oiling points around the shuttle assembly (refer to your machine's manual for specific oiling points).
- If the hook point is significantly damaged, the entire shuttle hook assembly may need to be replaced. This is a more involved repair and may require professional assistance to ensure correct timing.
Parts involved: Rotary hooks & bobbin cases →
4. Feeding Foot Bar and Feed Dog medium likelihood
How to tell
Uneven stitch length, fabric not feeding smoothly, fabric bunching, or visible wear on the teeth of the feed dog or the foot of the presser foot. The 'Singer #8675 Feeding Foot Bar' or 'Unbranded #8675 Feeding Foot Bar with Foot' may show signs of bending or excessive play.
Fix
- Inspect the teeth of the feed dog for wear, damage, or accumulation of lint and debris. Clean thoroughly with a stiff brush.
- Examine the presser foot for wear, especially on the underside where it contacts the fabric. Ensure it is flat and smooth.
- Check the 'Singer #8675 Feeding Foot Bar' or 'Unbranded #8675 Feeding Foot Bar with Foot' for any bending or excessive side-to-side play. If bent or worn, it will need replacement.
- To replace the feeding foot bar, loosen the retaining screws, remove the old bar, and install the new one, ensuring it moves freely and is properly aligned. (We stock 'Singer #8675 Feeding Foot Bar for SINGER 29K Industrial Patcher Sewing Machines' and 'Unbranded #8675 Feeding Foot Bar with Foot for Singer 29K Industrial Sewing Machine').
- Ensure the feed dog height is correctly adjusted according to your machine's manual.
We stock 'Singer #8675 Feeding Foot Bar for SINGER 29K Industrial Patcher Sewing Machines' and 'Unbranded #8675 Feeding Foot Bar with Foot for Singer 29K Industrial Sewing Machine' which are common wear items for the feed mechanism.
Parts involved: Presser feet & sewing parts → Shafts, bearings & bushings →
5. Screws and Fasteners low likelihood
How to tell
Loose components, rattling sounds, parts shifting out of alignment, or missing screws. Visually inspect for missing or stripped screws.
Fix
- Regularly check all accessible screws and fasteners for tightness. Gently tighten any that are loose, being careful not to overtighten.
- If a screw is missing or stripped, replace it immediately with the correct size and type. (We stock 'Singer 29K Sewing Machine #237F Replacement Screws (5 Pcs)').
- Pay particular attention to screws holding the needle clamp, presser foot, and throat plate, as these can affect stitch quality and machine function.
We stock 'Singer 29K Sewing Machine #237F Replacement Screws (5 Pcs)' which are essential for securing various components.
Parts involved: Screws, springs & small parts →
Maintenance schedule
| When | What to do | Why |
|---|---|---|
| Daily (or every 8 hours of operation) | Clean and Oil | Removes lint and debris from the hook area, feed dog, and tension discs, preventing buildup that can cause skipped stitches and thread breakage. Oiling reduces friction and wear on moving parts. |
| Weekly | Thorough Cleaning and Inspection | A deeper clean helps remove stubborn lint and inspect for early signs of wear on needles, presser feet, and thread guides. Check all accessible screws for tightness. |
| Monthly (or every 100-150 hours of operation) | Detailed Component Check | Inspect the shuttle hook for burrs, check the feeding foot bar for play, and examine drive belts (if applicable) for cracks or wear. This helps identify parts needing replacement before they cause major issues. |
| Annually (or every 500-1000 hours of operation) | Professional Servicing | A professional technician can perform a complete tear-down, clean internal components, check and adjust timing, replace worn bushings or bearings, and ensure the machine is operating at peak efficiency. |
Stop and call a technician if
- If you encounter persistent skipped stitches, thread breakage, or unusual noises after performing basic maintenance.
- If the machine's timing seems off or requires adjustment, as this is a complex procedure.
- If you suspect a major mechanical failure, such as a bent shaft or damaged gear, that is beyond your comfort level to repair.
- For annual professional servicing to ensure all components are in optimal condition and calibrated correctly.
Prevent it coming back
- Always use the correct needle type and size for your fabric and thread. A mismatched needle can cause damage to the machine and poor stitch quality.
- Use high-quality thread. Cheap or old thread can shed excessive lint, leading to buildup and tension issues.
- Avoid forcing thick materials through the machine. If the machine struggles, check for proper needle size, presser foot pressure, and feed dog settings.
- Never pull fabric forcefully while sewing. Allow the feed dog to do its job to prevent needle bending and timing issues.
- Keep your workspace clean to minimize dust and debris entering the machine.
Frequently asked questions
How often should I oil my Singer 29K?
For regular use, your Singer 29K should be oiled daily or every 8 hours of operation. Refer to your machine's manual for specific oiling points and recommended oil type.
What kind of oil should I use for my Singer 29K?
Always use high-quality, non-detergent sewing machine oil. Avoid using general-purpose oils like WD-40, as they can gum up the machine and cause damage.
Why is my Singer 29K skipping stitches after maintenance?
Skipped stitches after maintenance often indicate an issue with the needle (bent, dull, or incorrectly inserted), incorrect threading, or a burr on the shuttle hook. Double-check these components first.
Can I use compressed air to clean my Singer 29K?
Yes, compressed air can be effective for blowing out lint and dust from hard-to-reach areas. However, be cautious not to blow debris further into the machine's mechanisms. Always follow up with a brush for stubborn lint.
Did this guide fix your machine?
Rate it - it helps other operators find the right fix.
Not sure which part is failing?
Need the logo stitched too?
Get your logo digitized by the people who know this machine
Upload the artwork, see the stitch count and the exact price in 10 seconds, then order with a free sew-out preview. $1 per 1,000 stitches, $10 minimum, 24-hour delivery. Vector conversion from $12.
After the fix
Fixed it? Keep the rest of the shop moving.
OS 360 is the shop software from the team behind this parts store. Every job keeps its status, deadline and owner while a Singer head is down, restock alerts fire for needles, hooks and bobbins before you run dry, and quotes, invoices and payment live in one place.
- Jobs with status, deadline and owner - nothing slips during downtime
- Inventory with restock alerts, this store one click away
- Instant quotes, invoices and one place to collect payment