
Blog
Tajima STKN Series: Essential Maintenance Schedule & Wear Parts Guide

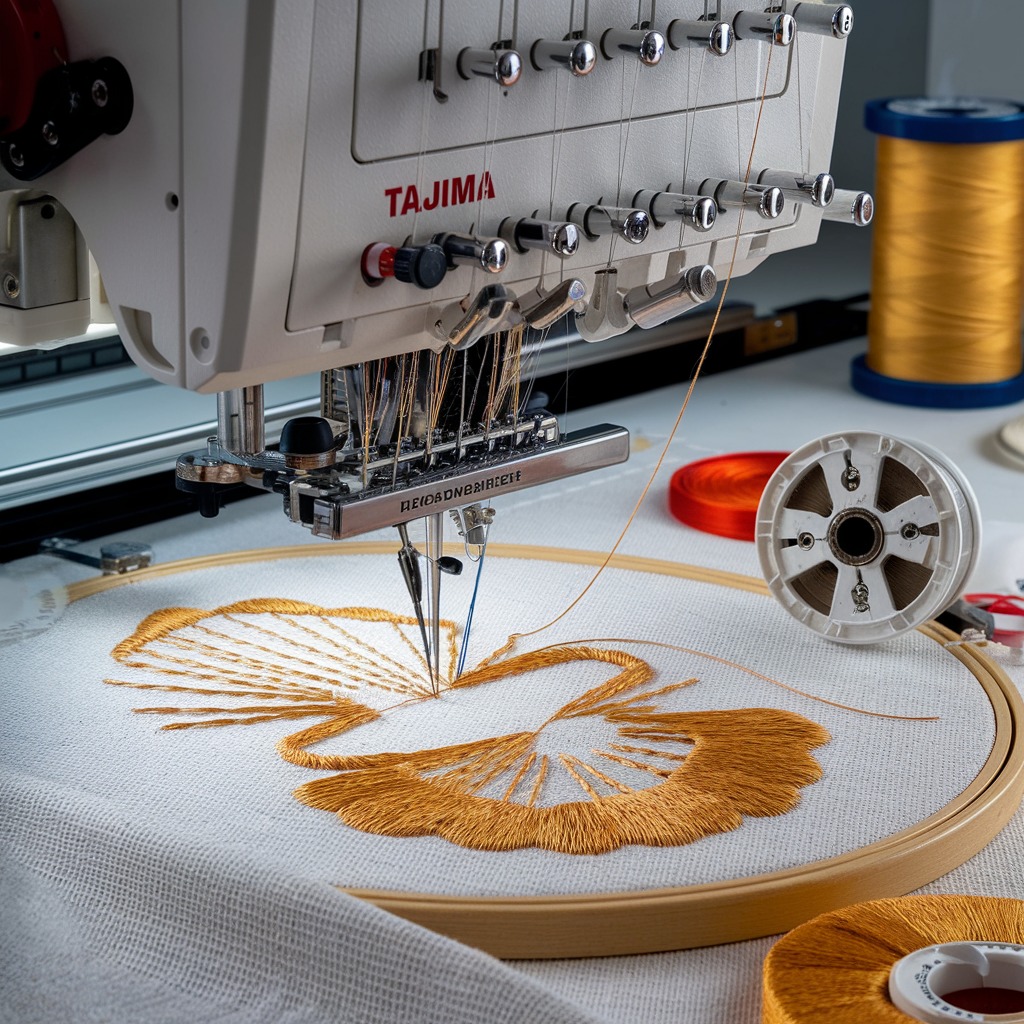
Quick answer: Regular maintenance, including daily cleaning, weekly lubrication, and periodic inspection/replacement of wear parts like needle bar guides, rotary hook components, and tension parts, is crucial for Tajima STKN machine longevity and optimal embroidery quality.
The Tajima STKN series embroidery machines are workhorses in the industry, known for their reliability and precision. To ensure your machine continues to produce high-quality embroidery and operates efficiently for years to come, a consistent and thorough maintenance routine is essential. This guide provides a practical maintenance schedule and identifies the most common wear parts, helping you keep your STKN machine in top condition and minimize downtime.
Two-minute checks before you open anything
- Check for any unusual noises or vibrations during operation.
- Inspect needles for dullness or bends; replace as needed.
- Ensure thread paths are clear and free of lint or tangles.
- Verify that the bobbin case is clean and the bobbin tension is correct.
- Confirm that the presser foot is moving freely and is at the correct height.
1. Needle Bar Guides high likelihood
How to tell
Excessive play or wobble in the needle bar, inconsistent needle depth, or unusual noise from the needle bar area. Worn guides can lead to needle breaks and poor stitch quality.
Fix
- With the machine off, gently try to wiggle each needle bar. There should be minimal side-to-side movement.
- Inspect the guide for visible wear, scoring, or cracks.
- If worn, remove the needle bar, then carefully remove the old guide.
- Install a new Tajima Needle Bar Guide (e.g., 090450036011, 090450049011, 09045005Y011) ensuring it fits snugly.
- Reinstall the needle bar and check for proper movement and alignment.
These guides wear out due to constant friction from needle bar movement. Keep them clean and lubricated as per schedule.
Parts involved: Needles & needle bars → Shafts, bearings & bushings →
2. Slit Rotary Disk high likelihood
How to tell
Frequent thread breaks, skipped stitches, poor loop formation, or unusual noise from the rotary hook area. Inspect the disk for nicks, burrs, or excessive wear on the edges.
Fix
- Power off the machine and remove the bobbin case.
- Carefully inspect the edge of the Tajima 0J4201400000 FG7210000000 Slit Rotary Disk ME20-100 for any damage or sharp edges.
- If damaged, remove the rotary hook assembly (refer to your machine's manual for specific steps).
- Replace the worn slit rotary disk with a new one.
- Reassemble the rotary hook and bobbin case, ensuring proper timing and clearance.
The slit rotary disk is critical for thread loop formation. Even minor damage can severely impact stitching.
Parts involved: Rotary hooks & bobbin cases →
Parts you may need for Tajima
In stock, tested before dispatch, Buyer Protection on every order. Part types for this problem: Rotary hooks & bobbin cases, Needles & needle bars, Thread path & tension, Presser feet & sewing parts.
 Hirose HSH-7.94ATR(MTQ) KHS12-RYP Rotary Hook for Tajima, Barudan, ...$ 18.09View part →
 Tajima EF0613220000 EF0613210000 090460040020 090460040031 Presser ...$ 18.09View part →
 Koban KHS12-RYP Rotary Hook with Trimmer for Tajima, Barudan, SWF, ...$ 37.29View part →
 Groz-Beckert DBXK5 FG/SUK Embroidery Needles (100 Pcs) for Tajima, ...$ 33.99View part →
 HAYA MGP BC-DBZ(1)-NBL KF220440 ME0503000NBL Bobbin Case (50 Pcs) f...$ 66.29View part →
 KHS12-RYP HSH-7.94ATR(MTQ) Rotary Hook for Tajima Embroidery Machines$ 15.99View part →
All Tajima parts → Rotary Hooks & Bobbin Cases → Needles & Needle Bars → Thread Path & Tension →
3. Thread Tension Stud Bolt medium likelihood
How to tell
Inconsistent thread tension, difficulty adjusting tension, or thread fraying/breaking at the tension assembly. The stud bolt can become grooved or bent over time.
Fix
- Examine the Tajima 0C0210010012 FN0903000000 Thread Tension Stud Bolt for any visible wear, grooves, or bends.
- Check if the tension discs are seating properly and moving freely on the stud.
- If worn, carefully remove the tension assembly.
- Replace the old stud bolt with a new Tajima 0C0210010012 FN0903000000 Thread Tension Stud Bolt.
- Reassemble the tension assembly and test tension adjustment.
A smooth stud bolt is essential for consistent thread tension. Keep it clean and free of lint buildup.
Parts involved: Thread path & tension → Screws, springs & small parts →
4. Thread Block medium likelihood
How to tell
Thread fraying, snagging, or breaking as it passes through the thread block. Visible grooves or sharp edges on the ceramic or plastic surfaces.
Fix
- Inspect the Tajima 050320350000 Thread Block for any nicks, burrs, or deep grooves where the thread passes.
- Run a piece of thread through the block to feel for any resistance or rough spots.
- If damaged, carefully remove the old thread block.
- Install a new Tajima 050320350000 Thread Block, ensuring it is correctly oriented and secured.
The thread block guides the thread smoothly. Any damage can cause significant thread issues.
Parts involved: Thread path & tension →
5. Synchronous Belts medium likelihood
How to tell
Skipped stitches, misaligned embroidery, unusual noises (squealing, grinding), or visible cracks, fraying, or missing teeth on the belt. Machine may fail to move or move erratically.
Fix
- Visually inspect all accessible synchronous belts (e.g., Tajima Synchronous Belt 623500270000, 623500360000, 623500400000, 623500430000, or Tajima W35-S5M Synchronous Belt) for wear, cracks, or damage.
- Check belt tension; it should be firm but not overly tight.
- If a belt is worn or damaged, power off the machine.
- Carefully remove the old belt, noting its path and tensioner settings.
- Install a new belt of the correct size and type, ensuring proper tension (refer to your manual for specific tensioning procedures).
- Test machine movement and embroidery after replacement.
Belts are crucial for synchronized movement. Replace them proactively if signs of wear appear to prevent more severe damage.
Parts involved: Belts, pulleys & gears →
6. Presser Foot Bushing Guide Collar low likelihood
How to tell
Excessive play or looseness in the presser foot, inconsistent presser foot height, or difficulty with presser foot movement. Can lead to poor fabric control.
Fix
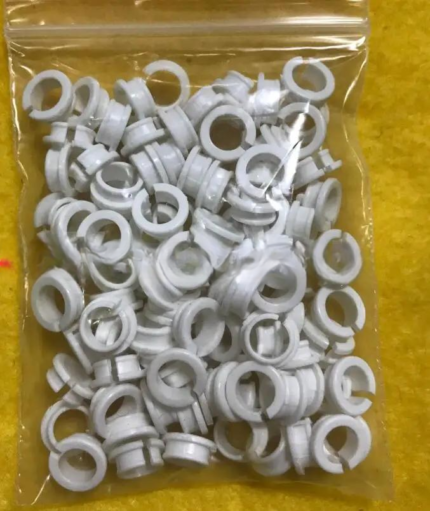
- Inspect the Tajima EF0613220000 EF0613210000 090460040020 090460040031 Presser Foot Bushing Guide Collar for wear or damage.
- Check for smooth movement of the presser foot shaft within the collar.
- If worn, carefully remove the presser foot assembly.
- Replace the worn bushing guide collar with a new one.
- Reassemble and ensure smooth, stable presser foot operation.
Ensures stable presser foot operation, which is vital for holding fabric correctly during embroidery.
Parts involved: Presser feet & sewing parts → Shafts, bearings & bushings →
7. TC Sensor Substrate (Thread Break Sensor) low likelihood
How to tell
False thread break errors, or failure to detect actual thread breaks. Machine stops unexpectedly or continues sewing with a broken thread.
Fix
- Clean the Onloyo 0J2602300A23 TC Sensor Substrate Thread Break Sensor with a soft brush or compressed air to remove lint and debris.
- Check wiring connections to the sensor for looseness or damage.
- If cleaning and connection checks don't resolve the issue, the sensor itself may be faulty.
- Power off the machine and carefully replace the sensor with a new Onloyo 0J2602300A23 TC Sensor Substrate.
A clean and functional thread break sensor is essential for efficient, error-free production.
Parts involved: Sensors & switches →
8. Electromagnetic Induction Substrate A (Magnetic Sensor A) low likelihood
How to tell
Incorrect needle position detection, machine stopping at wrong times, or errors related to head movement. Can cause misregistration or machine crashes.
Fix
- Inspect the Onloyo 0J4204400000 0J4200800012 Electromagnetic Induction Substrate A for physical damage or debris.
- Check its proximity to the corresponding metal target; it should be within the specified gap (refer to manual).
- Ensure all wiring connections are secure.
- If issues persist, replace the sensor with a new Onloyo 0J4204400000 0J4200800012 Electromagnetic Induction Substrate A.
These sensors are critical for precise machine timing and movement. Keep them clean and correctly positioned.
Parts involved: Sensors & switches →
Maintenance schedule
| When | What to do | Why |
|---|---|---|
| Daily (or every 8-10 operating hours) | Clean the rotary hook area, needle bars, and tension assemblies. Oil all specified lubrication points. | Removes lint and debris that can cause thread breaks and wear. Ensures smooth operation of moving parts. |
| Weekly (or every 40-50 operating hours) | Perform a more thorough cleaning of the entire machine, including under the needle plate and around the thread guides. Inspect thread path components for wear. | Prevents buildup in less accessible areas and allows for early detection of worn parts. |
| Monthly (or every 160-200 operating hours) | Inspect synchronous belts for wear, cracks, or proper tension. Check needle bar guides for excessive play. Examine the slit rotary disk for nicks. Clean and inspect sensors. | Identifies critical wear parts before they cause major issues, ensuring precise machine movement and timing. |
| Every 6 Months (or every 1000 operating hours) | Consider replacing high-wear items like needle bar guides and slit rotary disks proactively. Check all major bearings and shafts for play. Review electrical connections for security. | Proactive replacement of common wear parts extends machine life and prevents unexpected breakdowns. |
| Annually (or every 2000 operating hours) | Schedule a professional technician for a comprehensive inspection, lubrication, and calibration. This includes checking motor performance, timing, and tension settings. | Ensures optimal machine performance, identifies potential issues that may be missed during routine checks, and maintains factory specifications. |
Stop and call a technician if
- If you encounter persistent error codes that you cannot resolve with basic troubleshooting.
- For complex mechanical issues, such as severe timing problems or motor malfunctions.
- If you suspect an electrical problem or circuit board failure.
- For any repair that requires specialized tools or expertise beyond your comfort level.
- If you are unsure about a repair step and risk causing further damage to the machine.
Prevent it coming back
- Always use high-quality needles, threads, and bobbins to reduce stress on machine components.
- Maintain a clean working environment to prevent lint and dust buildup inside the machine.
- Do not force parts or make adjustments without understanding the proper procedure.
- Regularly check and tighten any loose screws or fasteners.
- Avoid overloading the machine or pushing it beyond its recommended operating parameters.
Frequently asked questions
How often should I oil my Tajima STKN machine?
You should oil your Tajima STKN machine daily or every 8-10 hours of operation, focusing on the needle bars, rotary hook, and other specified lubrication points. Always use high-quality machine oil recommended for embroidery machines. Refer to your machine's manual for exact lubrication points and frequency.
What causes frequent thread breaks on my STKN?
Frequent thread breaks can be caused by several factors, including worn needle bar guides, a damaged slit rotary disk, incorrect thread tension, burrs on thread path components (like the thread block or tension stud bolt), a bent or dull needle, or poor quality thread. Regular inspection and replacement of wear parts are key.
Can I perform all maintenance myself?
Many routine maintenance tasks like cleaning, oiling, and replacing common wear parts can be performed by an operator. However, complex repairs, electrical issues, or timing adjustments often require a certified technician. Always refer to your machine's manual and know your limits.
How do I know if a synchronous belt needs replacing?
Look for visible signs of wear such as cracks, fraying, missing teeth, or excessive stretching. You might also notice unusual noises, skipped stitches, or misaligned embroidery. If any of these symptoms appear, inspect the belts and replace them if necessary.
Did this guide fix your machine?
Rate it - it helps other operators find the right fix.
Not sure which part is failing?
Need the logo stitched too?
Get your logo digitized by the people who know this machine
Upload the artwork, see the stitch count and the exact price in 10 seconds, then order with a free sew-out preview. $1 per 1,000 stitches, $10 minimum, 24-hour delivery. Vector conversion from $12.
After the fix
Fixed it? Keep the rest of the shop moving.
OS 360 is the shop software from the team behind this parts store. Every job keeps its status, deadline and owner while a Tajima head is down, restock alerts fire for needles, hooks and bobbins before you run dry, and quotes, invoices and payment live in one place.
- Jobs with status, deadline and owner - nothing slips during downtime
- Inventory with restock alerts, this store one click away
- Instant quotes, invoices and one place to collect payment





