
Blog
Tajima TCMX Series: Essential Maintenance Schedule & Wear Parts Guide


Quick answer: Regular maintenance for your Tajima TCMX series machine involves daily cleaning and lubrication, weekly checks of thread path components, monthly inspections of rotary hooks and needle bars, and periodic replacement of wear parts like needles, rotary hooks, and needle bar guides to ensure optimal performance and prevent costly downtime.
Maintaining your Tajima TCMX series embroidery machine is crucial for consistent stitch quality, extended machine lifespan, and minimizing downtime. This guide provides a comprehensive maintenance schedule and identifies common wear parts, helping you keep your machine in top working condition. Regular care prevents small issues from becoming major problems.
Two-minute checks before you open anything
- Check for any unusual noises or vibrations during operation.
- Verify that all thread paths are clear and free of lint.
- Inspect needles for bends, burrs, or damage.
- Ensure bobbin cases are clean and bobbins are wound correctly.
- Check that the work area is clear and hoops are securely mounted.
1. Needles high likelihood
How to tell
Frequent thread breaks, skipped stitches, poor stitch quality, or visible bending/burrs on the needle point. Needles are consumable and wear out with use.
Fix
- Inspect the needle point and shaft for any damage, burrs, or bends.
- Ensure the needle is inserted correctly and fully seated with the scarf facing the hook.
- Replace the needle with a new, appropriate size and type (e.g., Organ PH-C120 Crocheted Towel Embroidery Needle for Tajima TMCE TCMX Machines) if any damage is found or after a set number of production hours (refer to your manual).
Parts involved: Needles & needle bars →
2. Rotary Hook high likelihood
How to tell
Excessive noise from the hook area, frequent thread breaks, loose loops on the underside of the embroidery, or visible nicks/grooves on the hook point or race. The hook can become worn or damaged by needle strikes.
Fix
- Remove the bobbin case and inspect the rotary hook for any burrs, nicks, or rough spots, especially on the hook point and the bobbin case race.
- Gently polish minor burrs with very fine emery cloth, but replace the hook if damage is significant.
- Ensure the hook timing is correct after any significant intervention (refer to your machine manual).
- Replace with a new Onloyo 050260010020 Rotary Hook Bobbin:Regular for Tajima TMLH TLMX TMCE TCMX Embroidery Machines if worn or damaged.
Parts involved: Rotary hooks & bobbin cases →
Parts you may need for Tajima TCMX
In stock, tested before dispatch, Buyer Protection on every order. Part types for this problem: Rotary hooks & bobbin cases, Needles & needle bars, Thread path & tension, Belts, pulleys & gears.
 Tajima 080210360A79 UN25009400GN Needle Bar Reciprocator Set for KN...$ 23.99View part →
 Tajima 0C0220080000 EF0910000000 Spring Hook for TMEG TMFD STNE TFK...$ 5.49View part →
 Onloyo 050260010020 Rotary Hook Bobbin:Regular for Tajima TMLH TLMX...$ 9.49View part →
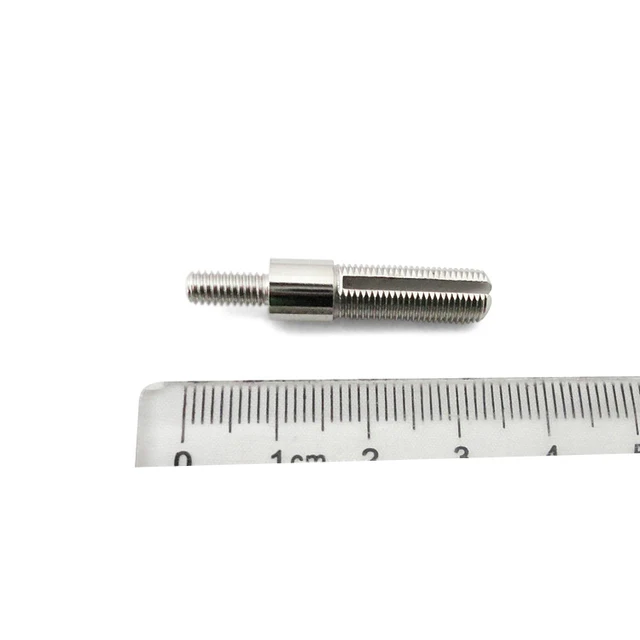 Tajima 0C0210010012 FN0903000000 Thread Tension Stud Bolt for STNE,...$ 11.29View part →
 Onloyo 507605030044 EF0618030000 Needle Retention Compression Sprin...$ 4.49View part →
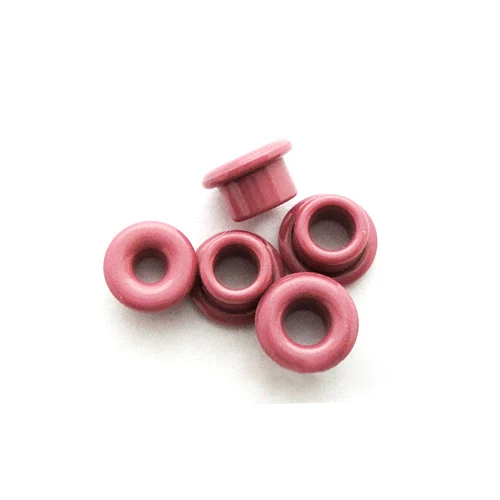 Tajima 516503010011 MX0521010000 Thread Guide Collar Ceramic Coil 1...$ 5.09View part →
All Tajima TCMX parts → Rotary Hooks & Bobbin Cases → Needles & Needle Bars → Thread Path & Tension →
3. Needle Bar Guides medium likelihood
How to tell
Excessive play or wobble in the needle bar, needle deflection, increased needle breaks, or unusual noise from the needle bar area. Guides can wear down over time due to constant friction.
Fix
- With the machine off, gently try to wiggle each needle bar side-to-side and front-to-back. There should be minimal play.
- Visually inspect the guides for wear, scoring, or cracks.
- If excessive play is detected or guides are visibly worn, replace them. This often requires removing the needle bar and associated components.
- Use appropriate Tajima Needle Bar Guide (e.g., 090450036011, 090450049011, 09045005Y011) for your specific needle bar position.
Parts involved: Needles & needle bars →
4. Thread Path Components (Spring Hook, Tension Stud, Ceramic Coil, Thread Block) medium likelihood
How to tell
Inconsistent thread tension, frequent thread breaks, shredding thread, or visible grooves/nicks on any part the thread passes through. These parts experience constant friction from the thread.
Fix
- Carefully inspect each component in the thread path from the thread cone to the needle eye.
- Look for any sharp edges, burrs, or deep grooves on the Tajima 0C0220080000 EF0910000000 Spring Hook, Tajima 0C0210010012 FN0903000000 Thread Tension Stud Bolt, Tajima 516503010011 MX0521010000 Thread Guide Collar Ceramic Coil, and Tajima 050320350000 Thread Block.
- Smooth minor imperfections with very fine abrasive paper or replace the component if damage is significant.
- Ensure all components are clean and free of lint and debris.
Parts involved: Thread path & tension →
5. Needle Bar Reciprocator Set medium likelihood
How to tell
Irregular needle bar movement, excessive vibration, unusual knocking sounds from the head, or difficulty in smooth needle bar reciprocation. Components can wear due to constant high-speed motion.
Fix
- Observe the needle bar movement during operation. It should be smooth and consistent.
- With the machine off, manually rotate the main shaft to cycle the needle bars and feel for any binding or excessive play in the reciprocator mechanism.
- Inspect the Tajima 080210360A79 UN25009400GN Needle Bar Reciprocator Set or Tajima 080210360A22 UN25009400GN Needle Bar Reciprocator GN[A] for visible wear, cracks, or looseness.
- Replacement involves careful disassembly and reassembly, often requiring timing adjustments. Consult your service manual or a qualified technician.
Ensure you select the correct reciprocator set for your specific machine model and needle bar type.
Parts involved: Needles & needle bars →
6. Synchronous Belts low likelihood
How to tell
Skipped stitches, misaligned designs, unusual squealing or flapping noises, or visible cracks, fraying, or missing teeth on the belt. Belts can stretch or degrade over time.
Fix
- Visually inspect all accessible synchronous belts for signs of wear, cracking, fraying, or missing teeth.
- Check belt tension; it should be firm but not overly tight (refer to your manual for specific tensioning procedures).
- If a belt is damaged or excessively stretched, replace it with the correct Tajima Synchronous Belt (e.g., 623500270000, 623500360000, 623500400000, 623500430000).
- Ensure proper alignment of pulleys during replacement.
Parts involved: Belts, pulleys & gears →
7. Oil-Bushing Bobbin Shaft Sleeve low likelihood
How to tell
Increased noise from the bobbin winding area, excessive vibration, or the bobbin winder not functioning smoothly. Bushings wear over time, leading to increased friction and play.
Fix
- Listen for unusual noises or feel for excessive vibration around the bobbin winder shaft.
- With the machine off, check for play in the bobbin winder shaft.
- If wear is suspected, the Onloyo 509179010000 EF0206000001 Oil-Bushing Bobbin Shaft Sleeve may need replacement. This typically involves disassembling the bobbin winder assembly.
Parts involved: Shafts, bearings & bushings →
8. TC Sensor Substrate Thread Break Sensor low likelihood
How to tell
False thread break errors, or the machine failing to detect actual thread breaks. Sensors can become dirty or fail electronically.
Fix
- Clean the sensor area thoroughly with compressed air and a soft brush to remove lint and debris.
- Check wiring connections to the Onloyo 0J2602300A23 TC Sensor Substrate Thread Break Sensor for looseness or damage.
- If cleaning and connection checks don't resolve the issue, the sensor itself may be faulty and require replacement.
Parts involved: Sensors & switches →
Maintenance schedule
| When | What to do | Why |
|---|---|---|
| Daily (or every 8-10 hours of operation) | Clean the rotary hook area and oil the hook race. | Removes lint and debris, reduces friction, and prevents premature wear of the hook. |
| Daily (or every 8-10 hours of operation) | Clean and oil needle bars. | Ensures smooth needle bar movement and reduces friction on needle bar guides. |
| Daily (or every 8-10 hours of operation) | Clean thread path components (tension discs, thread guides, take-up levers). | Removes lint and wax buildup, preventing thread breaks and tension issues. |
| Weekly (or every 40-50 hours of operation) | Clean under the needle plate and around the feed dog area. | Removes fabric dust and lint that can interfere with fabric movement and stitch formation. |
| Weekly (or every 40-50 hours of operation) | Inspect and clean thread tension assemblies. | Ensures consistent thread tension and prevents thread shredding. |
| Weekly (or every 40-50 hours of operation) | Check and clean thread break sensors. | Ensures accurate thread break detection and prevents false alarms. |
| Monthly (or every 200 hours of operation) | Inspect needle bar guides for wear and excessive play. | Prevents needle deflection, needle breaks, and poor stitch quality. |
| Monthly (or every 200 hours of operation) | Inspect rotary hooks for nicks, burrs, or excessive wear. | Prevents thread breaks, looping, and ensures proper stitch formation. |
| Monthly (or every 200 hours of operation) | Check all accessible belts for tension and wear (cracks, fraying). | Ensures proper machine timing and prevents skipped stitches or misaligned designs. |
| Every 500-1000 hours (or annually, depending on usage) | Lubricate all specified grease points (refer to your machine manual). | Reduces friction and wear in critical moving parts, extending machine life. |
| Every 500-1000 hours (or annually, depending on usage) | Inspect and clean main motor and head motors (if accessible). | Removes dust buildup that can cause overheating and reduce motor lifespan. |
| Every 500-1000 hours (or annually, depending on usage) | Check and tighten all accessible screws and fasteners. | Prevents parts from loosening due to vibration, which can lead to misalignment or damage. |
Stop and call a technician if
- If you encounter persistent error codes that you cannot resolve with basic troubleshooting.
- For complex mechanical issues requiring specialized tools or extensive disassembly.
- If you suspect major electronic component failure (e.g., main board, motor driver).
- For precise timing adjustments (e.g., hook timing, needle bar timing) if you are not experienced.
- If you are uncomfortable performing a repair or lack the necessary expertise.
Prevent it coming back
- Always use high-quality needles and threads appropriate for your fabric and design.
- Ensure proper machine grounding to prevent electrical issues.
- Avoid running the machine at excessively high speeds for extended periods, especially with dense designs.
- Keep your embroidery area clean and free of dust and debris.
- Train all operators on proper machine usage and basic daily maintenance procedures.
Frequently asked questions
How often should I lubricate my Tajima TCMX machine?
Lubrication frequency depends on usage. Generally, daily oiling of the rotary hook and needle bars is recommended. Other points may require weekly or monthly lubrication. Always refer to your machine's operation manual for specific lubrication points and intervals.
What kind of oil should I use for my Tajima TCMX?
Always use high-quality, clear, non-staining sewing machine oil specifically designed for industrial embroidery machines. Avoid multi-purpose oils or oils not intended for sewing machinery, as they can gum up mechanisms or stain fabric. Check your machine manual for any specific oil recommendations.
Why am I getting frequent thread breaks on my TCMX?
Frequent thread breaks can be caused by many factors, including worn needles, incorrect needle size, improper threading, incorrect tension, burrs in the thread path (tension discs, thread guides, rotary hook), poor quality thread, or incorrect machine timing. Systematically check each of these areas.
How do I know when to replace my rotary hook?
You should consider replacing your rotary hook if you notice consistent thread breaks, poor stitch quality (especially on the bobbin side), excessive noise from the hook area, or if visual inspection reveals nicks, burrs, or deep grooves on the hook point or race that cannot be polished out.
Can I use a USB floppy emulator on my Tajima TCMX?
Yes, many Tajima TCMX machines can be upgraded with a USB floppy emulator like the Gotek SFRM72-FU USB Floppy Emulator. This allows you to use a USB flash drive instead of floppy disks for design transfer, offering greater convenience and reliability. Installation typically involves replacing the existing floppy drive.
Did this guide fix your machine?
Rate it - it helps other operators find the right fix.
Not sure which part is failing?
Need the logo stitched too?
Get your logo digitized by the people who know this machine
Upload the artwork, see the stitch count and the exact price in 10 seconds, then order with a free sew-out preview. $1 per 1,000 stitches, $10 minimum, 24-hour delivery. Vector conversion from $12.
After the fix
Fixed it? Keep the rest of the shop moving.
OS 360 is the shop software from the team behind this parts store. Every job keeps its status, deadline and owner while a TCMX head is down, restock alerts fire for needles, hooks and bobbins before you run dry, and quotes, invoices and payment live in one place.
- Jobs with status, deadline and owner - nothing slips during downtime
- Inventory with restock alerts, this store one click away
- Instant quotes, invoices and one place to collect payment





