
Blog
Ricoma CHT Series: Essential Maintenance Guide

Quick answer: Regular maintenance, including cleaning, lubrication, and timely replacement of wear parts like needles, trimmer blades, and rotary hooks, is crucial for the optimal performance and longevity of your Ricoma CHT series embroidery machine.
The Ricoma CHT series embroidery machines are robust workhorses, but like any precision equipment, they require consistent and proper maintenance to ensure optimal performance, extend their lifespan, and prevent costly downtime. This guide provides essential maintenance steps, identifies common wear parts, and offers a realistic schedule to keep your CHT machine running smoothly. Regular cleaning, lubrication, and timely replacement of worn components are key to producing high-quality embroidery and avoiding unexpected breakdowns.
Two-minute checks before you open anything
- Check needles for dullness or bends.
- Inspect the rotary hook area for lint buildup.
- Verify thread paths are clear and tension discs are free of debris.
- Listen for any unusual noises during operation.
- Check for any loose screws or components.
1. Needles high likelihood
How to tell
Frequent thread breaks, skipped stitches, frayed thread, dull or bent needle points, or visible burrs on the needle.
Fix
- Inspect the needle point for burrs, bends, or dullness. A magnifying glass can be helpful.
- Replace the needle with a new, correct type and size for your fabric and thread. Ensure it's inserted correctly and fully seated.
- Confirm the needle scarf is facing the correct direction (usually towards the back).
Parts involved: Needles & needle bars →
2. Trimmer Blades (Moving and Fixed) high likelihood
How to tell
Incomplete thread trims, long thread tails after trimming, machine stopping with 'trim error' messages, or audible grinding during trimming.
Fix
- Carefully inspect both the moving and fixed trimmer blades for nicks, dullness, or excessive lint buildup.
- Clean away any lint, thread, or debris from around the trimmer mechanism.
- If blades are dull or nicked, replace both the moving and fixed trimmer blades as a set for optimal performance.
- Refer to your machine's manual for specific blade replacement instructions and alignment.
Parts involved: Cutters & trimmers →
Parts you may need for Ricoma
In stock, tested before dispatch, Buyer Protection on every order. Part types for this problem: Needles & needle bars, Cutters & trimmers, Rotary hooks & bobbin cases, Thread path & tension.
 20HS24 NEMA 8 Stepper Motor for Tajima, Barudan, Brother, Happy, Ri...$ 55.29View part →
 Groz-Beckert DBxK5 RG Embroidery Needles (500 Pcs) for Tajima Barud...$ 85.99View part →
 42HS60 Nema 17 Stepper Motor for CNC 3018 3040 6040, 3D Printers, L...$ 33.49View part →
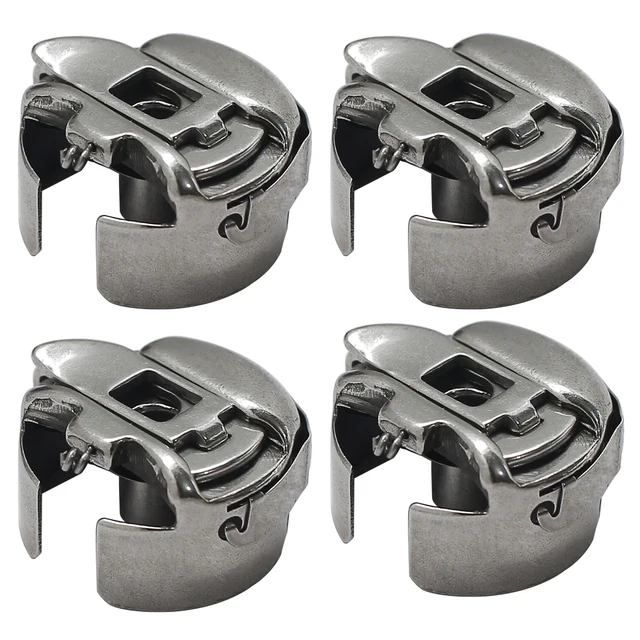 BC-DBZ(3)-NBL Small L Pigtail Embroidery Bobbin Case for Barudan, M...$ 16.09View part →
 Nema 23 Stepper Motor 57HS5628 23HS5628 2.8A 126N.cm 4-Lead for Taj...$ 53.49View part →
 GATYZTORY 60x75cm Colorful Cat Paint by Numbers Kit with Frame for ...$ 15.99View part →
All Ricoma parts → Needles & Needle Bars → Cutters & Trimmers → Rotary Hooks & Bobbin Cases →
3. Rotary Hook medium likelihood
How to tell
Skipped stitches, poor bottom tension, thread shredding, unusual noise from the hook area, or visible burrs/nicks on the hook point.
Fix
- Remove the bobbin case and thoroughly clean the hook area, removing all lint and thread fragments.
- Inspect the hook point and race for any damage, burrs, or rough spots. Use a magnifying glass if needed.
- If damaged, replace the rotary hook. Ensure proper installation and timing if required (consult your manual).
- Apply a drop of high-quality sewing machine oil to the hook race as per your machine's lubrication schedule.
Parts involved: Rotary hooks & bobbin cases →
4. Bobbin Case medium likelihood
How to tell
Inconsistent bobbin tension, thread breaks, loops on the underside of embroidery, or visible burrs/nicks inside the case or on the tension spring.
Fix
- Remove the bobbin case and inspect it for any burrs, nicks, or damage, especially around the thread path and tension spring.
- Clean out any lint or debris from inside the bobbin case and under the tension spring.
- Test the bobbin tension using the 'drop test' method. Adjust if necessary.
- If damaged or unable to hold consistent tension, replace the bobbin case.
Parts involved: Rotary hooks & bobbin cases →
5. Thread Tension Discs and Springs medium likelihood
How to tell
Inconsistent top thread tension, thread shredding, loops on top or bottom of embroidery, or visible lint buildup between tension discs.
Fix
- With the presser foot raised, floss a piece of sturdy thread or dental floss between each set of tension discs to remove lint and debris.
- Inspect tension springs for damage or weakness. Ensure they provide consistent pressure.
- Check that all tension discs are clean and move freely when the tension knob is adjusted.
- If tension issues persist after cleaning and adjustment, individual tension components may need replacement.
Parts involved: Thread path & tension →
6. Wiper Blade low likelihood
How to tell
Thread tails left on the needle after trimming, thread wrapping around the needle bar, or the wiper not effectively clearing the thread.
Fix
- Inspect the rubber or felt wiper blade for wear, tears, or hardening.
- Clean any lint or debris from the wiper and its mechanism.
- If the wiper is worn or damaged, replace it to ensure proper thread management during trims.
Parts involved: Presser feet & sewing parts →
7. Belts (X, Y, and Head Drive) low likelihood
How to tell
Skipped stitches, misaligned embroidery, unusual noises (squealing, grinding), or visible cracking/fraying on the belts.
Fix
- Visually inspect all visible belts (X-axis, Y-axis, and main head drive belt) for signs of wear, cracking, fraying, or looseness.
- Gently press on the belts to check for proper tension. They should be taut but not overly tight.
- If a belt is worn, damaged, or excessively loose, it should be replaced. Consult your manual for specific belt types and replacement procedures.
- Ensure pulleys are clean and free of debris.
Parts involved: Belts, pulleys & gears →
8. Color Change Stepping Motor low likelihood
How to tell
Machine failing to change colors, skipping colors, grinding noises during color change, or 'color change error' messages.
Fix
- Check for any obstructions in the color change mechanism that might be preventing smooth movement.
- Ensure all cables connected to the motor are secure and undamaged.
- If the motor is consistently failing or making unusual noises, it may need to be replaced. This is a more advanced repair, often requiring a technician.
- Consider replacing with a Ricoma 17H2059-12-6B Color Change Stepping Motor for EM, MT, TC, SWD, CHT Series if diagnosis confirms motor failure.
This part is specific to the color change mechanism and is a common replacement item for this series.
Parts involved: Motors & drivers →
Maintenance schedule
| When | What to do | Why |
|---|---|---|
| Daily (or every 8-10 operating hours) | Clean the rotary hook area and bobbin case. | Prevents lint and thread fragments from causing skipped stitches, thread breaks, and hook damage. |
| Daily (or every 8-10 operating hours) | Lubricate the rotary hook race. | Reduces friction and wear, ensuring smooth operation and preventing overheating of the hook. |
| Daily (or every 8-10 operating hours) | Clean under the needle plate and around the trimmer blades. | Removes lint and small thread pieces that can interfere with trimming and needle movement. |
| Daily (or every 8-10 operating hours) | Wipe down the machine exterior and monitor for loose components. | Keeps the machine clean and allows for early detection of potential issues. |
| Weekly (or every 40-50 operating hours) | Clean all thread tension discs and thread guides. | Ensures consistent thread tension and prevents thread shredding caused by lint buildup. |
| Weekly (or every 40-50 operating hours) | Inspect and clean the trimmer mechanism. | Ensures clean cuts and prevents 'trim error' messages. Check blades for wear. |
| Weekly (or every 40-50 operating hours) | Check and lubricate needle bars (if applicable, consult manual). | Ensures smooth up-and-down movement of needle bars. |
| Monthly (or every 160-200 operating hours) | Inspect all belts (X, Y, and head drive) for wear and tension. | Prevents misaligned embroidery and ensures smooth movement of the pantograph and head. |
| Monthly (or every 160-200 operating hours) | Clean and inspect the presser foot and needle bar area. | Removes hidden lint and ensures proper function of these critical components. |
| Monthly (or every 160-200 operating hours) | Check for loose screws on the machine head, pantograph, and frame arms. | Prevents vibration-induced issues and maintains machine stability. |
| Every 3-6 Months (or every 500-1000 operating hours) | Thoroughly clean the entire machine, including hard-to-reach areas. | Removes accumulated lint and debris that can affect performance and longevity. |
| Every 3-6 Months (or every 500-1000 operating hours) | Inspect and lubricate all major moving parts as specified in your manual. | Ensures all components move freely and reduces wear on critical parts. |
| As Needed | Replace worn needles, trimmer blades, rotary hooks, or bobbin cases. | Prevents embroidery quality issues and machine damage from worn components. |
Stop and call a technician if
- If you encounter persistent error codes that you cannot resolve with basic troubleshooting.
- If you notice unusual grinding or knocking noises that don't go away after cleaning and lubrication.
- If the machine's timing seems off (e.g., needle hitting the hook) and you are not experienced with timing adjustments.
- For electrical issues or circuit board malfunctions.
- If you are uncomfortable performing a specific repair or replacement, especially for internal components like motors or sensors.
Prevent it coming back
- Always use high-quality needles appropriate for your fabric and thread type, and replace them regularly.
- Use good quality embroidery thread that is free of slubs and inconsistencies.
- Ensure proper tension settings for both top and bobbin threads to prevent undue stress on machine parts.
- Keep your work area clean and free of dust and lint, which can easily infiltrate machine mechanisms.
- Avoid forcing the machine or running it at excessively high speeds for extended periods, especially with challenging materials.
- Perform daily quick checks and cleaning to catch minor issues before they become major problems.
Frequently asked questions
How often should I oil my Ricoma CHT machine?
The frequency of oiling depends on usage. Generally, apply a drop of oil to the rotary hook race daily or every 8-10 hours of operation. Other lubrication points may require weekly or monthly attention. Always refer to your Ricoma CHT series user manual for the exact lubrication schedule and recommended oil types.
What kind of oil should I use for my embroidery machine?
Always use high-quality, clear, non-staining sewing machine oil (often referred to as 'white oil' or 'spindle oil'). Avoid using general-purpose oils like WD-40 or motor oil, as these can gum up mechanisms and stain your embroidery.
Why is my machine skipping stitches?
Skipped stitches can be caused by several factors, including a dull or bent needle, incorrect needle size or type for the fabric, improper threading, incorrect tension, a damaged rotary hook, or lint buildup in the hook area. Start by replacing the needle and rethreading the machine, then check the hook and tension.
How do I know when to replace my trimmer blades?
You should replace your trimmer blades when you notice incomplete thread trims, long thread tails after a trim, or if the machine frequently stops with 'trim error' messages. Visually inspect the blades for nicks or dullness. It's often best to replace both the moving and fixed blades together.
Can I use any brand of hoops with my Ricoma CHT machine?
While some universal hoops may fit, it's generally recommended to use hoops specifically designed for Ricoma machines to ensure proper fit, tension, and compatibility with the machine's hooping system. For example, the Ricoma Cap Frame for EM-1010, TC, MT, SWD, CHT2, CHT3 Series Embroidery Machines is designed for optimal performance.
From the Ricoma MT-1501 parts book
The assemblies involved in this problem, as the manufacturer lists them. Open a section to see every part number, which ones we stock, and get a price on the rest.
- 04.needle Bar Case29 parts · 0 in stock
- 02.rotary Hook Base18 parts · 0 in stock
- 12.cap Frame12 parts · 0 in stock
- 09.thread Tension Base12 parts · 0 in stock
- 08.thread Stand12 parts · 0 in stock
- 06.y-axis Drive System11 parts · 0 in stock
Reference book: Ricoma MT-1501. Part numbers differ by model - search yours below and we will confirm fit.
Did this guide fix your machine?
Rate it - it helps other operators find the right fix.
Not sure which part is failing?
Need the logo stitched too?
Get your logo digitized by the people who know this machine
Upload the artwork, see the stitch count and the exact price in 10 seconds, then order with a free sew-out preview. $1 per 1,000 stitches, $10 minimum, 24-hour delivery. Vector conversion from $12.
After the fix
Fixed it? Keep the rest of the shop moving.
OS 360 is the shop software from the team behind this parts store. Every job keeps its status, deadline and owner while a Ricoma head is down, restock alerts fire for needles, hooks and bobbins before you run dry, and quotes, invoices and payment live in one place.
- Jobs with status, deadline and owner - nothing slips during downtime
- Inventory with restock alerts, this store one click away
- Instant quotes, invoices and one place to collect payment