
Blog
Ricoma EM-1010 Series Embroidery Machine Maintenance Guide

Quick answer: Regular maintenance for your Ricoma EM-1010 involves daily cleaning, weekly lubrication, and periodic inspection and replacement of wear parts like needles, trimmer blades, and rotary hooks to ensure optimal performance and extend machine life.
Regular maintenance is crucial for the longevity and optimal performance of your Ricoma EM-1010 series embroidery machine. This guide provides a comprehensive schedule and highlights common wear parts, helping you keep your machine running smoothly and minimize downtime. Following these steps will ensure consistent stitch quality and extend the life of your investment.
Two-minute checks before you open anything
- Check for any loose threads or lint around the needle area and rotary hook.
- Ensure the bobbin is wound correctly and inserted properly.
- Verify the needle is straight, sharp, and correctly inserted.
- Check that all thread paths are clear and free of tangles.
- Confirm hoops are securely attached and fabric is taut.
1. Needles high likelihood
How to tell
Skipped stitches, frequent thread breaks, damaged fabric, dull or bent needle point, or a clicking sound as the needle penetrates the fabric.
Fix
- Visually inspect the needle point for any burrs, bends, or dullness.
- Ensure the needle is the correct type and size for your fabric and thread.
- Loosen the needle clamp screw, remove the old needle, and insert a new needle with the scarf facing the hook, pushing it up as far as it will go.
- Tighten the needle clamp screw securely.
Parts involved: Needles & needle bars →
2. Thread Trimmer Blades high likelihood
How to tell
Long thread tails after trimming, frayed thread ends, machine stopping with a 'trim error' message, or threads not being cut cleanly.
Fix
- Power off the machine and carefully access the trimmer mechanism (often under the needle plate).
- Inspect both the moving and fixed blades for nicks, burrs, or excessive lint buildup.
- Clean any lint or debris from around the blades.
- If blades appear dull or damaged, replace both the moving and fixed blades as a set. Refer to your machine's manual for specific replacement steps, as this can vary.
Parts involved: Cutters & trimmers →
Parts you may need for Ricoma EM-1010
In stock, tested before dispatch, Buyer Protection on every order. Part types for this problem: Needles & needle bars, Cutters & trimmers, Rotary hooks & bobbin cases, Thread path & tension.
 Ricoma Magnetic Mighty Hoops for MT-1501, TC-1501, EM-1010 Embroide...$ 76.29View part →
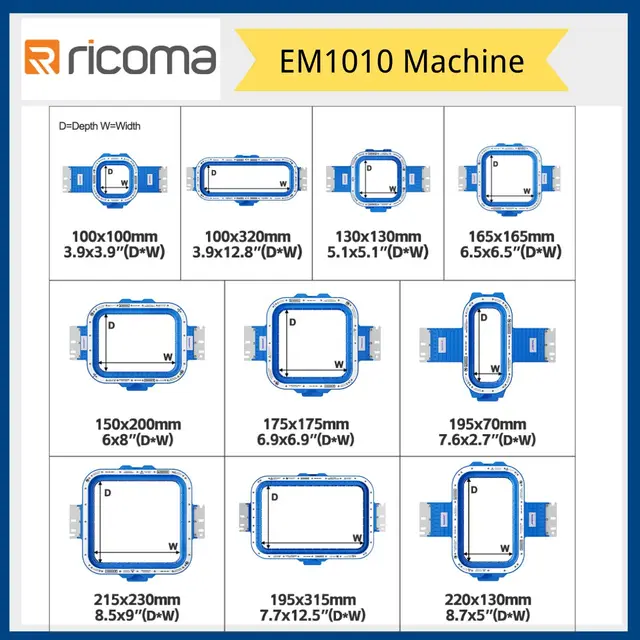 Magnetic Mighty Hoops for Ricoma EM1010 Multi-Brand Embroidery Mach...$ 68.29View part →
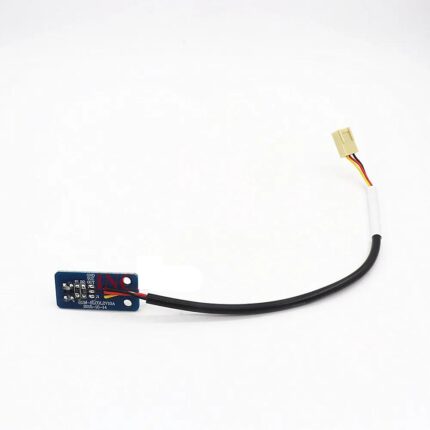 Ricoma EM1010 Half Rotation Color Change Sensor for Ricoma EM1010 &...$ 26.09View part →
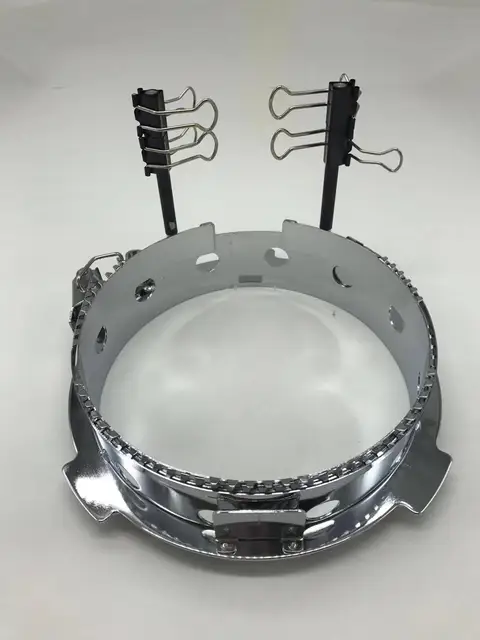 Ricoma Cap Frame for EM-1010, TC, MT, SWD, CHT2, CHT3 Series Embroi...$ 123.29View part →
 Groz-Beckert DBxK5 RG Embroidery Needles (500 Pcs) for Tajima Barud...$ 85.99View part →
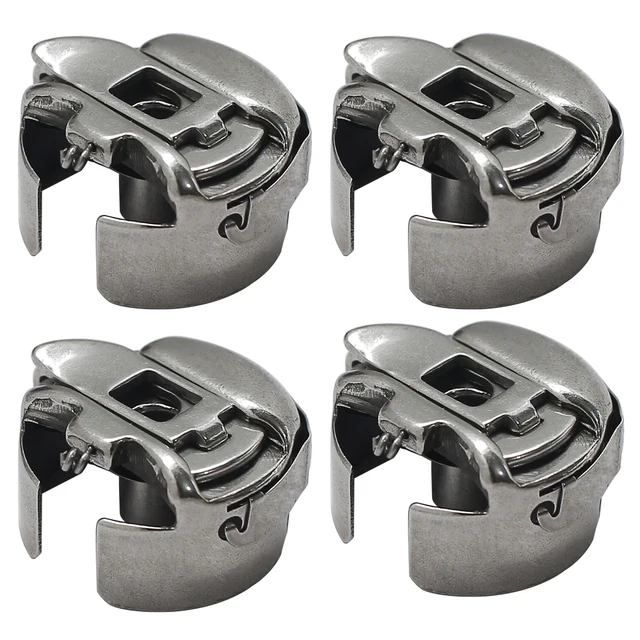 BC-DBZ(3)-NBL Small L Pigtail Embroidery Bobbin Case for Barudan, M...$ 16.09View part →
All Ricoma EM-1010 parts → Needles & Needle Bars → Cutters & Trimmers → Rotary Hooks & Bobbin Cases →
3. Rotary Hook high likelihood
How to tell
Shredded bobbin thread, poor stitch quality (especially on the underside), knocking sounds from the hook area, frequent bobbin thread breaks, or burrs visible on the hook point.
Fix
- Remove the needle plate and bobbin case.
- Carefully inspect the hook point for any nicks, burrs, or damage. Run a fingernail gently along the hook point; it should feel smooth.
- Clean the hook area thoroughly with a brush and compressed air, removing all lint and thread bits.
- If damage is present, the rotary hook assembly may need to be replaced. This is a precise operation; consult your machine manual or a technician for detailed replacement and timing instructions.
Parts involved: Rotary hooks & bobbin cases →
4. Bobbin Cases medium likelihood
How to tell
Inconsistent bobbin tension, frequent bobbin thread breaks, loops on the top side of the embroidery, or visible wear/grooves on the bobbin case tension spring or inside the case.
Fix
- Remove the bobbin case from the machine.
- Inspect the tension spring for any damage, bending, or lint accumulation underneath it.
- Check the entire bobbin case for burrs or nicks, especially where the thread exits.
- Clean the bobbin case thoroughly. If tension cannot be adjusted or if visible damage is present, replace the bobbin case.
Parts involved: Rotary hooks & bobbin cases →
5. Thread Tension Discs and Springs medium likelihood
How to tell
Inconsistent top thread tension, loops on the underside of the embroidery, frequent top thread breaks, or visible grooves worn into the tension discs.
Fix
- Remove the thread from the tension assembly.
- Inspect the tension discs for any grooves, nicks, or debris lodged between them.
- Check the tension spring for proper function and any signs of fatigue or damage.
- Clean the tension discs with a thin piece of fabric or dental floss. If discs are grooved or springs are weak, replacement may be necessary. This often requires partial disassembly of the tension assembly.
Parts involved: Thread path & tension →
6. Belts (X-axis, Y-axis, Main Drive) medium likelihood
How to tell
Skipped stitches, misaligned designs, grinding noises, machine stopping with movement errors, or visible cracks, fraying, or looseness in the belts.
Fix
- Visually inspect all accessible belts for wear, cracks, fraying, or excessive slack.
- Gently feel the belts for proper tension; they should be taut but not overly tight.
- If a belt shows signs of wear or is loose, it should be replaced. Belt replacement can be complex and may require specific tools and alignment procedures; consult your manual or a technician.
Parts involved: Belts, pulleys & gears →
7. Hoops and Frames low likelihood
How to tell
Fabric slipping during embroidery, difficulty hooping, bent or broken hoop clips/screws, or visible cracks in the hoop material.
Fix
- Inspect all hoops and frames for damage, especially the clips, screws, and the inner ring's integrity.
- Ensure the hoop screws tighten securely and hold fabric firmly.
- If clips are broken or the hoop is cracked, it may need replacement. For magnetic hoops, check magnet strength and ensure no damage to the frame itself.
- Consider replacing with Ricoma Magnetic Mighty Hoops for MT-1501, TC-1501, EM-1010 Embroidery Machines or Magnetic Mighty Hoops for Ricoma EM1010 Multi-Brand Embroidery Machines if your existing hoops are worn or you desire an upgrade.
We stock Ricoma Magnetic Mighty Hoops for MT-1501, TC-1501, EM-1010 Embroidery Machines and Magnetic Mighty Hoops for Ricoma EM1010 Multi-Brand Embroidery Machines.
Parts involved: Hoops & frames →
8. Color Change Sensor low likelihood
How to tell
Machine failing to change colors correctly, stopping with color change errors, or skipping needles during a color change sequence.
Fix
- Power off the machine.
- Locate the color change sensor (often near the needle bar case or head movement mechanism).
- Inspect the sensor and its wiring for any visible damage or loose connections.
- Gently clean the sensor lens (if applicable) with a soft, lint-free cloth to remove dust or debris.
- If issues persist after cleaning and inspection, the sensor may be faulty and require replacement. We stock the Ricoma EM1010 Half Rotation Color Change Sensor for Ricoma EM1010 & Household Cap Embroidery Machines.
We stock Ricoma EM1010 Half Rotation Color Change Sensor for Ricoma EM1010 & Household Cap Embroidery Machines.
Parts involved: Sensors & switches →
Maintenance schedule
| When | What to do | Why |
|---|---|---|
| Daily (or every 8-10 operating hours) | Clean the rotary hook area | Removes lint and thread debris that can cause stitch problems, thread breaks, and damage to the hook. |
| Daily (or every 8-10 operating hours) | Oil the rotary hook | Lubricates the high-speed moving parts of the hook, reducing friction and wear. |
| Daily (or every 8-10 operating hours) | Inspect and replace needles | Dull or bent needles cause skipped stitches, thread breaks, and fabric damage. |
| Weekly (or every 40-50 operating hours) | Clean under the needle plate | Removes lint and debris that can interfere with trimmer function and needle movement. |
| Weekly (or every 40-50 operating hours) | Clean thread tension assemblies | Removes lint and debris from tension discs, ensuring consistent thread tension. |
| Weekly (or every 40-50 operating hours) | Lubricate specified points (e.g., needle bars, trimmer mechanism) | Ensures smooth operation of moving parts and reduces wear. Refer to your manual for specific points. |
| Monthly (or every 160-200 operating hours) | Inspect thread trimmer blades | Ensures clean thread cuts and prevents 'trim error' messages. |
| Monthly (or every 160-200 operating hours) | Inspect belts for wear and tension | Prevents misaligned designs and ensures smooth machine movement. |
| Monthly (or every 160-200 operating hours) | Clean entire machine exterior and control panel | Prevents dust buildup from entering internal components and maintains visibility of controls. |
| Every 3-6 Months (or every 500-1000 operating hours) | Inspect and clean sensors (e.g., color change sensor) | Ensures accurate machine function and prevents errors related to sensor readings. |
| Every 3-6 Months (or every 500-1000 operating hours) | Check all screws and fasteners for tightness | Vibration can loosen screws, leading to misalignments or part failure. |
Stop and call a technician if
- If you encounter persistent error codes that cannot be resolved with basic troubleshooting.
- If you hear unusual grinding or clunking noises from inside the machine that do not resolve with cleaning or basic adjustments.
- For complex mechanical issues like timing adjustments, motor problems, or circuit board failures.
- If you are unsure about performing a repair or adjustment and fear causing further damage.
Prevent it coming back
- Always use high-quality needles appropriate for your fabric and thread type.
- Use good quality embroidery thread to minimize lint and thread breaks.
- Keep your workspace clean and free of dust and debris.
- Avoid forcing the machine to sew through overly thick or inappropriate materials.
- Ensure proper tension settings for both top and bobbin threads to reduce stress on machine parts.
- Never pull fabric while the needle is in it, as this can bend needles or throw off timing.
Frequently asked questions
How often should I oil my Ricoma EM-1010?
Generally, daily or every 8-10 hours of operation for the rotary hook, and weekly for other specified lubrication points. Always refer to your Ricoma EM-1010 user manual for precise lubrication points and recommended intervals, as these can vary.
What kind of oil should I use for my embroidery machine?
Use only high-quality, clear, non-staining sewing machine oil (often referred to as 'white oil' or 'spindle oil'). Never use household oils or automotive oils, as they can gum up mechanisms and stain fabric.
Why is my machine making a knocking sound?
A knocking sound often indicates an issue with the rotary hook, a bent needle hitting the needle plate, or incorrect timing. Stop the machine immediately, inspect the needle and hook for damage, and clean the hook area. If the sound persists, it may require a technician.
How do I know when to replace my needles?
Replace needles at the first sign of skipped stitches, thread breaks, fabric damage, or if the needle point feels dull or has burrs. A good rule of thumb is to replace them every 8-10 hours of continuous sewing or after completing a large, dense design.
From the Ricoma MT-1501 parts book
The assemblies involved in this problem, as the manufacturer lists them. Open a section to see every part number, which ones we stock, and get a price on the rest.
- 04.needle Bar Case29 parts · 0 in stock
- 02.rotary Hook Base18 parts · 0 in stock
- 12.cap Frame12 parts · 0 in stock
- 09.thread Tension Base12 parts · 0 in stock
- 08.thread Stand12 parts · 0 in stock
- 06.y-axis Drive System11 parts · 0 in stock
Reference book: Ricoma MT-1501. Part numbers differ by model - search yours below and we will confirm fit.
Did this guide fix your machine?
Rate it - it helps other operators find the right fix.
Not sure which part is failing?
Need the logo stitched too?
Get your logo digitized by the people who know this machine
Upload the artwork, see the stitch count and the exact price in 10 seconds, then order with a free sew-out preview. $1 per 1,000 stitches, $10 minimum, 24-hour delivery. Vector conversion from $12.
After the fix
Fixed it? Keep the rest of the shop moving.
OS 360 is the shop software from the team behind this parts store. Every job keeps its status, deadline and owner while a EM-1010 head is down, restock alerts fire for needles, hooks and bobbins before you run dry, and quotes, invoices and payment live in one place.
- Jobs with status, deadline and owner - nothing slips during downtime
- Inventory with restock alerts, this store one click away
- Instant quotes, invoices and one place to collect payment