
Blog
Durkopp Adler 267 Series: Essential Maintenance Guide


Quick answer: Regular maintenance for your Durkopp Adler 267 includes daily cleaning and oiling, weekly checks of thread path components and presser feet, and monthly inspections of the rotary hook and belts. Timely replacement of wear parts like needles, rotary hooks, and presser feet is crucial for optimal performance.
The Durkopp Adler 267 series is renowned for its robust construction and reliability in heavy-duty sewing applications. To ensure your machine continues to perform at its best and to extend its lifespan, regular and diligent maintenance is essential. This guide outlines key maintenance tasks and identifies common wear parts, helping you keep your DA 267 productive and minimize downtime.
Two-minute checks before you open anything
- Check needle for straightness and sharpness.
- Inspect thread path for any obstructions or burrs.
- Ensure bobbin is wound evenly and inserted correctly.
- Verify presser foot is securely attached and not damaged.
- Listen for any unusual noises during operation.
1. Needles high likelihood
How to tell
Skipped stitches, thread breakage, damaged material, dull or bent needle point, excessive noise during sewing. A needle that feels rough when run over a fingertip is dull.
Fix
- Inspect the needle point for sharpness and straightness.
- Ensure the needle is inserted correctly and fully seated in the needle bar.
- Replace the needle with the correct type and size for your material and thread at the first sign of wear or damage.
Parts involved: Needles & needle bars →
2. Rotary Hook Cap, Bobbins & Bobbin Case high likelihood
How to tell
Poor stitch quality, thread fraying or breaking, excessive noise from the hook area, bobbin case rattling, or visible burrs and nicks on the hook or bobbin case. The bobbin case may not hold tension consistently.
Fix
- Open the bobbin area and remove the bobbin case and bobbin.
- Carefully inspect the rotary hook for any nicks, burrs, or excessive wear, especially on the point and edges where thread passes.
- Check the bobbin case for damage, especially the tension spring and the edges where thread exits.
- Clean the hook area thoroughly with a brush and compressed air.
- If damage is found, replace the affected components. Ensure the new parts are properly seated and adjusted.
- Re-oil the hook race as per your machine's manual.
We stock Durkopp Adler 167 168 267 268 Rotary Hook Cap Bobbins & Bobbin Case Replacement.
Parts involved: Rotary hooks & bobbin cases →
Parts you may need for your machine
In stock, tested before dispatch, Buyer Protection on every order. Part types for this problem: Needles & needle bars, Rotary hooks & bobbin cases, Presser feet & sewing parts, Thread path & tension.
 Bobbin Case & 2 Metal Bobbins for Brother, Janome, Singer, Babylock...$ 5.59View part →
 Portable Mini Manual Sewing Machine - Handy Needlework Tool for Sim...$ 10.49View part →
 Adjustable Retro Sewing Thimble Finger Protection for Embroidery & ...$ 4.99View part →
 CHCH Essential Embroidery Machine Spare Part - Restore Performance$ 0.00View part →
 11PCS Low Shank Presser Foot Kit Set for Singer Brother Janome Kenm...$ 25.09View part →
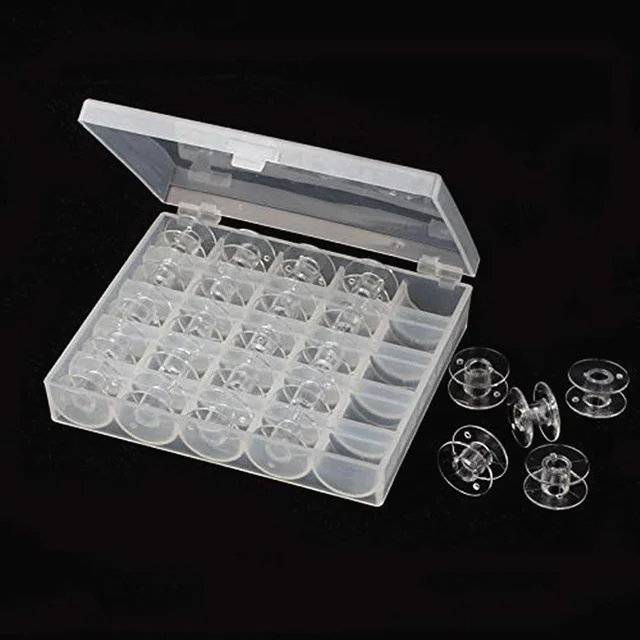 OZXHIXU AA7650 25Pcs Clear Plastic Sewing Machine Bobbins Spools & ...$ 6.49View part →
All your machine parts → Needles & Needle Bars → Rotary Hooks & Bobbin Cases → Presser Feet & Sewing Parts →
3. Presser Feet medium likelihood
How to tell
Uneven feeding of material, material damage, poor stitch formation, or visible wear (grooves, flat spots, or bending) on the bottom surface or edges of the presser foot. The foot may wobble or not sit flat.
Fix
- Raise the presser foot and inspect its underside for wear, nicks, or burrs.
- Check that the foot is securely attached and not bent.
- Ensure the correct presser foot is being used for the application.
- If worn or damaged, replace the presser foot. Ensure the new foot is properly aligned.
We stock Binding Sewing Feet Set for Durkopp Adler 69, 267, 269 Industrial Machines, Durkopp Adler Industrial Zipper Foot Set #067-22-070-0 #067-22-079-0 for 67, 167, 267, 69, 269, and Durkopp Adler 67, 167, 267, 69, 269 Zipper Foot Set #067-22-070-6 + #067-22-078-0.
Parts involved: Presser feet & sewing parts →
4. Thread Tension Discs and Springs medium likelihood
How to tell
Inconsistent thread tension, looping stitches, thread fraying or breaking at the tension assembly, or visible grooves worn into the tension discs. The tension knob may feel loose or stiff.
Fix
- Remove the thread from the tension assembly.
- Inspect the tension discs for any nicks, burrs, or grooves worn by the thread.
- Check the tension spring for proper function and ensure it's not bent or weak.
- Clean any lint or debris from between the tension discs.
- If discs are grooved or the spring is faulty, replacement is necessary. Consult your machine manual for specific replacement procedures.
Parts involved: Thread path & tension →
5. Feed Dog medium likelihood
How to tell
Material not feeding evenly, material slipping, or visible wear (flattened teeth, missing teeth, or burrs) on the feed dog. Stitch length may become inconsistent.
Fix
- Raise the presser foot and inspect the feed dog teeth for wear or damage.
- Ensure the feed dog is clean and free of lint and debris.
- If teeth are worn or damaged, the feed dog should be replaced. This often involves removing the needle plate and carefully detaching the feed dog assembly.
Parts involved: Head & mechanical parts →
6. Drive Belts low likelihood
How to tell
Machine running sluggishly, unusual noises (squealing, flapping), loss of power, or visible cracks, fraying, or stretching on the drive belts. The machine may skip stitches or stop unexpectedly.
Fix
- Visually inspect all accessible drive belts for signs of wear, cracking, fraying, or excessive slack.
- Check belt tension; it should be firm but not overly tight. Refer to your machine's manual for proper tensioning.
- If a belt shows signs of wear or damage, it should be replaced. This may require partial disassembly of the machine's covers.
Parts involved: Belts, pulleys & gears →
Maintenance schedule
| When | What to do | Why |
|---|---|---|
| Daily (or every 8 hours of operation) | Clean and oil the rotary hook area. | Removes lint and debris, reduces friction, and prevents premature wear of critical hook components. |
| Daily (or every 8 hours of operation) | Wipe down the machine exterior and clear lint from the needle plate area. | Prevents lint and dust from entering internal mechanisms and keeps the work area clean. |
| Daily (or every 8 hours of operation) | Check and replace the needle if dull, bent, or damaged. | A sharp, straight needle is crucial for good stitch quality and prevents thread breakage and material damage. |
| Weekly (or every 40 hours of operation) | Clean the entire thread path, including tension discs, thread guides, and take-up lever. | Removes accumulated lint and wax buildup that can affect thread tension and cause breakage. |
| Weekly (or every 40 hours of operation) | Inspect presser feet and feed dog for wear or damage. | Ensures proper material feeding and prevents damage to fabric. Worn parts can lead to uneven stitches. |
| Monthly (or every 160 hours of operation) | Thoroughly clean under the needle plate and around the feed dog mechanism. | Removes stubborn lint and debris that can impede feed dog movement and affect stitch consistency. |
| Monthly (or every 160 hours of operation) | Inspect drive belts for wear, cracks, or proper tension. | Ensures smooth operation and prevents power loss or unexpected breakdowns. Adjust tension if necessary (refer to manual). |
| Every 500-1000 hours (or annually, whichever comes first) | Lubricate internal moving parts as specified in the machine manual. | Reduces friction and wear on internal components, extending the machine's lifespan. This may require partial disassembly. |
Stop and call a technician if
- If you suspect timing issues with the needle bar or rotary hook.
- If there are persistent unusual noises or vibrations that you cannot identify or resolve.
- For any electrical issues or motor problems.
- If you need to replace major internal components that require specialized tools or expertise.
- If the machine is consistently producing poor stitch quality despite routine maintenance and part replacement.
Prevent it coming back
- Always use the correct needle type and size for your material and thread.
- Replace needles proactively, especially when working with tough materials.
- Use high-quality threads to minimize lint buildup and abrasion.
- Keep your work area clean to prevent dust and debris from entering the machine.
- Do not force thick materials through the machine; adjust presser foot pressure and needle size accordingly.
- Follow the manufacturer's recommended oiling schedule and use only specified lubricants.
Frequently asked questions
How often should I oil my Durkopp Adler 267?
The Durkopp Adler 267 is a heavy-duty industrial machine. It typically requires daily oiling of key lubrication points, especially the rotary hook, and other moving parts as specified in your machine's operation manual. Always use the recommended sewing machine oil.
What causes thread breakage on my Durkopp Adler 267?
Thread breakage can be caused by several factors including a dull or bent needle, incorrect needle size, improper threading, too much thread tension, burrs on the rotary hook or bobbin case, worn tension discs, or lint buildup in the thread path. Inspect these areas systematically.
Why are my stitches skipping on the Durkopp Adler 267?
Skipped stitches are often due to a bent or dull needle, incorrect needle insertion, incorrect needle system for the thread/material, improper timing of the hook, or insufficient presser foot pressure. Check your needle first, then inspect the hook area and timing.
Can I use any sewing machine oil for my Durkopp Adler 267?
No, it's crucial to use high-quality industrial sewing machine oil specifically designed for high-speed machines. Using incorrect oil can lead to premature wear, gumming, and machine damage. Always refer to your machine's manual for the recommended oil type.
Did this guide fix your machine?
Rate it - it helps other operators find the right fix.
Not sure which part is failing?
Need the logo stitched too?
Get your logo digitized by the people who know this machine
Upload the artwork, see the stitch count and the exact price in 10 seconds, then order with a free sew-out preview. $1 per 1,000 stitches, $10 minimum, 24-hour delivery. Vector conversion from $12.
After the fix
Fixed it? Keep the rest of the shop moving.
OS 360 is the shop software from the team behind this parts store. Every job keeps its status, deadline and owner while a embroidery head is down, restock alerts fire for needles, hooks and bobbins before you run dry, and quotes, invoices and payment live in one place.
- Jobs with status, deadline and owner - nothing slips during downtime
- Inventory with restock alerts, this store one click away
- Instant quotes, invoices and one place to collect payment





