
Blog
Tajima TME-HC Series: Essential Maintenance Schedule & Wear Parts Guide


Quick answer: Regular maintenance of your Tajima TME-HC machine is crucial for optimal performance and longevity. This guide provides a detailed schedule, identifies common wear parts like needles, rotary hooks, and the Take-Up Lever Drive Crank Rod Gear, and offers step-by-step instructions for inspection and replacement.
The Tajima TME-HC series embroidery machines are workhorses in the industry, known for their reliability and precision. However, like any complex machinery, consistent performance relies heavily on a diligent maintenance routine. Neglecting regular checks and timely replacement of wear parts can lead to costly downtime, inconsistent stitch quality, and premature machine failure. This guide from 360 Digitizing Shop provides you with an essential maintenance schedule and identifies the most common wear parts for your TME-HC, helping you keep your machine in top condition and extend its operational life.
Two-minute checks before you open anything
- Check needles for dullness or bends.
- Inspect the rotary hook for lint buildup and oil it.
- Ensure thread paths are clear and free of debris.
- Verify proper thread tension for all needles.
- Check for any loose screws or unusual noises.
- Clean the area around the needle plate and presser foot.
1. Needles high likelihood
How to tell
Skipped stitches, thread breaks, burrs on the needle eye, bent or dull points, or excessive noise during stitching. Needles should be replaced proactively based on material and stitch count.
Fix
- Turn off the machine power.
- Loosen the needle clamp screw for the affected needle.
- Remove the old needle, ensuring the scarf is facing the back.
- Insert a new, correct size and type needle all the way up into the needle bar, with the scarf facing the back.
- Tighten the needle clamp screw securely.
- Perform a test stitch to confirm proper function.
Parts involved: Needles & needle bars →
2. Rotary Hook Assembly high likelihood
How to tell
Frequent thread breaks, poor stitch quality (looping, loose stitches), excessive noise from the hook area, or visible nicks, burrs, or wear on the hook point or race. Lint and debris buildup are also common issues.
Fix
- Turn off the machine power.
- Remove the bobbin case and bobbin.
- Carefully inspect the hook point for any damage or dullness. Run a fingernail over the point; it should be smooth.
- Check the hook race for lint, debris, or grooves. Clean thoroughly with a brush and compressed air.
- If damaged, loosen the hook set screws and remove the old hook.
- Install a new rotary hook, ensuring proper timing and gap settings according to your machine's manual.
- Reinsert the bobbin case and bobbin, then perform a test stitch.
Always refer to your machine's manual for specific hook timing and gap adjustment procedures when replacing the rotary hook.
Parts involved: Rotary hooks & bobbin cases →
Parts you may need for Tajima
In stock, tested before dispatch, Buyer Protection on every order. Part types for this problem: Needles & needle bars, Rotary hooks & bobbin cases, Cutters & trimmers, Belts, pulleys & gears.
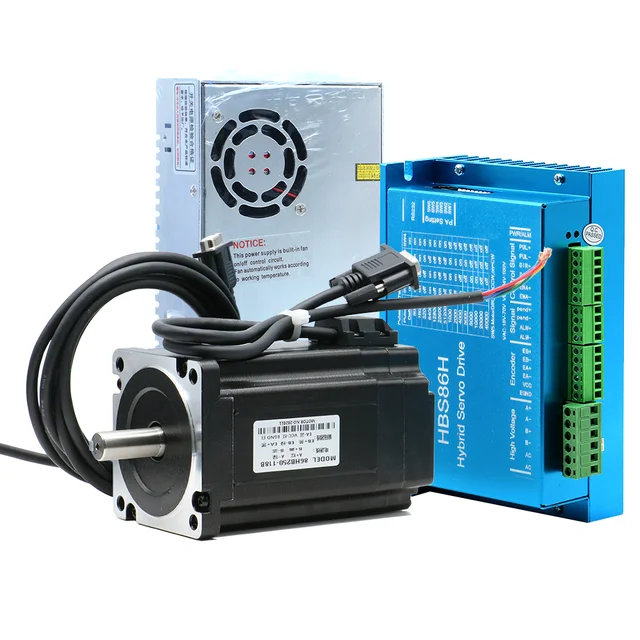 TAJIMA DU-10 XY Driver Board EH5404000000 MP-117-1-A for TME-HC, TM...$ 156.49View part →
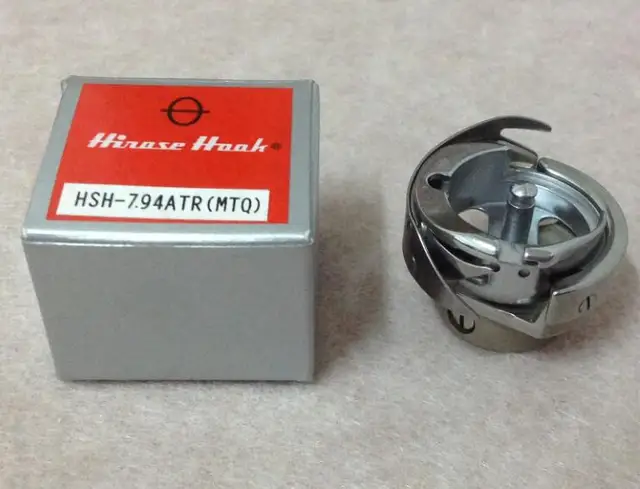 Hirose HSH-7.94ATR(MTQ) KHS12-RYP Rotary Hook for Tajima, Barudan, ...$ 18.09View part →
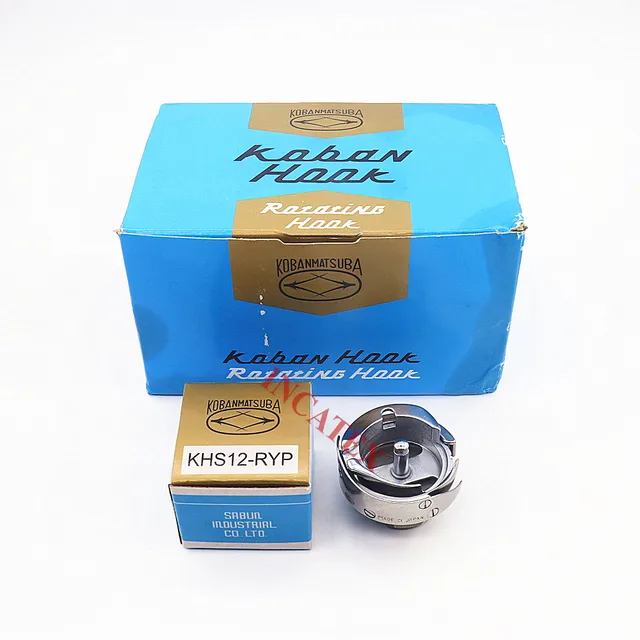 Koban KHS12-RYP Rotary Hook with Trimmer for Tajima, Barudan, SWF, ...$ 37.29View part →
 Groz-Beckert DBXK5 FG/SUK Embroidery Needles (100 Pcs) for Tajima, ...$ 33.99View part →
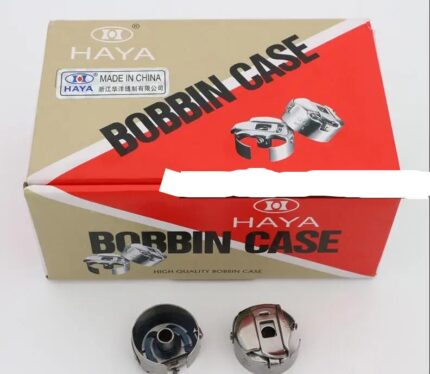 HAYA MGP BC-DBZ(1)-NBL KF220440 ME0503000NBL Bobbin Case (50 Pcs) f...$ 66.29View part →
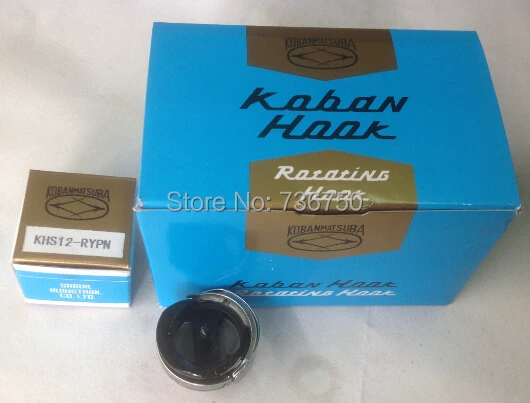 KHS12-RYPN KF220750 ME0505010AMQ Rotary Hook for Tajima Barudan SWF...$ 27.09View part →
All Tajima parts → Needles & Needle Bars → Rotary Hooks & Bobbin Cases → Cutters & Trimmers →
3. Trimmer Blades (Moving and Fixed) medium likelihood
How to tell
Inconsistent thread trims, frayed thread ends after trimming, threads not trimming at all, or excessive noise during the trim cycle. Dull or damaged blades are the primary cause.
Fix
- Turn off the machine power.
- Carefully inspect both the moving and fixed trimmer blades for nicks, dullness, or excessive lint buildup.
- Clean any lint or debris from around the blades.
- If blades are dull or damaged, loosen the retaining screws for the affected blade(s).
- Remove the old blade(s) and install new ones, ensuring they are correctly seated and aligned.
- Tighten the retaining screws securely.
- Perform a test trim to ensure clean cuts. Adjust blade gap if necessary, referring to your manual.
Parts involved: Cutters & trimmers →
4. Take-Up Lever Drive Crank Rod Gear medium likelihood
How to tell
Erratic or no movement of the take-up lever, grinding noises from the take-up lever mechanism, or complete seizure of the take-up lever. Visible wear, broken teeth, or cracks on the gear (Tajima ME0530000000) itself.
Fix
- Turn off the machine power and unplug it.
- Access the take-up lever drive mechanism, typically located behind the machine head cover.
- Carefully inspect the Take-Up Lever Drive Crank Rod Gear (Tajima ME0530000000) for any signs of wear, stripped teeth, or damage.
- If damaged, remove the retaining clips or screws securing the crank rod and gear.
- Replace the worn gear with a new Tajima ME0530000000 Take-Up Lever Drive Crank Rod Gear.
- Reassemble the mechanism, ensuring all parts are correctly aligned and secured.
- Lubricate according to the machine's manual.
- Manually cycle the machine to check for smooth operation before powering on and testing.
This is a specific mechanical part (Tajima ME0530000000) that can wear over time. Proper lubrication is key to its longevity.
Parts involved: Belts, pulleys & gears → Head & mechanical parts →
5. Drive Belts (X/Y Axis, Main Shaft) medium likelihood
How to tell
Skipped stitches, misaligned designs, inconsistent stitching, grinding or squealing noises, or visible cracks, fraying, or stretching on the belts. Loose belts can also cause tension issues.
Fix
- Turn off the machine power and unplug it.
- Locate the drive belts (e.g., X-axis, Y-axis, main shaft).
- Inspect belts for cracks, fraying, stretching, or excessive wear. Check tension by gently pressing on the belt; it should have slight give but not be slack.
- If a belt is worn or loose, loosen the motor or idler pulley mounting bolts.
- Remove the old belt and install a new one of the correct size.
- Adjust tension according to the machine's manual (usually firm but not overly tight).
- Tighten mounting bolts securely.
- Manually move the gantry and main shaft to ensure smooth, unrestricted movement before powering on and testing.
Parts involved: Belts, pulleys & gears →
6. Thread Tension Assemblies (Discs, Springs) medium likelihood
How to tell
Inconsistent thread tension, looping stitches, thread breaks, or visible grooves worn into the tension discs. Weak or broken tension springs can also cause issues.
Fix
- Turn off the machine power.
- Remove the thread from the affected tension assembly.
- Inspect the tension discs for grooves, nicks, or debris. Clean thoroughly with a soft brush or cloth.
- Check the tension spring for proper tension and ensure it's not bent or broken.
- If discs are grooved, they may need replacement. If the spring is weak or broken, replace it.
- Reassemble the tension assembly, ensuring all parts are correctly seated.
- Thread the machine and test the tension, adjusting as needed.
Parts involved: Thread path & tension →
7. Presser Feet and Needle Plate low likelihood
How to tell
Damaged fabric, skipped stitches, needle deflection, or excessive noise. Visible bending, burrs, or nicks on the presser foot or needle plate hole.
Fix
- Turn off the machine power.
- Inspect the presser foot for any bending, burrs, or damage. Ensure it moves freely.
- Examine the needle plate hole for burrs or enlargement caused by needle strikes.
- If the presser foot is damaged, loosen its retaining screw and replace it with a new one.
- If the needle plate is damaged, remove the retaining screws and replace it. Ensure the new plate is correctly oriented.
- Tighten screws securely and perform a test stitch.
Parts involved: Presser feet & sewing parts →
8. DU-10 XY Driver Board (e.g., EH5404000000 MP-117-1-A) low likelihood
How to tell
Erratic or no movement of the X or Y axis, machine stopping with X or Y axis errors, burning smell from the control box, or visible damage (e.g., burnt components) on the board itself. Intermittent axis movement or loss of position.
Fix
- Turn off the machine power and unplug it.
- Access the main control box where the driver boards are located.
- Carefully inspect the DU-10 XY Driver Board (e.g., Tajima DU-10 XY Driver Board EH5404000000 MP-117-1-A for TME-HC) for any visible signs of damage, such as burnt components, bulging capacitors, or discolored areas.
- If replacement is necessary, disconnect all cables and connectors from the old board, noting their positions.
- Unscrew and remove the old board.
- Install the new DU-10 XY Driver Board, ensuring it is correctly seated and secured.
- Reconnect all cables and connectors firmly.
- Power on the machine and test X and Y axis movement. Run a test design to confirm proper function.
Replacing circuit boards requires careful handling and attention to detail. If unsure, consult a qualified technician. Ensure you order the correct board for your specific TME-HC model (e.g., MP-117-1-A or MP-117-6).
Parts involved: Circuit boards & electronics →
Maintenance schedule
| When | What to do | Why |
|---|---|---|
| Daily (or every 8-10 hours of operation) | Clean and oil the rotary hook. | Prevents lint buildup, reduces friction, and ensures smooth bobbin rotation for consistent stitch quality and hook longevity. |
| Daily (or before each shift) | Inspect and replace needles as needed. | Dull or bent needles cause skipped stitches, thread breaks, and fabric damage. Proactive replacement maintains stitch quality. |
| Daily | Clean thread paths and tension assemblies. | Removes lint and debris that can cause inconsistent tension and thread breaks. |
| Weekly | Lubricate needle bars and other specified moving parts. | Reduces friction and wear on critical components, ensuring smooth operation and extending part life. Refer to your manual for specific points. |
| Weekly | Inspect trimmer blades and clean the trimmer mechanism. | Ensures clean thread cuts and prevents thread jams. Replace dull blades promptly. |
| Monthly | Inspect drive belts (X/Y axis, main shaft) for wear and tension. | Prevents misaligned designs, inconsistent stitching, and component damage from loose or worn belts. |
| Monthly | Grease specified points on the machine (e.g., pantograph rails, take-up lever mechanism). | Provides long-lasting lubrication for high-friction areas. Consult your manual for exact points and grease type. |
| Every 500-1000 hours (or Annually) | Comprehensive inspection of all major mechanical components. | Identifies potential issues before they become major problems, including checking for wear on gears (like the Take-Up Lever Drive Crank Rod Gear), bearings, and shafts. Consider professional servicing. |
| As needed | Inspect and clean circuit boards and electrical connections. | Ensures reliable electrical contact and prevents issues caused by dust or loose connections. Only perform with power off and unplugged. |
Stop and call a technician if
- If you encounter persistent error codes that you cannot resolve with basic troubleshooting.
- If you observe unusual noises (grinding, clunking) that indicate internal mechanical issues.
- If you suspect a major electrical component failure, such as a motor or circuit board, and are not comfortable performing the replacement yourself.
- For complex timing adjustments (e.g., hook timing after a major repair) if you are not experienced.
- If the machine is experiencing consistent, unexplained poor stitch quality despite checking all common causes.
Prevent it coming back
- Always use high-quality needles, threads, and bobbins appropriate for your fabric and design.
- Regularly clean lint and debris from the hook area, tension assemblies, and thread path.
- Ensure proper thread tension settings for each job to prevent undue stress on machine components.
- Avoid running the machine at excessively high speeds for extended periods, especially with dense designs.
- Keep your work environment clean and free of excessive dust and humidity.
- Never force machine parts; investigate and resolve any resistance immediately.
- Follow the manufacturer's recommended lubrication schedule and use only specified lubricants.
Frequently asked questions
How often should I lubricate my Tajima TME-HC?
Lubrication frequency depends on machine usage. Generally, daily oiling of the rotary hook and needle bars, weekly oiling of other moving parts, and monthly greasing of specific points is recommended. Always refer to your Tajima TME-HC operator's manual for precise lubrication points and intervals.
What causes frequent thread breaks on my TME-HC?
Frequent thread breaks can be caused by several factors, including dull or bent needles, a damaged rotary hook, incorrect thread tension, burrs in the thread path, improper threading, or worn trimmer blades. Systematically check each of these components as outlined in this guide.
Can I use generic parts for my Tajima TME-HC?
While some generic parts may fit, 360 Digitizing Shop strongly recommends using genuine or high-quality aftermarket parts specifically designed for Tajima TME-HC machines. Using incorrect or low-quality parts can lead to poor performance, increased wear on other components, and potential machine damage.
How do I know if my DU-10 XY Driver Board is failing?
Signs of a failing DU-10 XY Driver Board include erratic or no movement of the X or Y axis, machine stopping with axis-related errors, or a burning smell from the control box. If you suspect a board issue, it's best to consult a technician or carefully inspect the board for visible damage after powering off the machine.
Did this guide fix your machine?
Rate it - it helps other operators find the right fix.
Not sure which part is failing?
Need the logo stitched too?
Get your logo digitized by the people who know this machine
Upload the artwork, see the stitch count and the exact price in 10 seconds, then order with a free sew-out preview. $1 per 1,000 stitches, $10 minimum, 24-hour delivery. Vector conversion from $12.
After the fix
Fixed it? Keep the rest of the shop moving.
OS 360 is the shop software from the team behind this parts store. Every job keeps its status, deadline and owner while a Tajima head is down, restock alerts fire for needles, hooks and bobbins before you run dry, and quotes, invoices and payment live in one place.
- Jobs with status, deadline and owner - nothing slips during downtime
- Inventory with restock alerts, this store one click away
- Instant quotes, invoices and one place to collect payment