
Blog
Tajima TEHX Series: Essential Maintenance Schedule & Wear Parts Guide

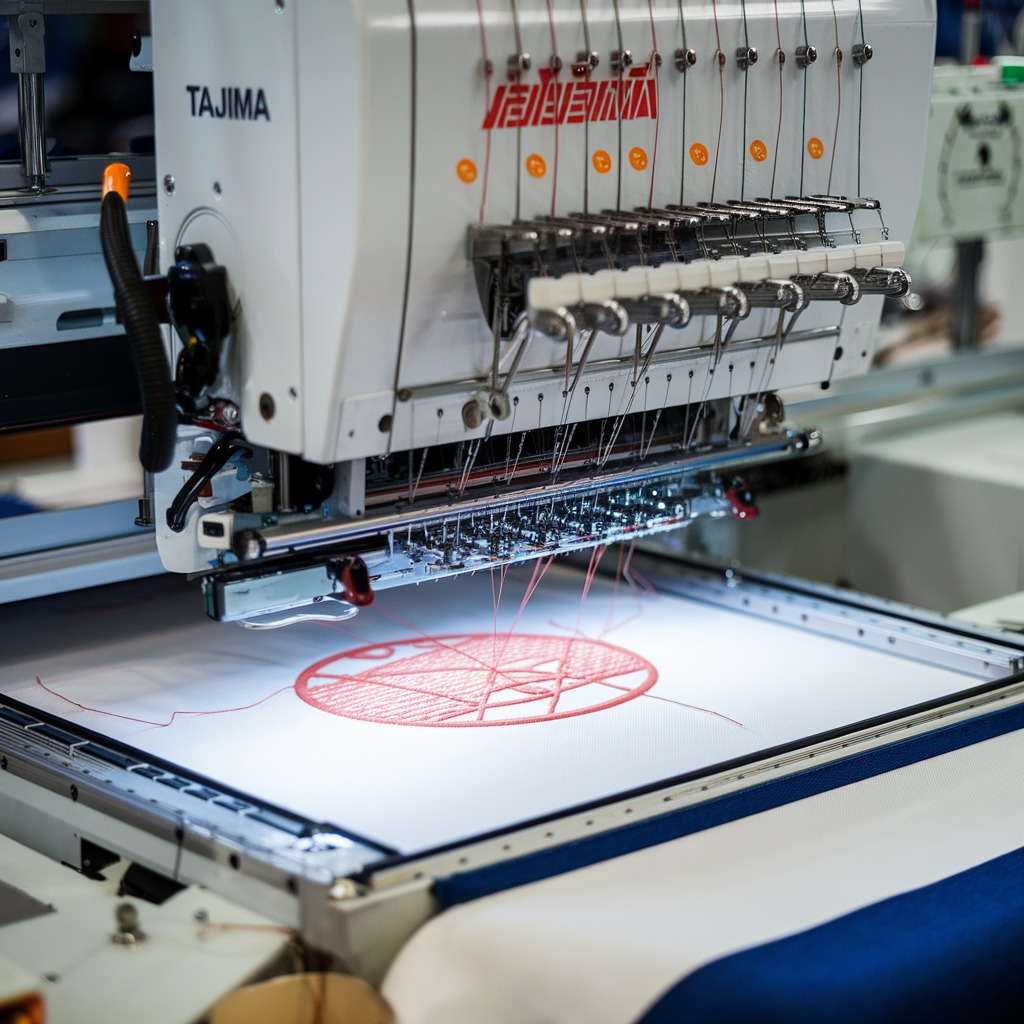
Quick answer: Regular maintenance for your Tajima TEHX series machine involves daily cleaning and oiling, weekly checks of thread path components, monthly inspections of belts and moving parts, and periodic replacement of wear items like presser foot bushings, thread sensors, timing belts, and needle bar components to ensure optimal performance and longevity.
The Tajima TEHX series embroidery machines are workhorses in the industry, known for their reliability and stitch quality. To keep your TEHX running at peak performance and extend its lifespan, a consistent maintenance routine is essential. This guide provides a comprehensive maintenance schedule and highlights the wear parts you should regularly inspect and replace. Following these steps will help prevent costly downtime and ensure your machine continues to produce high-quality embroidery.
Two-minute checks before you open anything
- Check thread paths for lint buildup or obstructions.
- Inspect needles for bends, burrs, or dullness.
- Verify bobbin tension and ensure the bobbin case is clean.
- Listen for any unusual noises during machine operation.
- Ensure all safety guards are in place and functional.
1. Tajima EF0613220000 EF0613210000 090460040020 090460040031 Presser Foot Bushing Guide Collar for TFMX TMAR TMBP-SC TMEZ high likelihood
How to tell
Excessive play or wobble in the presser foot, inconsistent stitch quality, or unusual noise from the needle bar area during operation. Visually inspect for cracks, wear, or deformation.
Fix
- Turn off and unplug the machine.
- Remove the presser foot assembly.
- Carefully inspect the existing bushing/collar for signs of wear, cracks, or excessive looseness.
- If worn, remove the old bushing/collar. This may require specialized tools or careful prying.
- Install the new Presser Foot Bushing Guide Collar, ensuring it seats correctly and allows smooth presser foot movement without excessive play.
- Reassemble the presser foot and test machine operation.
These bushings are critical for stable presser foot operation and stitch quality. Replace them at the first sign of wear.
Parts involved: Presser feet & sewing parts → Shafts, bearings & bushings →
2. Premium 2 Set Thread Sensor Wheel for Tajima TEHX, TFHX, TMLH, TEHX-C, TFGN & Toyota ESP9000, ESP9100 medium likelihood
How to tell
Frequent thread breaks that are not resolved by re-threading or tension adjustments, 'thread break' errors appearing when thread is clearly present, or the machine failing to detect thread presence. Visually inspect the wheels for damage, debris, or excessive wear on the grooves.
Fix
- Turn off and unplug the machine.
- Locate the thread sensor wheels for the affected head(s).
- Carefully clean any lint or debris from the wheels and their housing using compressed air or a soft brush.
- Inspect the wheels for cracks, chips, or deep grooves that might impede thread movement or sensor function.
- If damaged, carefully remove the old sensor wheel(s) and install the new set, ensuring they spin freely.
- Test the machine with thread to confirm proper detection.
These wheels are part of the thread break detection system. Keep them clean and replace if damaged to prevent false thread break errors.
Parts involved: Sensors & switches → Thread path & tension →
Parts you may need for Tajima TEHX
In stock, tested before dispatch, Buyer Protection on every order. Part types for this problem: Rotary hooks & bobbin cases, Needles & needle bars, Thread path & tension, Presser feet & sewing parts.
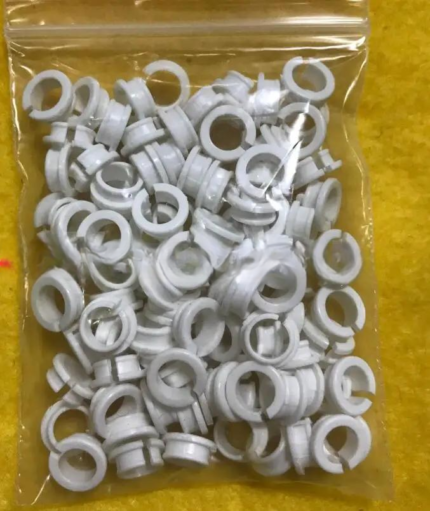 Tajima EF0613220000 EF0613210000 090460040020 090460040031 Presser ...$ 18.09View part →
 Tajima PB0025A1PW00 Power Supply 150W 24V for TEHX-C1501, TMEZ, TMA...$ 140.99View part →
 Gotek SFR1M44-FU USB Floppy Emulator for Tajima TMFX TFMX TFMX-C TE...$ 58.99View part →
 Tajima EC6102050000 XY Axis Driver Card Board MP167-1 for Single He...$ 1,153.49View part →
 Tajima Needle Bar Drive Reciprocator Assembly for TFMX, TMFX, TMAR,...$ 27.09View part →
 MBL S5M1160 Timing Belt 30mm for Tajima TMAR TFMX TFGN TEJT TEHX Se...$ 86.99View part →
All Tajima TEHX parts → Rotary Hooks & Bobbin Cases → Needles & Needle Bars → Thread Path & Tension →
3. Tajima TC Sensor Card & Thread Contact Set 0J2602300A22 0J2602300A23 FG7204010000 0J2602100010 for TFMX, TFGN, TMAR, TMEZ, TSW, TEHX, TE medium likelihood
How to tell
Consistent 'thread break' errors even after replacing thread sensor wheels and checking thread path, intermittent thread detection issues, or specific heads consistently failing to detect thread. This often indicates an electronic fault rather than mechanical wear.
Fix
- Turn off and unplug the machine.
- Locate the TC Sensor Card and thread contact set, typically near the thread tension assemblies.
- Visually inspect the card for any signs of burn marks, corrosion, or loose connections. Check the contact points for damage or excessive wear.
- If suspect, carefully disconnect the old sensor card and contact set, noting the orientation and wiring.
- Install the new TC Sensor Card & Thread Contact Set, ensuring all connections are secure.
- Power on the machine and test thread detection on all heads.
This is an electronic component of the thread break detection system. Handle with care to avoid static discharge.
Parts involved: Sensors & switches → Circuit boards & electronics →
4. MBL S5M1160 Timing Belt 30mm for Tajima TMAR TFMX TFGN TEJT TEHX Series Embroidery Machines medium likelihood
How to tell
Skipped stitches, inconsistent stitch registration, unusual noises (squealing, flapping), or visible cracks, fraying, or stretching on the belt. The machine may also exhibit jerky movements or errors related to motor synchronization.
Fix
- Turn off and unplug the machine.
- Locate the timing belt(s) for the main drive or X/Y axis movement. Refer to your machine's manual for exact locations.
- Inspect the belt thoroughly for any signs of wear, such as cracks, missing teeth, fraying, or excessive slack.
- If replacement is needed, carefully loosen any tensioning mechanisms and remove the old belt.
- Install the new timing belt, ensuring it is correctly seated on all pulleys.
- Adjust belt tension according to manufacturer specifications (refer to your machine manual) – it should be firm but not overly tight.
- Manually rotate the machine to ensure smooth movement and proper alignment before powering on.
Proper belt tension is crucial for machine performance and longevity. Overtightening can damage bearings, while too loose can cause skipped stitches.
Parts involved: Belts, pulleys & gears →
5. Tajima TU10 W25-170/E Timing Belt 626400260000 BPT102517000 for TMAR, TFMX, TFGN, TMBR, TMBP, TEJT, TEHX Series medium likelihood
How to tell
Similar symptoms to other timing belts: skipped stitches, poor registration, unusual noises, or visible deterioration of the belt material (cracks, fraying, stretching).
Fix
- Turn off and unplug the machine.
- Identify the specific timing belt that needs replacement (refer to your machine's manual for belt locations).
- Inspect the belt for any signs of wear, damage, or excessive slack.
- If replacement is necessary, carefully release the tensioner and remove the worn belt.
- Install the new timing belt, ensuring it is properly aligned on the pulleys.
- Adjust the belt tension to the manufacturer's recommended specifications, ensuring it's taut but not strained.
- Cycle the machine manually to confirm smooth operation and correct belt tracking.
Always ensure the correct belt type and size are used for replacement. Incorrect belts can lead to premature failure or machine damage.
Parts involved: Belts, pulleys & gears →
6. Tajima 090420060017 Stopper Lower Dead Point Needle Bar Connecting Stud for TMEG TMFD TMFX STNE TFKN STKN STKN-C TFGN TMEX TEMX TEHX TEJT TMLH TLMX low likelihood
How to tell
Unusual clunking noises from the needle bar area, inconsistent needle depth, or the needle bar not stopping precisely at its lower dead point. This can lead to skipped stitches or needle breaks. Visually inspect the stud for bending, wear, or looseness.
Fix
- Turn off and unplug the machine.
- Access the needle bar mechanism (this may require removing covers).
- Carefully inspect the stopper stud for any signs of damage, bending, or excessive wear.
- If damaged, carefully remove the old stud. This may require specific tools and careful handling to avoid damaging surrounding components.
- Install the new stopper stud, ensuring it is securely fastened and correctly positioned.
- Manually cycle the machine to confirm proper needle bar movement and stopping at the lower dead point.
- Test machine operation with thread and fabric.
This part is crucial for precise needle bar movement. If it fails, it can cause significant timing issues and damage to other components.
Parts involved: Needles & needle bars → Head & mechanical parts → Screws, springs & small parts →
7. Tajima Needle Bar Drive Reciprocator Assembly for TFMX, TMFX, TMAR, TFGN, TEHX Series Embroidery Machines low likelihood
How to tell
Severe mechanical noise from the needle bar drive, erratic needle bar movement, complete seizure of a needle bar, or visible damage to the assembly itself (e.g., bent rods, broken components). This is usually a catastrophic failure.
Fix
- Turn off and unplug the machine.
- Access the needle bar drive mechanism (this is an advanced repair and may require significant disassembly).
- Visually inspect the entire reciprocator assembly for any broken, bent, or excessively worn parts.
- If the assembly is damaged beyond repair, carefully remove the old assembly, noting all connections and alignments.
- Install the new Needle Bar Drive Reciprocator Assembly, ensuring all components are correctly aligned and secured.
- Re-lubricate as per manufacturer guidelines and carefully reassemble the machine.
- Perform extensive testing, including manual cycling and test stitching, to ensure proper function and timing.
Replacement of this assembly is a complex task best performed by experienced technicians. Incorrect installation can cause severe machine damage.
Parts involved: Needles & needle bars → Head & mechanical parts →
8. Gotek SFR1M44-FU USB Floppy Emulator for Tajima TMFX TFMX TFMX-C TEHX Series low likelihood
How to tell
Machine unable to read designs from floppy disk, 'disk read error' messages, or complete failure of the floppy drive to operate. This is a common upgrade rather than a wear item, but the original floppy drive can fail.
Fix
- Turn off and unplug the machine.
- Locate the existing floppy disk drive.
- Carefully disconnect the power and data cables from the old floppy drive.
- Remove the old floppy drive from its mounting bracket.
- Install the Gotek SFR1M44-FU USB Floppy Emulator into the same bay, ensuring it is securely mounted.
- Connect the power and data cables to the emulator.
- Power on the machine and follow the emulator's instructions for formatting a USB drive and loading designs.
- Test loading and stitching a design from the USB drive.
This is an excellent upgrade to replace unreliable floppy drives with modern USB functionality. Ensure proper configuration after installation.
Parts involved: Floppy, USB & memory →
9. Tajima PB0025A1PW00 Power Supply 150W 24V for TEHX-C1501, TMEZ, TMAR, TMBR-SC Embroidery Machines low likelihood
How to tell
Machine fails to power on, intermittent power loss, specific electronic components (like control panel or motors) not receiving power, or unusual smells/sounds from the power supply unit. Often indicated by error codes related to voltage or power.
Fix
- Turn off and unplug the machine.
- Locate the power supply unit, typically inside the machine's main cabinet.
- Visually inspect the power supply for any signs of burning, bulging capacitors, or loose connections.
- Using a multimeter (if you are comfortable and trained to do so), test the output voltage to confirm it's within specifications (24V).
- If faulty, carefully disconnect all input and output wiring, noting their positions.
- Remove the old power supply and install the new Tajima PB0025A1PW00 Power Supply.
- Reconnect all wiring securely.
- Power on the machine and observe for normal operation.
Working with power supplies involves high voltage. If you are not experienced, consult a qualified technician. Always ensure the machine is unplugged before handling.
Parts involved: Circuit boards & electronics →
10. Tajima EC6102050000 XY Axis Driver Card Board MP167-1 for Single Head Tajima TMEX TEHX-C1501 TMFX TFMX Embroidery Machines low likelihood
How to tell
Machine fails to move in the X or Y direction, jerky or erratic movement in one axis, 'motor error' or 'driver error' messages related to X/Y axis, or the machine getting stuck during frame movement. Often accompanied by error codes indicating a driver fault.
Fix
- Turn off and unplug the machine.
- Locate the XY Axis Driver Card Board, usually within the main control cabinet.
- Visually inspect the board for any signs of damage, such as burn marks, bulging components, or corrosion.
- If suspect, carefully disconnect all cables from the old driver card, noting their orientation and position.
- Remove the old board and install the new Tajima EC6102050000 XY Axis Driver Card Board.
- Reconnect all cables securely.
- Power on the machine and test X/Y axis movement. You may need to recalibrate the frame after replacement (refer to your machine manual).
This board controls the precise movement of your embroidery frame. Handle with care to prevent static damage. Replacement may require recalibration.
Parts involved: Circuit boards & electronics → Motors & drivers →
Maintenance schedule
| When | What to do | Why |
|---|---|---|
| Daily (or per shift) | Clean the rotary hook area and bobbin case. | Removes lint and thread fragments that can cause skipped stitches, thread breaks, and damage to the hook. |
| Daily (or per shift) | Oil the rotary hook, needle bars, and other specified points. | Reduces friction and wear on moving parts, ensuring smooth operation and preventing premature failure. Refer to your manual for exact oiling points. |
| Daily (or per shift) | Clean the thread path, including tension discs and thread guides. | Prevents lint buildup that can affect thread tension and lead to thread breaks or poor stitch quality. |
| Weekly | Inspect and clean thread sensor wheels and contacts. | Ensures accurate thread break detection and prevents false alarms. Remove any lint or debris. |
| Weekly | Check presser foot for excessive play or damage. | Excessive play can lead to inconsistent stitch quality. Inspect the Presser Foot Bushing Guide Collar for wear. |
| Weekly | Clean under the needle plate and around the feed dog area. | Removes lint and debris that can interfere with fabric movement and stitch formation. |
| Monthly (or every 200-300 operating hours) | Inspect all timing belts (MBL S5M1160, Tajima TU10 W25-170/E) for wear, cracks, or fraying. | Worn belts can cause timing issues, skipped stitches, and poor registration. Replace if any signs of wear are present. |
| Monthly (or every 200-300 operating hours) | Check for loose screws and fasteners throughout the machine. | Vibration can loosen components, leading to misalignment or damage. Tighten as needed. |
| Monthly (or every 200-300 operating hours) | Clean the main machine body and control panel. | Prevents dust and lint from entering internal components and keeps the machine looking professional. |
| Quarterly (or every 500-750 operating hours) | Inspect the needle bar drive reciprocator assembly for excessive play or wear. | Ensures smooth and precise needle bar movement. Address any issues to prevent major mechanical failure. |
| Annually (or every 1500-2000 operating hours) | Consider professional servicing for comprehensive inspection and lubrication of internal mechanisms. | A technician can identify and address issues not visible during routine maintenance, ensuring long-term machine health. |
Stop and call a technician if
- If you encounter persistent error codes that you cannot resolve with basic troubleshooting.
- For any issues involving the main control board, motor drivers, or power supply if you are not experienced with electronics.
- When replacing major mechanical assemblies like the needle bar drive reciprocator.
- If you suspect a complex timing issue that you cannot correct using manual adjustments.
- For any problem that requires specialized tools or extensive disassembly beyond your comfort level.
Prevent it coming back
- Always use high-quality threads and needles appropriate for your fabric to minimize stress on the machine.
- Ensure proper thread tension settings to prevent excessive strain on thread path components and needle bars.
- Keep your work area clean to prevent dust and lint from entering the machine's sensitive mechanisms.
- Avoid running the machine at excessively high speeds for extended periods, especially with dense designs.
- Regularly check and tighten any loose screws or fasteners to prevent vibration-induced wear.
- Never force machine parts; if something is stuck, investigate the cause rather than applying excessive force.
Frequently asked questions
How often should I oil my Tajima TEHX machine?
You should oil your Tajima TEHX machine daily, or at the start of each shift, especially the rotary hook and needle bars. Refer to your machine's manual for specific oiling points and frequency, as heavy usage may require more frequent lubrication.
What kind of oil should I use for my Tajima TEHX?
Always use high-quality, non-staining sewing machine oil specifically designed for embroidery machines. Avoid general-purpose oils that can gum up mechanisms or stain fabric. Consult your machine's manual for recommended oil specifications.
Why is my Tajima TEHX making a new noise?
New noises often indicate a problem. It could be due to lack of lubrication, a loose screw, worn parts like bushings or bearings, or a timing issue. Stop the machine, inspect for obvious issues, and refer to this guide or your manual for troubleshooting. Do not continue running the machine if the noise is severe.
How do I know when to replace timing belts on my TEHX?
Inspect timing belts monthly for cracks, fraying, missing teeth, or excessive slack. If you notice inconsistent stitching, jerky movements, or hear squealing/flapping noises, it's a strong indicator that a belt may need replacement. Replace them proactively if they show significant wear.
Can I perform all maintenance myself?
Many routine maintenance tasks like cleaning, oiling, and replacing easily accessible wear parts can be done by an operator. However, complex repairs involving internal electronics, motor replacements, or major mechanical overhauls should be performed by a qualified technician to avoid further damage.
Did this guide fix your machine?
Rate it - it helps other operators find the right fix.
Not sure which part is failing?
Need the logo stitched too?
Get your logo digitized by the people who know this machine
Upload the artwork, see the stitch count and the exact price in 10 seconds, then order with a free sew-out preview. $1 per 1,000 stitches, $10 minimum, 24-hour delivery. Vector conversion from $12.
After the fix
Fixed it? Keep the rest of the shop moving.
OS 360 is the shop software from the team behind this parts store. Every job keeps its status, deadline and owner while a TEHX head is down, restock alerts fire for needles, hooks and bobbins before you run dry, and quotes, invoices and payment live in one place.
- Jobs with status, deadline and owner - nothing slips during downtime
- Inventory with restock alerts, this store one click away
- Instant quotes, invoices and one place to collect payment





