
Blog
Juki MO-6800 / 6900 Series Maintenance Guide


Quick answer: Regular maintenance, including cleaning, lubrication, and timely replacement of wear parts like feed dogs, loopers, and knives, is crucial for optimal performance and longevity of your Juki MO-6800/6900 series overlock machine.
Welcome to your essential guide for maintaining your Juki MO-6800 or MO-6900 series industrial overlock machine. Regular, diligent maintenance is key to ensuring your machine operates at peak performance, extends its lifespan, and prevents costly downtime. This guide will walk you through routine checks, common wear parts, and steps to keep your Juki running smoothly. Remember, always refer to your machine's official instruction manual for specific details and safety precautions.
Two-minute checks before you open anything
- Check oil level and confirm oil is circulating in the sight glass.
- Inspect needles for bends, burrs, or dullness.
- Check for any loose threads or lint accumulation in the thread path and under the needle plate.
- Listen for any unusual noises during operation.
- Verify that the tension settings are appropriate for the current task.
1. Feed Dog high likelihood
How to tell
Skipped stitches, uneven fabric feeding, fabric damage, or unusual noise during operation. Visually inspect the teeth for wear, flattening, or damage.
Fix
- Turn off and unplug the machine.
- Raise the presser foot.
- Remove the needle plate screws and lift the needle plate.
- Carefully inspect the feed dog teeth for any signs of wear, flattening, or damage. Ensure no lint or debris is lodged between the teeth.
- If worn or damaged, remove the screws holding the feed dog in place.
- Install a new Replacement Feed Dog Set #401-59820 + #700-00782 or Feed Dog 401-59836, ensuring it is seated correctly.
- Reattach the needle plate and secure with screws. Test machine operation.
We stock Replacement Feed Dog Set #401-59820 + #700-00782 and Feed Dog 401-59836 for Juki MO-6804.
Parts involved: Presser feet & sewing parts →
2. Upper and Lower Loopers high likelihood
How to tell
Skipped stitches, loose or inconsistent stitch formation, frequent thread breakage, or unusual noise. Visually inspect the looper tips for burrs, nicks, or bending.
Fix
- Turn off and unplug the machine.
- Open the front cover to access the looper area.
- Carefully inspect the tips and bodies of both the upper and lower loopers for any signs of wear, burrs, nicks, or bending. Run a finger gently over the tips to feel for roughness.
- If damage is found, loosen the set screws holding the affected looper in place.
- Carefully remove the old looper and install a new one, ensuring it is correctly oriented and positioned according to your machine's manual for proper timing and clearance.
- Tighten the set screws. Close the cover and test machine operation with scrap fabric.
Parts involved: Head & mechanical parts →
Parts you may need for Juki
In stock, tested before dispatch, Buyer Protection on every order. Part types for this problem: Rotary hooks & bobbin cases, Needles & needle bars, Thread path & tension, Presser feet & sewing parts.
 Flying Tiger DBx1 Industrial Lockstitch Needles, 100 pcs/box, Sizes...$ 12.09View part →
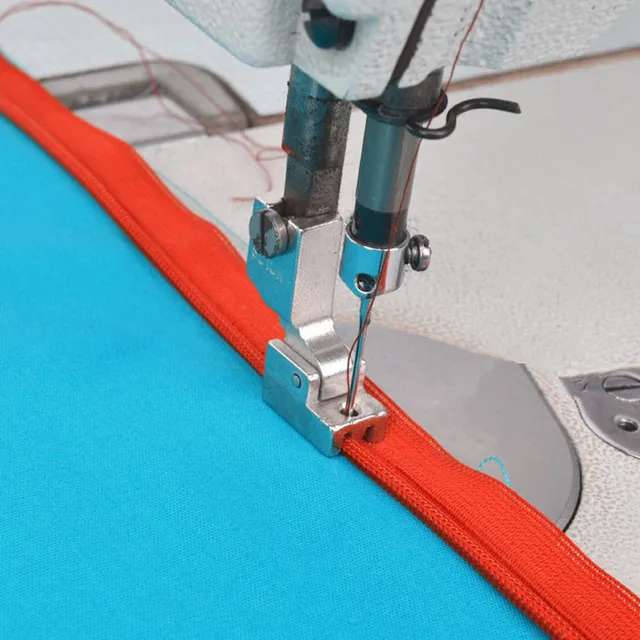 Industrial Sewing Machine Zipper Presser Foot S518N - Compatible wi...$ 8.49View part →
 Flying Tiger HAX1 15x1 Sewing Machine Needles 100-Pack for Brother ...$ 13.99View part →
 Industrial BC-DBZ(1)-NBL6 Bobbin Case for Barudan TZ1 LE2, Brother ...$ 8.49View part →
 BC-DBZ(1)-NBL6 Bobbin Case for Barudan TZ1, Brother BAS-400, JUKI L...$ 8.49View part →
 Rotary Hook HSH-7.94B HSH-7.94A B1830-127-OAO for JUKI DDL-5550 DDL...$ 16.49View part →
All Juki parts → Rotary Hooks & Bobbin Cases → Needles & Needle Bars → Thread Path & Tension →
3. Upper and Lower Knives high likelihood
How to tell
Ragged or untrimmed fabric edges, fabric bunching at the cutting area, excessive fabric dust, or a dull cutting sound. Visually inspect the cutting edges for dullness, nicks, or chips.
Fix
- Turn off and unplug the machine.
- Open the front cover to access the knife assembly.
- Carefully inspect the sharpness of both the upper and lower knives. They should have clean, sharp edges.
- If dull or damaged, loosen the screws holding the upper knife in place and remove it.
- Loosen the screws holding the lower knife in place and remove it.
- Install new upper and lower knives, ensuring they are correctly positioned and aligned according to your machine's manual for proper cutting action and clearance.
- Tighten the screws securely. Close the cover and test machine operation with scrap fabric.
Parts involved: Cutters & trimmers →
4. Needles high likelihood
How to tell
Skipped stitches, thread breakage, needle deflection, fabric damage, or loud 'thud' sounds. Visually inspect the needle tip for bends, burrs, or dullness.
Fix
- Turn off and unplug the machine.
- Loosen the needle clamp screw.
- Remove the old needle.
- Insert a new, correct type and size needle (e.g., DCx27) all the way up into the needle bar, ensuring the scarf is facing the correct direction (usually towards the looper).
- Tighten the needle clamp screw securely. Test machine operation.
Parts involved: Needles & needle bars →
5. Thread Tension Discs medium likelihood
How to tell
Inconsistent stitch tension, uneven stitches, thread shredding, or difficulty adjusting tension. Visually inspect discs for grooves, burrs, or debris.
Fix
- Turn off and unplug the machine.
- Remove the thread from the tension assembly.
- Inspect the tension discs for any signs of wear, such as grooves or nicks, and check for lint or debris lodged between them.
- Clean the discs thoroughly with a soft brush or compressed air. If grooves or damage are present, the tension assembly may need replacement or professional repair.
- Re-thread the machine and test tension settings.
Parts involved: Thread path & tension →
6. Oil Filter / Lubrication System medium likelihood
How to tell
Machine running hot, unusual noises, reduced oil flow in sight glass, or visible signs of wear on moving parts due to insufficient lubrication. Clogged filter can restrict oil flow.
Fix
- Turn off and unplug the machine.
- Locate the oil pan and oil filter (refer to your machine's manual for exact location).
- Drain the old oil into an appropriate container.
- Remove the old oil filter and inspect for clogging or damage.
- Install a new, clean oil filter.
- Refill the oil pan with the recommended type and amount of fresh sewing machine oil (check your manual for specifications).
- Run the machine briefly and check the oil sight glass for proper circulation.
Parts involved: Lubrication & maintenance →
7. JUKI SC-920 Control Box PCB Assembly low likelihood
How to tell
Machine fails to power on, erratic electronic behavior, specific error codes related to control functions, or complete loss of electronic control. This is typically a failure, not wear.
Fix
- Turn off and unplug the machine.
- Confirm all power connections are secure and there are no visible signs of damage to external wiring.
- If the issue persists and points to an electronic failure, a qualified technician should diagnose the control box.
- If diagnosed as faulty, the JUKI SC-920 Control Box PCB Assembly 400-87119 400-85908 may need replacement. This is an advanced repair best left to professionals.
- If replacing, carefully disconnect all wiring harnesses from the old PCB and connect them to the new one, ensuring correct orientation. Secure the new PCB in place.
We stock JUKI SC-920 Control Box PCB Assembly 400-87119 400-85908.
Parts involved: Circuit boards & electronics →
Maintenance schedule
| When | What to do | Why |
|---|---|---|
| Daily (or every 8-10 hours of operation) | Clean lint and dust from the needle plate, feed dog, and looper area. | Prevents lint buildup from interfering with stitch formation and causing wear. |
| Daily (or every 8-10 hours of operation) | Check oil level and confirm oil circulation in the sight glass. | Ensures proper lubrication and prevents premature wear of moving parts. |
| Daily (or every 8-10 hours of operation) | Inspect needles for damage and replace if necessary. | Prevents skipped stitches, fabric damage, and thread breakage. |
| Weekly (or every 40-50 hours of operation) | Thoroughly clean under the needle plate, around loopers, and tension discs. | Removes stubborn lint and debris that can affect stitch quality and tension. |
| Weekly (or every 40-50 hours of operation) | Inspect upper and lower knives for sharpness and replace if dull. | Ensures clean fabric trimming and prevents ragged edges. |
| Monthly (or every 160-200 hours of operation) | Inspect feed dog for wear or damage. | Ensures consistent fabric feeding and prevents skipped stitches. |
| Monthly (or every 160-200 hours of operation) | Inspect upper and lower loopers for burrs, nicks, or bending. | Critical for proper stitch formation and preventing thread breakage. |
| Monthly (or every 160-200 hours of operation) | Check and clean the oil pan and filter screen (if accessible without draining oil). | Maintains oil purity and efficient lubrication. |
| Every 6-12 months (or every 1000-2000 hours of operation) | Drain old oil, replace oil filter, and refill with fresh, recommended oil. | Ensures optimal lubrication and extends the life of internal components. Refer to your manual for exact intervals. |
| Every 6-12 months (or every 1000-2000 hours of operation) | Inspect belts for wear, cracking, or proper tension. | Prevents slippage and ensures consistent machine operation. |
| Annually (or every 2000+ hours of operation) | Professional service and timing check by a qualified technician. | Ensures all critical timings are accurate and identifies potential issues before they become major problems. |
Stop and call a technician if
- If you encounter persistent error codes that cannot be resolved with basic troubleshooting.
- If there is significant mechanical damage, such as a bent shaft or broken casting.
- If the machine is experiencing severe electronic issues, like a non-responsive control panel or power failure.
- For complex timing adjustments or internal component replacements that require specialized tools or expertise.
- If you notice oil leaks or issues with the automatic lubrication system that you cannot resolve.
Prevent it coming back
- Always use high-quality threads and needles appropriate for your fabric type.
- Ensure proper machine threading to prevent tension issues and thread breakage.
- Keep the work area clean and free of lint and fabric scraps.
- Do not force thick materials through the machine; adjust settings or use appropriate needles.
- Regularly check and maintain the oil level and quality in the lubrication system.
- Follow the recommended maintenance schedule diligently.
Frequently asked questions
How often should I oil my Juki MO-6800/6900?
The Juki MO-6800/6900 series machines typically have an automatic lubrication system. You should check the oil level daily and ensure the oil sight glass shows proper circulation. The oil should be changed and the filter replaced periodically, usually every 6-12 months or after a certain number of operating hours, depending on usage. Always refer to your machine's instruction manual for specific oil change intervals and recommended oil types.
What causes skipped stitches on my overlock machine?
Skipped stitches are often caused by a dull or bent needle, incorrect needle insertion, worn or damaged loopers, incorrect threading, improper tension, or a worn feed dog. Start by replacing the needle, re-threading the machine, and then inspect the loopers and feed dog for wear.
Why is my Juki MO-6800/6900 making a strange noise?
Unusual noises can indicate several issues, including lack of lubrication, loose components, worn bearings, or damaged parts like loopers or knives. First, check the oil level and ensure proper lubrication. Then, inspect for any loose screws or visible damage to moving parts. If the noise persists, it's best to consult your machine's manual or a qualified technician.
Can I use any sewing machine oil for my Juki MO-6800/6900?
No, it's crucial to use the specific type and grade of industrial sewing machine oil recommended by Juki for your MO-6800/6900 series. Using the wrong oil can lead to premature wear, overheating, and damage to precision components. Always check your machine's manual for the correct oil specifications.
Did this guide fix your machine?
Rate it - it helps other operators find the right fix.
Not sure which part is failing?
Need the logo stitched too?
Get your logo digitized by the people who know this machine
Upload the artwork, see the stitch count and the exact price in 10 seconds, then order with a free sew-out preview. $1 per 1,000 stitches, $10 minimum, 24-hour delivery. Vector conversion from $12.
After the fix
Fixed it? Keep the rest of the shop moving.
OS 360 is the shop software from the team behind this parts store. Every job keeps its status, deadline and owner while a Juki head is down, restock alerts fire for needles, hooks and bobbins before you run dry, and quotes, invoices and payment live in one place.
- Jobs with status, deadline and owner - nothing slips during downtime
- Inventory with restock alerts, this store one click away
- Instant quotes, invoices and one place to collect payment





