
Blog
Durkopp Adler 867 Series: Common Problems & Fixes


Quick answer: Common Durkopp Adler 867 issues include skipped stitches, thread breaking, and needle breaking, often caused by incorrect threading, worn needles, or tension problems. Regular cleaning, proper part replacement, and correct machine settings are key to resolving these issues.
The Durkopp Adler 867 series is a robust and reliable industrial sewing machine, known for its heavy-duty capabilities. However, like all complex machinery, operators may encounter common issues. This guide provides practical, step-by-step solutions to the most frequently reported problems, helping you get your machine back to optimal performance quickly. We focus on common faults, how to identify them, and how to fix them, often with simple adjustments or replacement parts.
Two-minute checks before you open anything
- Is the machine correctly threaded (top and bobbin)?
- Is the needle new, inserted correctly, and the right type/size?
- Are the bobbin and bobbin case clean and free of lint?
- Is the thread tension (top and bobbin) set appropriately?
- Are there any visible obstructions or tangled threads in the sewing area?
- Is the machine adequately lubricated?
1. Skipped Stitches or Poor Stitch Quality high likelihood
How to tell
Stitches appear irregular, loops form on the top or bottom of the fabric, or stitches are completely missing from the seam.
Fix
- Re-thread the entire machine, ensuring the thread is correctly seated in all guides and tension discs.
- Replace the needle with a new, correct type and size for your thread and material. Ensure it's inserted fully and correctly oriented (scarf facing the rotary hook).
- Clean the bobbin case and rotary hook area thoroughly, removing any lint or thread scraps.
- Check for burrs or damage on the needle plate, rotary hook, or bobbin case. Smooth or replace if necessary.
- Adjust the upper thread tension. If loops are on top, increase tension; if on bottom, decrease tension. Adjust bobbin tension if necessary (usually a small screw on the bobbin case).
- Ensure the correct presser foot is installed and is not worn or damaged.
A worn needle is a very common culprit. The bobbin tension spring can also affect stitch quality if it's weak or damaged.
Parts involved: Needles & needle bars → Thread path & tension → Rotary hooks & bobbin cases → Presser feet & sewing parts →
2. Thread Breaking high likelihood
How to tell
The thread snaps frequently during sewing, often with a distinct 'pop' sound.
Fix
- Inspect the entire thread path for any obstructions, burrs, or sharp edges on guides, tension discs, or the needle eye. Clean or smooth as needed.
- Replace the needle. A bent, dull, or burred needle can fray and break the thread.
- Ensure the thread is appropriate for the needle size and fabric type. Too thick a thread for the needle eye can cause friction and breaking.
- Check bobbin winding – it should be smooth and even, not too tight or too loose. Rewind if necessary.
- Adjust thread tension. Too much tension (upper or bobbin) can stress the thread and cause it to break.
- Clean out any lint or debris from the tension discs and bobbin case area.
A faulty '32mm Bobbin Tension Spring 0767-150590 for Durkopp Adler 467, 767, 768, 867, 868' can lead to inconsistent bobbin tension and thread breaks.
Parts involved: Thread path & tension → Needles & needle bars → Rotary hooks & bobbin cases → Lubrication & maintenance →
Parts you may need for your machine
In stock, tested before dispatch, Buyer Protection on every order. Part types for this problem: Needles & needle bars, Thread path & tension, Rotary hooks & bobbin cases, Presser feet & sewing parts.
 Bobbin Case & 2 Metal Bobbins for Brother, Janome, Singer, Babylock...$ 5.59View part →
 Portable Mini Manual Sewing Machine - Handy Needlework Tool for Sim...$ 10.49View part →
 Adjustable Retro Sewing Thimble Finger Protection for Embroidery & ...$ 4.99View part →
 CHCH Essential Embroidery Machine Spare Part - Restore Performance$ 0.00View part →
 11PCS Low Shank Presser Foot Kit Set for Singer Brother Janome Kenm...$ 25.09View part →
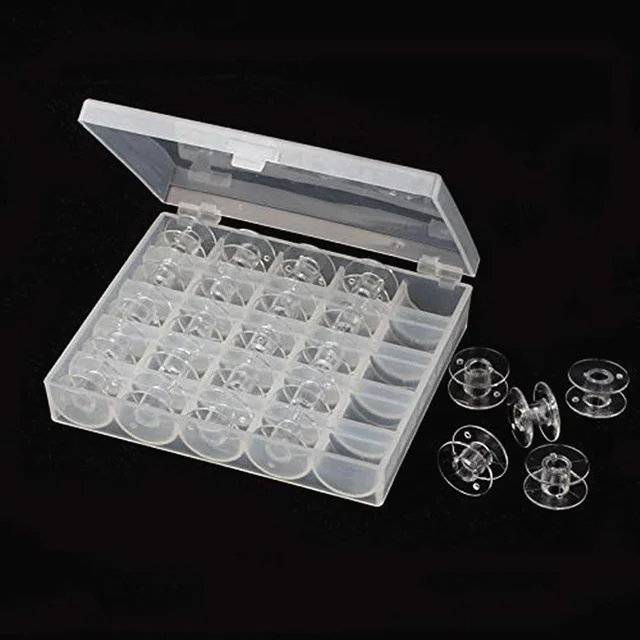 OZXHIXU AA7650 25Pcs Clear Plastic Sewing Machine Bobbins Spools & ...$ 6.49View part →
All your machine parts → Needles & Needle Bars → Thread Path & Tension → Rotary Hooks & Bobbin Cases →
3. Needle Breaking medium likelihood
How to tell
The needle snaps during sewing, sometimes with a loud crack, often damaging the fabric or machine parts.
Fix
- Ensure the needle is inserted correctly, fully seated, and facing the right direction (scarf towards the rotary hook).
- Verify the needle is the correct type and size for the material being sewn. Using too fine a needle on heavy material can cause it to bend or break.
- Check the presser foot. If it's loose, bent, or the wrong type, it can cause the needle to strike it.
- Inspect the needle plate hole for damage or misalignment. A bent needle plate can cause the needle to hit it.
- Check for timing issues. If the rotary hook is out of sync with the needle, it can strike the needle.
- Ensure the fabric is not being pulled or pushed excessively while sewing, which can deflect the needle.
A new needle is the immediate fix, but addressing the underlying cause (e.g., presser foot, timing) is crucial to prevent recurrence.
Parts involved: Needles & needle bars → Presser feet & sewing parts → Rotary hooks & bobbin cases → Head & mechanical parts →
4. Machine Jamming or Excessive Noise medium likelihood
How to tell
The machine seizes up, makes grinding or clunking noises, or struggles to move the fabric.
Fix
- Immediately stop the machine. Remove the fabric and check for tangled thread in the bobbin area or rotary hook.
- Clean and lubricate the rotary hook and other moving parts as per your machine's manual. Lack of lubrication is a common cause of noise and friction.
- Inspect the bobbin case and rotary hook for damage or debris. Remove any foreign objects.
- Check for loose screws or worn parts, especially in the needle bar or presser foot mechanisms.
- Ensure the correct bobbin is being used. Incorrect bobbins can cause jamming. For example, 'Durkopp Adler 0667 150803 32mm Aluminum Bobbins' or 'Durkopp Adler 0867-150150 (0867150150) 6-Hole Bobbins' are specific to this series.
- If the noise persists after cleaning and lubrication, a mechanical component might be worn or misaligned. Consult your machine manual for specific adjustment points.
Using the correct bobbins, such as 'Durkopp Adler 0667 150803 32mm Aluminum Bobbins' or 'Durkopp Adler 0867-150150 (0867150150) 6-Hole Bobbins', is essential to prevent bobbin-related jams.
Parts involved: Rotary hooks & bobbin cases → Lubrication & maintenance → Shafts, bearings & bushings → Belts, pulleys & gears → Screws, springs & small parts → Head & mechanical parts →
5. Uneven or Inconsistent Material Feeding low likelihood
How to tell
Fabric doesn't move smoothly, stitches are inconsistent in length, or the material puckers.
Fix
- Check the presser foot pressure. Adjust it according to the thickness of your material. Too little pressure can cause slippage, too much can mark the fabric.
- Ensure the feed dog is clean and free of lint or debris. Its teeth must be able to grip the fabric effectively.
- Verify the feed dog height is correctly set for your material. Refer to your machine manual for adjustment.
- Inspect the presser foot for wear or damage. A worn 'Right Guiding Presser Foot – Durkopp Adler 367, 467, 767, 768, 867, 1767 & Juki LU-2210, LU-2810A' or 'Center Guide Presser Foot for Durkopp Adler 467, 767, 867, 869, 1767 & Juki LU-2260, PLC-2760 Industrial Sewing Machines' can affect feeding.
- Ensure the stitch length setting is appropriate for your material and desired seam.
A worn 'Right Guiding Presser Foot – Durkopp Adler 367, 467, 767, 768, 867, 1767 & Juki LU-2210, LU-2810A' or 'Center Guide Presser Foot for Durkopp Adler 467, 767, 867, 869, 1767 & Juki LU-2260, PLC-2760 Industrial Sewing Machines' can significantly impact material feeding.
Parts involved: Presser feet & sewing parts → Head & mechanical parts → Lubrication & maintenance →
Maintenance schedule
| When | What to do | Why |
|---|---|---|
| Daily / Every 8 hours of use | Clean the bobbin case, rotary hook, and feed dog area. | Prevents lint buildup that causes skipped stitches, thread breaks, and jamming. |
| Daily / Every 8 hours of use | Lubricate all designated oiling points. | Reduces friction and wear, preventing noise, jamming, and premature part failure. Confirm specific points and oil type in your manual. |
| Weekly / Every 40 hours of use | Inspect needles, presser feet, and bobbin cases for wear or damage. | Early detection of worn parts prevents stitch quality issues, thread breaks, and machine damage. |
| Monthly / Every 160 hours of use | Clean tension discs and thread guides thoroughly. | Ensures smooth thread flow and consistent tension, preventing thread breaks and poor stitch quality. |
| Annually / Every 2000 hours of use | Professional service and timing check. | Maintains optimal machine performance, prevents major breakdowns, and extends machine lifespan. |
Stop and call a technician if
- If the machine is making grinding noises and you cannot identify or fix the cause after basic troubleshooting.
- If you suspect a major mechanical component (e.g., rotary hook timing, shaft damage) is out of alignment or broken.
- If electrical issues arise, such as the machine not powering on or inconsistent motor operation.
- For any issue that requires disassembly beyond routine maintenance, especially if you are not experienced with industrial machine repair.
Prevent it coming back
- Always use the correct needle type and size for your fabric and thread.
- Ensure proper machine threading, checking all guides and tension discs.
- Perform daily cleaning of the bobbin case, rotary hook, and feed dog areas.
- Adhere to the manufacturer's recommended lubrication schedule and use appropriate oil.
- Regularly inspect needles, bobbins, and presser feet for wear or damage and replace as needed.
- Avoid pulling or pushing fabric excessively while sewing, allowing the feed dogs to do their job.
- Use only genuine or high-quality compatible replacement parts specific to the Durkopp Adler 867 series.
Frequently asked questions
Why does my Durkopp Adler 867 keep breaking needles?
Needle breaks are often due to incorrect needle insertion, using the wrong needle type/size for the material, incorrect presser foot, or timing issues. Always ensure the needle is fully seated, oriented correctly, and suitable for your project.
How often should I clean and oil my Durkopp Adler 867?
For industrial machines like the 867, daily cleaning of the bobbin and feed dog area is recommended. Oiling should be done daily or every few hours of continuous use, depending on the machine's specific lubrication points and your manual's recommendations. Heavy use requires more frequent attention.
My stitches are looping on the bottom. What's wrong?
Loops on the bottom of the fabric usually indicate that the top thread tension is too loose. Try increasing the upper thread tension. Also, ensure the machine is threaded correctly and the thread is seated properly in all tension discs.
Can I use any bobbin in my Durkopp Adler 867?
No, it's crucial to use bobbins specifically designed for the Durkopp Adler 867 series. Incorrect bobbins can cause jamming, poor stitch quality, and machine damage. Look for 'Durkopp Adler 0667 150803 32mm Aluminum Bobbins' or 'Durkopp Adler 0867-150150 (0867150150) 6-Hole Bobbins' for this series.
Did this guide fix your machine?
Rate it - it helps other operators find the right fix.
Not sure which part is failing?
Need the logo stitched too?
Get your logo digitized by the people who know this machine
Upload the artwork, see the stitch count and the exact price in 10 seconds, then order with a free sew-out preview. $1 per 1,000 stitches, $10 minimum, 24-hour delivery. Vector conversion from $12.
After the fix
Fixed it? Keep the rest of the shop moving.
OS 360 is the shop software from the team behind this parts store. Every job keeps its status, deadline and owner while a embroidery head is down, restock alerts fire for needles, hooks and bobbins before you run dry, and quotes, invoices and payment live in one place.
- Jobs with status, deadline and owner - nothing slips during downtime
- Inventory with restock alerts, this store one click away
- Instant quotes, invoices and one place to collect payment





