
Blog
Juki LU-1508 Series Maintenance Guide


Quick answer: Regular maintenance for your Juki LU-1508 series machine involves daily cleaning and oiling, weekly checks of thread path and tension, and periodic inspection and replacement of wear parts such as the rotary hook, bed slide spring, and knee lifter joint to ensure optimal performance and longevity.
The Juki LU-1508 series is a robust industrial sewing machine designed for heavy-duty applications. Like any precision machinery, regular maintenance is crucial to ensure its longevity, consistent performance, and to prevent costly downtime. This guide outlines essential maintenance tasks and identifies common wear parts to help you keep your LU-1508 running smoothly. Always refer to your machine's official instruction manual for specific procedures, torque values, and detailed diagrams.
Two-minute checks before you open anything
- Check oil level and ensure proper lubrication.
- Inspect the needle for straightness and sharpness.
- Wipe down the machine surface to remove dust and lint.
- Check for any loose screws or unusual noises during initial operation.
- Ensure thread is correctly routed through all guides and tension discs.
1. Rotary Hook high likelihood
How to tell
Skipped stitches, inconsistent stitch formation, thread breakage, excessive noise from the bobbin area, or visible nicks and burrs on the hook point or race. A worn hook can also cause bobbin case issues.
Fix
- Turn off and unplug the machine.
- Remove the needle plate and bobbin case.
- Carefully inspect the hook point for any nicks, burrs, or dullness. Check the hook race for grooves or roughness.
- If damage is found, loosen the set screws holding the hook in place (refer to your machine's manual for specific instructions and screw locations).
- Remove the old rotary hook.
- Clean the area thoroughly.
- Install the new rotary hook, ensuring it is correctly timed with the needle (consult your machine's manual for precise timing procedures).
- Tighten the set screws securely.
- Reinstall the bobbin case and needle plate.
- Test the machine with scrap material.
Ensure you select the correct hook for your specific LU-1508 model, such as JUKI B1830-563-BA0 Large Rotary Hook for LU-1508, LU-1508H or KRT150LJCIV 21387055 Rotary Hook for LU-1509N-7, LU-1510N-7, LU1560N-7 if applicable to your sub-model.
Parts involved: Rotary hooks & bobbin cases →
2. Needle Plate and Feed Dog medium likelihood
How to tell
Fabric not feeding smoothly, damaged fabric, skipped stitches, or excessive needle breakage. Visually inspect for burrs, grooves, or wear around the needle hole on the needle plate, and worn teeth on the feed dog.
Fix
- Turn off and unplug the machine.
- Remove the needle plate screws and lift off the needle plate.
- Inspect the needle plate for any sharp edges, nicks, or an enlarged needle hole. Inspect the feed dog teeth for wear or damage.
- If worn, remove the feed dog screws and replace the feed dog.
- Replace the needle plate if damaged.
- Clean any lint or debris from the area.
- Reinstall the new or cleaned needle plate and feed dog, ensuring they are properly aligned.
- Tighten all screws securely.
- Test the machine with scrap material.
Parts involved: Presser feet & sewing parts →
Parts you may need for Juki
In stock, tested before dispatch, Buyer Protection on every order. Part types for this problem: Rotary hooks & bobbin cases, Needles & needle bars, Thread path & tension, Presser feet & sewing parts.
 Flying Tiger DBx1 Industrial Lockstitch Needles, 100 pcs/box, Sizes...$ 12.09View part →
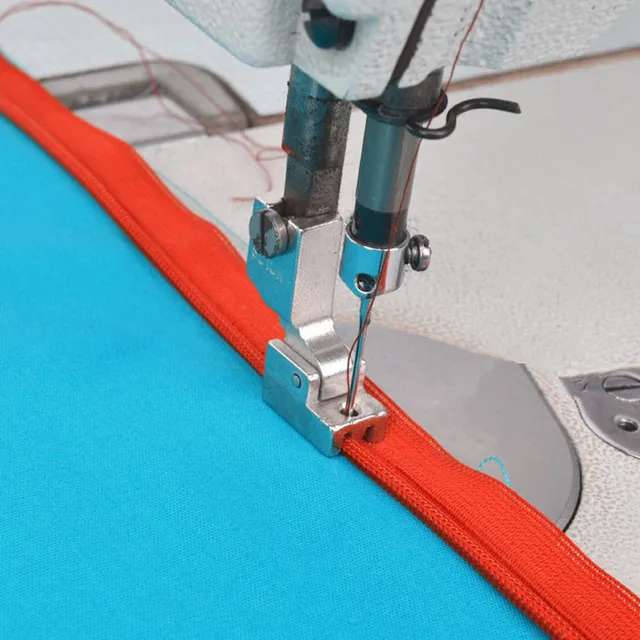 Industrial Sewing Machine Zipper Presser Foot S518N - Compatible wi...$ 8.49View part →
 Flying Tiger HAX1 15x1 Sewing Machine Needles 100-Pack for Brother ...$ 13.99View part →
 Industrial BC-DBZ(1)-NBL6 Bobbin Case for Barudan TZ1 LE2, Brother ...$ 8.49View part →
 BC-DBZ(1)-NBL6 Bobbin Case for Barudan TZ1, Brother BAS-400, JUKI L...$ 8.49View part →
 Rotary Hook HSH-7.94B HSH-7.94A B1830-127-OAO for JUKI DDL-5550 DDL...$ 16.49View part →
All Juki parts → Rotary Hooks & Bobbin Cases → Needles & Needle Bars → Thread Path & Tension →
3. Bed Slide Spring medium likelihood
How to tell
The bed slide cover feels loose, rattles, or does not stay securely in place, potentially leading to increased noise or difficulty accessing the bobbin area. The spring may appear bent, stretched, or broken.
Fix
- Turn off and unplug the machine.
- Locate the bed slide cover and its retaining mechanism.
- Carefully remove the bed slide cover.
- Inspect the existing spring for damage or fatigue. The Juki Bed Slide Spring & Screw for LU-562, LU-563, LU-1560, LU-1508, LU-1509, LU-1510, LH-1152 is a common replacement.
- Remove the old spring and screw if present.
- Install the new bed slide spring and screw, ensuring it is seated correctly to provide proper tension.
- Reattach the bed slide cover, ensuring it operates smoothly and securely.
- Test the bed slide cover's movement.
Parts involved: Screws, springs & small parts →
4. Knee Lifter Joint low likelihood
How to tell
Excessive play or looseness in the knee lifter mechanism, difficulty in raising the presser foot with the knee lifter, or a grinding/squeaking noise when operating it. The joint may feel stiff or have visible wear at the pivot points.
Fix
- Turn off and unplug the machine.
- Locate the knee lifter mechanism, typically underneath the machine table or connected to the machine head.
- Identify the specific joint that is worn or loose. The Juki Knee Lifter Joint for DNU-1541, LU-1508, LU-1510 is a common component.
- Loosen any retaining screws or nuts holding the worn joint in place.
- Remove the old joint.
- Clean the area around the joint connection points.
- Install the new knee lifter joint, ensuring all components are correctly aligned.
- Tighten all screws and nuts securely, but do not overtighten to allow for smooth movement.
- Test the knee lifter for smooth operation and proper presser foot lift.
Parts involved: Head & mechanical parts →
5. Tension Discs medium likelihood
How to tell
Inconsistent thread tension, looping stitches, or thread fraying. Visually inspect the tension discs for grooves, nicks, or embedded lint/debris. They should be smooth and clean.
Fix
- Turn off and unplug the machine.
- Remove the thread from the tension assembly.
- Loosen the tension knob completely.
- Inspect the surfaces of the tension discs for any damage or foreign material.
- Use a thin piece of fabric or dental floss to clean between the discs.
- If discs are grooved or nicked, they may need replacement. Consult your machine's manual for disassembly and replacement instructions.
- Reassemble if disassembled, rethread the machine, and test tension on scrap fabric.
Parts involved: Thread path & tension →
Maintenance schedule
| When | What to do | Why |
|---|---|---|
| Daily (or per 8 hours of operation) | Clean lint and dust from the bobbin area, under the needle plate, and around the feed dogs. | Prevents lint buildup from interfering with hook rotation, thread path, and stitch formation, reducing wear. |
| Daily (or per 8 hours of operation) | Check oil level and replenish as needed. Oil all specified points according to the manual. | Ensures all moving parts are adequately lubricated, reducing friction, heat, and wear. |
| Daily (or per 8 hours of operation) | Replace the needle. | Dull or bent needles cause skipped stitches, thread breakage, fabric damage, and can damage the rotary hook. |
| Weekly (or per 40 hours of operation) | Thoroughly clean the entire thread path, including tension discs, thread guides, and take-up lever. | Removes hidden lint and debris that can cause inconsistent tension and thread fraying. |
| Weekly (or per 40 hours of operation) | Inspect the rotary hook for nicks, burrs, or excessive wear. | Early detection of hook damage prevents skipped stitches, thread breakage, and potential damage to other components. |
| Weekly (or per 40 hours of operation) | Check the needle plate and feed dog for burrs or damage. | Ensures smooth fabric feeding and prevents fabric damage or needle breakage. |
| Monthly (or per 160 hours of operation) | Clean under the machine head and around the handwheel. | Removes accumulated dust and lint that can interfere with mechanical operation. |
| Monthly (or per 160 hours of operation) | Check and clean the motor and fan (if accessible and safe to do so). | Prevents motor overheating and extends motor life. |
| Monthly (or per 160 hours of operation) | Inspect drive belts for wear, cracks, or proper tension. | Ensures consistent power transmission and prevents slippage or breakage. |
| Every 3-6 Months (or per 500-1000 hours of operation) | Inspect and clean the oil pan and oil filter (if applicable). | Maintains oil quality and prevents contaminants from circulating through the lubrication system. |
| Every 3-6 Months (or per 500-1000 hours of operation) | Check all screws and fasteners for tightness. | Prevents parts from loosening due to vibration, which can affect machine timing and performance. |
| Annually (or per 2000 hours of operation) | Consider professional servicing for comprehensive inspection, timing adjustments, and replacement of heavily worn internal components. | Ensures optimal machine performance, identifies potential issues before they become critical, and extends machine lifespan. |
Stop and call a technician if
- If you encounter persistent timing issues that you cannot resolve after following the manual's instructions.
- If the machine exhibits unusual grinding noises or vibrations that do not resolve with cleaning and lubrication.
- If there are electrical issues, such as power fluctuations or motor problems.
- For complex repairs involving internal mechanisms, motor adjustments, or electronic component failures.
- If you are unsure about any repair or adjustment, especially those that require specialized tools or knowledge.
Prevent it coming back
- Always use high-quality needles appropriate for your fabric and thread type, and replace them regularly (e.g., every 8 hours of sewing or at the first sign of dullness/bending).
- Use only high-quality industrial sewing machine oil as recommended by Juki.
- Ensure proper thread tension to avoid undue stress on machine components and to produce quality stitches.
- Keep your work area clean to prevent dust and debris from entering the machine.
- Avoid forcing thick materials through the machine if it struggles; adjust presser foot pressure or needle size as needed.
- Do not pull fabric aggressively while sewing, as this can bend needles, damage hooks, or affect timing.
Frequently asked questions
How often should I oil my Juki LU-1508?
For regular use, oil your Juki LU-1508 daily or at the start of each shift. Always refer to your machine's manual for specific oiling points and recommended oil types and frequencies, as usage intensity can vary requirements.
What kind of oil should I use for my Juki LU-1508?
Always use high-quality, clear, non-staining industrial sewing machine oil. Consult your Juki LU-1508's instruction manual for the manufacturer's specific oil recommendations to ensure proper lubrication and avoid damage.
Why is my Juki LU-1508 skipping stitches after maintenance?
Skipped stitches after maintenance can be due to several factors: incorrect needle installation (wrong size, type, or inserted backward), improper needle-to-hook timing, a burr on the needle plate or hook, incorrect thread tension, or a worn rotary hook. Double-check your needle and re-time the hook if necessary, referring to your manual.
How do I clean the feed dogs on my Juki LU-1508?
To clean the feed dogs, turn off and unplug the machine. Remove the needle and needle plate. Use a small brush or compressed air to remove lint and debris from around and between the feed dog teeth. Be careful not to push debris further into the machine.
When should I replace the rotary hook on my Juki LU-1508?
The rotary hook should be replaced when you observe consistent skipped stitches, thread breakage, excessive noise from the bobbin area, or visible nicks, burrs, or wear on the hook point or race. Regular inspection during maintenance helps identify wear before it causes major issues.
Did this guide fix your machine?
Rate it - it helps other operators find the right fix.
Not sure which part is failing?
Need the logo stitched too?
Get your logo digitized by the people who know this machine
Upload the artwork, see the stitch count and the exact price in 10 seconds, then order with a free sew-out preview. $1 per 1,000 stitches, $10 minimum, 24-hour delivery. Vector conversion from $12.
After the fix
Fixed it? Keep the rest of the shop moving.
OS 360 is the shop software from the team behind this parts store. Every job keeps its status, deadline and owner while a Juki head is down, restock alerts fire for needles, hooks and bobbins before you run dry, and quotes, invoices and payment live in one place.
- Jobs with status, deadline and owner - nothing slips during downtime
- Inventory with restock alerts, this store one click away
- Instant quotes, invoices and one place to collect payment





