What is this case study? This page documents a real completed Digitizing order produced by 360 Digitizing Solutions for a Cap Front placement on Other. To protect client privacy, company and brand names have been anonymized. Browse specs, before/after images, and production notes below.
Mastering Detailed Cap Front Outlines with Precision Stitching
Discover how our expert digitizers converted a complex outlined design into a clean, production-ready cap front embroidery file with zero distortion.
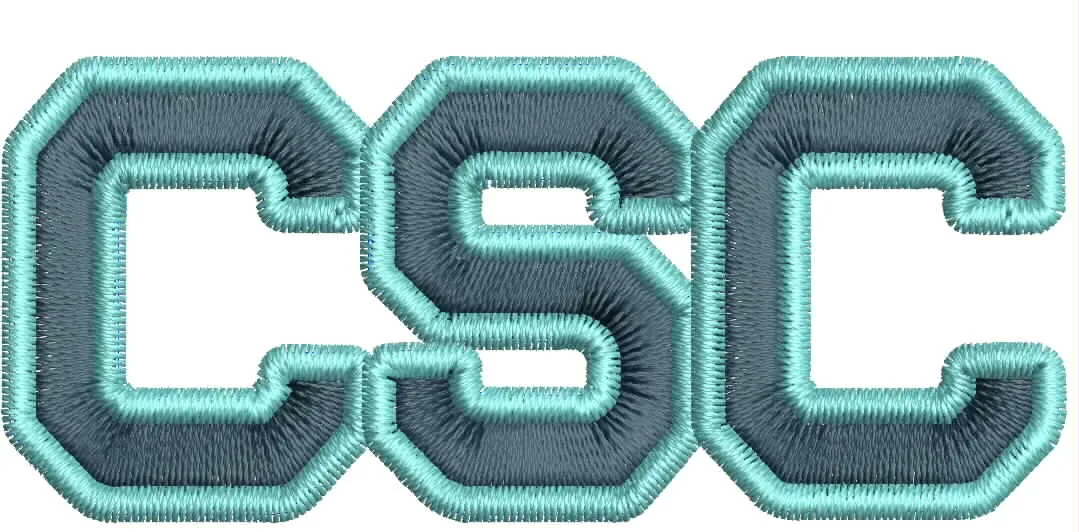
Final Digitized Proof
Order Specifications
Project Background
Working with outlined artwork requires careful attention to registration and path sequencing. If the outlines do not line up precisely with the interior fill areas, gaps will appear once the material is hooped and stitched. The decorator requested a reliable file that could handle repeated runs on their multi-head machines without requiring constant thread trimming or manual intervention from the machine operator. We evaluated the geometry of the text and border elements to determine the optimal stitch angles for this specific size and placement.
The primary hurdle for this project was fitting a high level of detail into a relatively small area. At only 2.5 inches wide by 1.0 inch tall, standard stitch settings would have caused the outlines to blur together into a solid block. Our experienced digitizers had to carefully thin out unnecessary stitches while reinforcing the structural integrity of the outer borders. Every single letter and line segment was manually adjusted to ensure clean separation and sharp corners when sewn out on structured caps.
By analyzing the physical constraints of cap embroidery, our team mapped out a customized path order. We prioritized minimizing jump stitches and reducing excessive thread trims, which ultimately saves time on the production floor and reduces wear and tear on the embroidery machine. The resulting program was built from the ground up to support high-speed running while maintaining strict adherence to the original artwork proportions provided by the client.
Technical Production Process
Density adjustments played a crucial role in preventing thread buildup within the tight 2.5×1.0 inch dimensions. We lowered the stitch density slightly along the overlapping outline sections to keep the fabric flexible and flat. Additionally, we incorporated precise pull compensation values to counteract the natural horizontal pull of cap frames, ensuring that vertical and horizontal stems maintained their exact visual weight.
Thread management was another vital technical consideration. We optimized the entry and exit points for all color segments, routing travel stitches underneath heavier elements whenever possible to eliminate visible ties and trims. This careful planning ensures that the final stitchout looks clean and professional, with zero stray threads interfering with the crisp look of the outlines.
- ✓ Applied custom pull compensation to prevent outline distortion on curved cap surfaces.
- ✓ Optimized stitch density across 3725 total stitches to fit a compact 2.5×1.0 inch layout.
- ✓ Engineered an efficient center-out travel path to minimize thread breaks and machine downtime.
Final Outcome
This project highlights our commitment to delivering reliable, production-ready embroidery files tailored to specific placements and constraints. By combining careful technical planning with rigorous quality control, we ensure that every design translates from concept to finished product with absolute perfection. Our clients trust us to handle intricate details so their embroidery businesses can run efficiently and profitably every single day.
Ready for Flawless Production?
We deliver production-ready files optimized for your exact machines and fabrics, reducing thread breaks and maximizing shop efficiency.
Frequently Asked Questions
What is the typical turnaround time for cap front embroidery digitizing? +
Our standard turnaround time is exceptionally fast, usually within 12 to 24 hours, ensuring your production schedule stays right on track.
How do you handle small text and fine outlines on structured caps? +
We use specialized pull compensation, underlay stitching, and optimized stitch density to ensure small text and fine outlines remain crisp and clear without distorting the fabric.
Are your digitized files compatible with all major commercial embroidery machines? +
Yes, we deliver machine-ready files formatted precisely to match your specific embroidery machine brand and hoop requirements.
Disclaimer: All logos and designs are the property of their respective copyright/trademark owners. This case study is for the sole purpose of demonstrating 360 Digitizing Solutions’ technique and quality. We do not claim ownership of the original artwork, nor are these designs for sale.
Brand Representative? Request Portfolio Privacy/Removal (Corporate Email Required)