What is this case study? This page documents a real completed Digitizing order produced by 360 Digitizing Solutions for a Cap placement on 5 Panel Richardson 169. To protect client privacy, company and brand names have been anonymized. Browse specs, before/after images, and production notes below.
Precision Digitizing for 5-Panel Richardson Caps
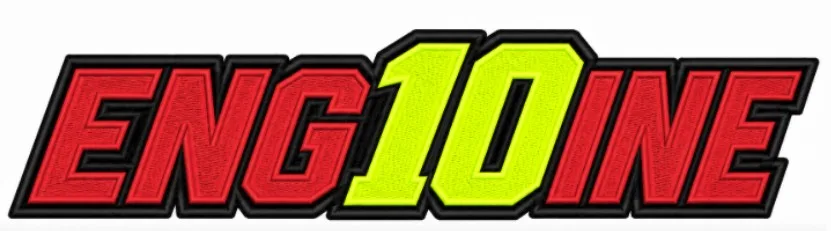
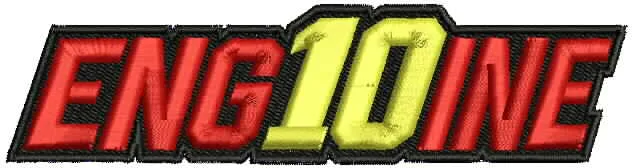
We transformed a complex graphic into a high-performance embroidery file. This project demonstrates how accurate density and pull compensation lead to cleaner results on structured headwear.
Customer Original Artwork
Final Digitized Proof
Order Specifications
Project Background
The primary obstacle was the nature of the 5-panel cap fabric. Unlike standard baseball caps, the 5-panel construction often features a prominent center seam. If the digitizing is not carefully adjusted to compensate for this structure, the design can easily distort or show gaps. Our client needed a file that would sit flush against the fabric without pulling or puckering.
We analyzed the artwork to identify areas where the detail was dense. Because the cap is a smaller surface area, we had to ensure the letter spacing was open enough to prevent the thread from overlapping and creating a muddy look. Maintaining clarity at this scale requires a deep understanding of how thread interacts with stiff cap material.
Our team collaborated with the decorator to understand their specific machine tension and needle requirements. By gathering these technical details, we were able to create a roadmap that prioritized clean edges and consistent stitch density throughout the entire logo. This approach minimizes the risk of thread breaks during the actual production run.
Ultimately, the client required a professional, production-ready file that could handle multiple runs with consistent quality. We ensured that the final stitch file was optimized to run efficiently, allowing the decorator to maintain their high output standards without needing to stop for constant machine adjustments.
Technical Production Process
We adjusted the stitch directions to follow the contours of the lettering, which helps in preventing the fabric from distorting. By using varying density settings, we ensured that the heavier areas of the logo received enough coverage while the finer details remained crisp and distinct.
Pull compensation was applied to every element of the logo. This is a critical step because embroidery thread physically pulls the fabric as it is sewn; without proper compensation, the finished logo would appear thinner and less detailed than the original artwork.
Finally, we minimized the number of jump stitches to ensure the finished piece was clean and required very little trimming after coming off the machine. This efficiency is vital for high-volume jobs where time is money.
- ✓ Strategic center-out underlay for structural stability.
- ✓ Precision pull compensation to maintain font integrity.
- ✓ Optimized stitch density for clean, readable lettering.
Final Outcome
By focusing on the technical foundation rather than just the visual appearance, we delivered a file that maximizes shop efficiency. The decorator was able to move directly into production, saving time and resources. This successful project highlights why accurate digitizing is the most important step in the embroidery process. We remain committed to helping apparel decorators achieve these results on every single order.
Ready for Flawless Production?
We deliver production-ready files optimized for your exact machines and fabrics, reducing thread breaks and maximizing shop efficiency.
Frequently Asked Questions
How do you handle digitizing for 5-panel caps? +
We account for the center seam and the specific tension requirements of 5-panel caps, such as the Richardson 169, to ensure the design sits flat and looks sharp without distortion.
Why is the stitch count important? +
The stitch count of 15,480 was carefully selected to balance visual detail with fabric integrity, preventing puckering or thread breaks during high-speed production.
Disclaimer: All logos and designs are the property of their respective copyright/trademark owners. This case study is for the sole purpose of demonstrating 360 Digitizing Solutions’ technique and quality. We do not claim ownership of the original artwork, nor are these designs for sale.
Brand Representative? Request Portfolio Privacy/Removal (Corporate Email Required)