
Blog
Durkopp Adler 767 Series: Common Problems & Fixes


Quick answer: Common Durkopp Adler 767 problems include skipped stitches, thread breakage, and uneven feeding, often caused by incorrect tension, worn needles, or damaged presser feet. Most issues can be resolved by checking the needle, re-threading, cleaning the bobbin area, and adjusting tension.
The Durkopp Adler 767 series is a robust and reliable industrial sewing machine, but like any complex machinery, it can encounter issues. This guide provides practical, step-by-step solutions for the most common problems reported by operators. By understanding how to identify and fix these issues, you can minimize downtime and keep your machine running smoothly. Remember to always consult your machine's official manual for detailed specifications and safety procedures.
Two-minute checks before you open anything
- Is the machine threaded correctly, both top and bobbin?
- Is the needle new, inserted correctly, and the right type/size?
- Is the bobbin wound evenly and inserted correctly?
- Are the tension settings appropriate for the thread and material?
- Is there any lint or thread caught in the bobbin case or under the needle plate?
1. Skipped Stitches or Poor Stitch Quality high likelihood
How to tell
Stitches are missing, irregular, or form loops on the top or bottom of the material. The seam may look loose or uneven.
Fix
- Ensure the needle is inserted correctly, fully seated, and facing the right direction.
- Replace the needle with a new, appropriate size and type for your material and thread.
- Completely re-thread the machine, ensuring the thread passes through all guides and tension discs correctly.
- Adjust the upper thread tension. Start with a slightly looser setting and gradually tighten until stitches are balanced.
- Check the bobbin tension. If loops are on the bottom, the top tension is too tight or bobbin tension is too loose. If loops are on top, the top tension is too loose or bobbin tension is too tight.
- Clean the bobbin case and rotary hook area thoroughly, removing any lint or thread scraps.
- Inspect the bobbin for damage or burrs. Replace if necessary.
A fresh needle is often the first step. If bobbin tension is consistently off, the 32mm Bobbin Tension Spring 0767-150590 might be worn. Damaged Durkopp Adler 0867-150150 (0867150150) 6-Hole Bobbins can also cause issues.
Parts involved: Needles & needle bars → Thread path & tension → Rotary hooks & bobbin cases → Screws, springs & small parts →
2. Frequent Thread Breakage high likelihood
How to tell
The upper or bobbin thread snaps repeatedly during sewing, often with a loud pop.
Fix
- Inspect the entire thread path (spool pin, guides, tension discs, take-up lever, needle eye) for any burrs, sharp edges, or obstructions. Smooth or clean as needed.
- Replace the needle. A bent, dull, or incorrectly sized needle is a common cause.
- Ensure the thread is appropriate for the needle size and material. Too thick thread for the needle eye can cause friction and breakage.
- Reduce upper thread tension slightly.
- Check the bobbin case for burrs or nicks. Replace if damaged.
- Clean out any lint or debris from the bobbin area and under the needle plate.
- Verify the machine's timing. If the hook is not catching the thread loop correctly, it can cause breakage (this may require a technician).
A new needle is often the simplest fix. If the bobbin case is damaged, it will need replacement. A worn 32mm Bobbin Tension Spring 0767-150590 can lead to inconsistent tension and breakage.
Parts involved: Needles & needle bars → Thread path & tension → Rotary hooks & bobbin cases → Screws, springs & small parts →
Parts you may need for your machine
In stock, tested before dispatch, Buyer Protection on every order. Part types for this problem: Needles & needle bars, Thread path & tension, Rotary hooks & bobbin cases, Screws, springs & small parts.
 Bobbin Case & 2 Metal Bobbins for Brother, Janome, Singer, Babylock...$ 5.59View part →
 Portable Mini Manual Sewing Machine - Handy Needlework Tool for Sim...$ 10.49View part →
 Adjustable Retro Sewing Thimble Finger Protection for Embroidery & ...$ 4.99View part →
 CHCH Essential Embroidery Machine Spare Part - Restore Performance$ 0.00View part →
 10 Inch Stainless Steel Tailor Scissors with Blackening for Profess...$ 7.99View part →
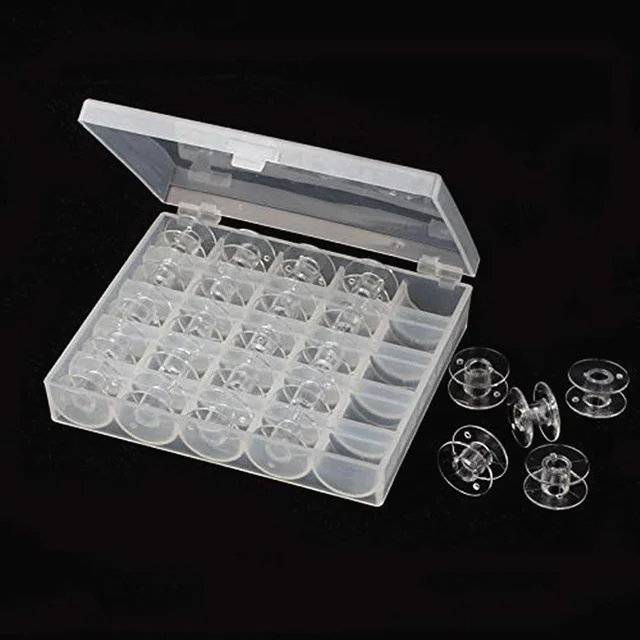 OZXHIXU AA7650 25Pcs Clear Plastic Sewing Machine Bobbins Spools & ...$ 6.49View part →
All your machine parts → Needles & Needle Bars → Thread Path & Tension → Rotary Hooks & Bobbin Cases →
3. Uneven or Difficult Material Feeding medium likelihood
How to tell
Material doesn't move smoothly, stitches are inconsistent in length, or the machine struggles to pull the fabric through.
Fix
- Check that the presser foot is installed correctly and is the right type for your application. Ensure it's not loose or bent.
- Adjust the presser foot pressure. Too little pressure can cause slipping, too much can hinder feeding.
- Inspect the feed dog teeth for wear or damage. Clean any lint or debris from between the feed dog teeth.
- Ensure the needle plate opening is not excessively worn or damaged, which can snag fabric.
- Verify the material is not too thick or too thin for the machine's capabilities or current setup.
- If using a specialized foot, ensure it's compatible and correctly aligned.
Worn or incorrect presser feet are common culprits. Consider replacing with a Right Guiding Presser Foot – Durkopp Adler 367, 467, 767, 768, 867, 1767 & Juki LU-2210, LU-2810A or a Center Guide Presser Foot for Durkopp Adler 467, 767, 867, 869, 1767 & Juki LU-2260, PLC-2760 if your current one is damaged or unsuitable.
Parts involved: Presser feet & sewing parts → Head & mechanical parts →
4. Bobbin Winding Issues low likelihood
How to tell
Bobbins are not winding evenly, are too loose, too tight, or not winding at all.
Fix
- Ensure the thread path for bobbin winding is correct and free of obstructions.
- Check the bobbin winder tension. Adjust if the bobbin is winding too loosely or too tightly.
- Verify the bobbin is seated correctly on the winder spindle.
- Clean any lint or debris from the bobbin winder mechanism.
- Inspect the bobbin winder tire (if applicable) for wear. Replace if it's slipping.
Using genuine Durkopp Adler 0867-150150 (0867150150) 6-Hole Bobbins ensures proper fit and winding. A worn bobbin winder tire (not stocked for this specific model, but a general part) can prevent proper winding.
Parts involved: Rotary hooks & bobbin cases → Belts, pulleys & gears →
5. Edge Cutting Problems (if equipped with edge cutter) low likelihood
How to tell
Material is not cut cleanly, edges are frayed, or the cutter is jamming.
Fix
- Inspect the cutting blades for sharpness and damage. Replace if dull or nicked.
- Ensure the cutter mechanism is clean and free of lint or fabric scraps.
- Verify the cutter timing and adjustment. Refer to your machine's manual for specific settings.
- Check that the material is feeding smoothly and consistently through the cutting area.
If you are experiencing cutting issues, consider the 3mm Edge Cutting Conversion Gauge Set for Durkopp 467, 767, Juki LU-2210 Industrial Sewing Machines if your existing blades are dull or you need to change the cutting width.
Parts involved: Cutters & trimmers →
Maintenance schedule
| When | What to do | Why |
|---|---|---|
| Daily | Clean the bobbin area, feed dogs, and under the needle plate. | Prevents lint buildup that can cause skipped stitches, thread breakage, and timing issues. |
| Daily / Every 4-8 hours of use | Change the needle. | Dull or bent needles cause skipped stitches, thread breakage, and can damage the hook. |
| Weekly | Wipe down the entire machine and check for loose screws. | Maintains cleanliness and identifies potential issues before they become major problems. |
| Monthly / Every 160 hours of use | Lubricate all specified oiling points. | Reduces friction and wear on moving parts, extending machine life. Refer to your manual for exact points and oil type. |
| Quarterly / Every 500 hours of use | Inspect presser feet, feed dogs, and thread guides for wear or burrs. | Worn parts can cause feeding issues, poor stitch quality, and thread damage. |
Stop and call a technician if
- If the machine timing is off and you are not experienced in adjusting it.
- If there is a persistent mechanical grinding or knocking noise.
- If the motor is overheating or showing error codes not covered in the manual.
- If electrical issues or control panel malfunctions occur.
- For any repairs that require specialized tools or extensive disassembly beyond basic maintenance.
Prevent it coming back
- Regularly clean the machine, especially the bobbin area, feed dogs, and thread path, to prevent lint buildup.
- Use high-quality needles and threads appropriate for your material and machine.
- Follow the manufacturer's recommended lubrication schedule and use the specified oil.
- Change needles frequently to avoid dull or bent needles causing damage or skipped stitches.
- Inspect presser feet and feed dogs regularly for wear or damage.
- Ensure proper machine settings (tension, presser foot pressure, stitch length) for each material and application.
Frequently asked questions
How often should I change the needle on my Durkopp Adler 767?
For optimal performance, change your needle at the start of each shift, or every 4-8 hours of continuous sewing, and immediately if you notice any skipped stitches, thread breakage, or hear a 'popping' sound.
What kind of oil should I use for my Durkopp Adler 767?
Always refer to your machine's official Durkopp Adler manual for the exact oil specifications. Generally, industrial sewing machines require a high-quality, non-detergent, light-viscosity sewing machine oil. Do not use household oils.
My machine is making a strange noise. What should I do?
First, stop the machine immediately. Check for any visible obstructions like tangled thread in the bobbin area or under the needle plate. If the noise persists after clearing and re-threading, or if it's a mechanical grinding sound, it's best to call a technician to prevent further damage.
Did this guide fix your machine?
Rate it - it helps other operators find the right fix.
Not sure which part is failing?
Need the logo stitched too?
Get your logo digitized by the people who know this machine
Upload the artwork, see the stitch count and the exact price in 10 seconds, then order with a free sew-out preview. $1 per 1,000 stitches, $10 minimum, 24-hour delivery. Vector conversion from $12.
After the fix
Fixed it? Keep the rest of the shop moving.
OS 360 is the shop software from the team behind this parts store. Every job keeps its status, deadline and owner while a embroidery head is down, restock alerts fire for needles, hooks and bobbins before you run dry, and quotes, invoices and payment live in one place.
- Jobs with status, deadline and owner - nothing slips during downtime
- Inventory with restock alerts, this store one click away
- Instant quotes, invoices and one place to collect payment





